Receiver
After your transmitter is in bind mode, you need to do the same with the receiver. This procedure is the
same for all receiver types available:
1. Power up the receiver
2. Within 1 minute, push the bind button on the receiver
Receiver Update (OTA)
Depending on the firmware on your transmitter and the receiver, you might need to update your receiver.
With the transmitter and the receiver both in bind mode, you then will get a message on the radio/ Agent
X, telling you that the receiver needs to be updated. Follow the instructions shown there. The firmware will
be sent to the receiver over the air (OTA). When the transmission is finished, the receiver flashes itself.
After this, they are bound and ready to be used.
Auto Bind
When you update your transmitter firmware, you need to rebind the receiver in order to run the OTA
update. In this case, you don’t need to hit the bind button on the receiver again, when he was bound
before:
1. Power up your transmitter
2. Set it in bind mode
3. Power up the receiver
4. Wait a few seconds
5. Now you should get the update prompt without pressing the receiver bind button again
Multi bind
Since fw 3.71 you can use all your transmitters on all your receivers without rebinding them each time.
This is useful if you own more than one transmitter module or an external module and a Tango II etc.
Make sure you initiated your WiFi module before!
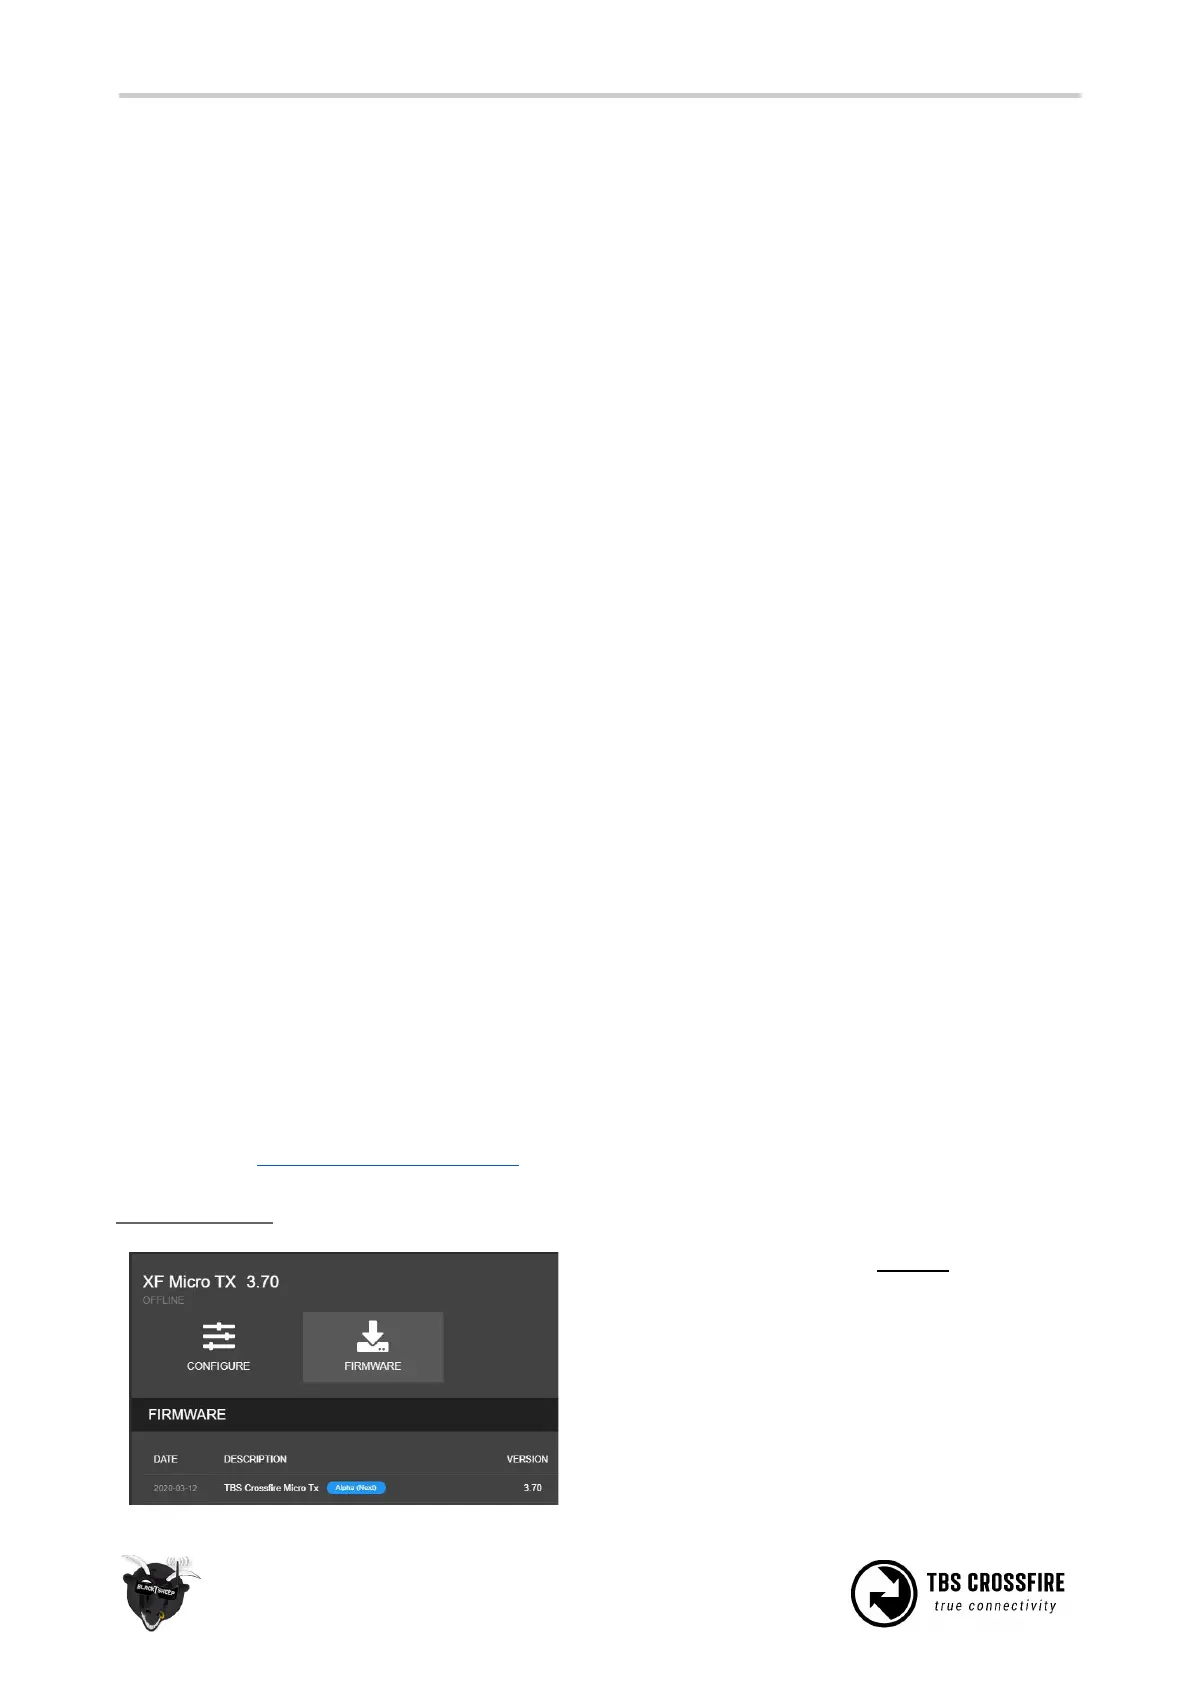
How to set it up
Update your CROSSFIRE TX to FW 3.71 (or later) by
Agent X. If you can’t see the required FW version,
click on the 3 dots in the top right corner and
check
“include beta releases”.
Make sure that the WiFi module is powered up as
well (standard tx).