Section E – Autosampler Installation
CD14 Tester & CD AutoPlus Autosampler User Guide—75-108-800 Rev. B—31 May 2021 40 of 130
EAR99 technology subject to restrictions on cover page.
a. Note any damage to the shipping container. If
container is damaged, contact Teledyne Hanson
immediately.
b. Place shipping containers near installation
location.
c. Remove straps from the containers.
d. Open containers and remove any accessory
boxes.
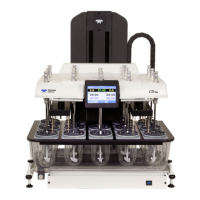
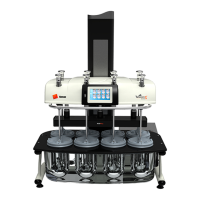
e. Carefully remove each CD AutoPlus and AutoFill
from its shipping container.
2. Place each CD AutoPlus on the bench.
a. Each CD AutoPlus should be placed in a
manner to allow access to the back of the
autosampler until the installation is completed.
Once the installation is complete, the instrument
can be placed in its final position.
b. Place each AutoFill on top of its corresponding
CD AutoPlus with the tray for the rack toward the
front of the unit.
c. Place a collection rack on the tray of each
AutoFill. The racks should sit flat on the bottom
of the trays.
Electrical Connections
NOTE: The CD AutoPlus and AutoFill have ports located on
the underside of the silkscreen panel. The panel illustrates port
placement. (See Figures E-1 and E-2.)
Figure E-1: CD AutoPlus Back Panel and Ports