11
3.5
Power supply
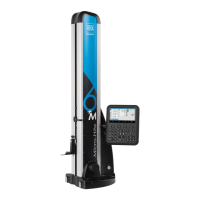
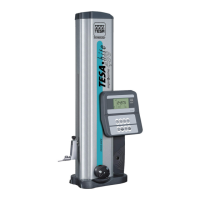
TESA Micro-hite plus M is provided with the bat-
tery pack N° 00760141, which can be charged
using the mains adaptor (N° 04761054) along with
either of both cables EU 04761055 or US 04761056
(see chapter 5.2 – Recharging the battery pack).
Use of a second battery pack (optional) provides
full autonomy as one can be recharging while the
other is in use. Continuous operation is thus made
easier as there are no cables to clutter up the oper-
ator working on the surface plate.
The battery pack is also used for powering the con-
trol panel directly connected to the height gauge.
3.6
Measuring system
TESA Micro-hite plus M incorporates an opto-elec-
tronic measuring system (TESA’s patent), which
catches the measured quantity (also known as mea-
surand) digitally. The glass scale with both incre-
mental graduations and reference mark serve as
material measure. According to the principle of the
reflected light, each graduation is scanned by the
photocells inside the optical sensor, with no
mechanical contact. As next step, the measurement
signal is transmitted to the control panel, which
operates an analogue/digital conversion.
The probing procedure is either started by activat-
ing a measuring function or rotating the power con-
trol. As soon as the measuring insert enters into
contact with the point to be probed, the friction
clutch ensures a constant measuring force . After a
wait for stabilisation, the measured value is
processed through the control panel.
3.7
Automatic value
correction
It is agreed that producing a perfectly accurate
measuring instrument is quite impossible.
Consequently, any displayed value shows a devia-
tion from the exact value, which is more or less sig-
nificant. This deviation mainly includes the system-
atic (bias) errors and random errors of the
measuring instrument being used. The latter often
result from influences which can not be predicted –
e.g. value dispersion.
On the other hand, any detectable systematic
errors can be compensated for by corrections.
These errors may be due to inaccuracies in the
graduations of the material measure or to form and
position errors of the head guides.
TESA Micro-hite plus M is able to execute the auto-
matic correction of the measured values through
CAA (computer-aided accuracy) while taking bias
errors into account. This is done in two ways: while
one is based on the measured lengths, the other
refers to both perpendicularity and straightness
checked with the aid of a TESA IG-13 digital probe
(N° 00760139) listed under optional accessories
(this probe can only be used with the Power Panel
Plus M).
Straightness and perpendicularity errors are first
corrected once the main part has been entirely
assembled.
TESA Micro-hite plus M is calibrated on the high
quality surface plate with the aid of a high accuracy
master angle square to 90°; both features are made
of granite – a hard (usually grey) stone. The meas-
urements are carried out in both measuring direc-
tions (frontal and lateral) with use of a TESA GT-21
electronic probe, which only serves as reference at
our plant. The EEPROM memory inside the main
part includes a correction table for each direction. It
should be noted that automatic value correction
cannot be activated unless TESA IG-13 probe is
connected. With regard to this, report to chapter
4.13.
Length values are corrected based on the actual
deviations previously determined step by step at
each probing point throughout the measuring range
using reference gauge blocks. These deviations are
then captured by the computer used for calculating
all correction values and further stored in the elec-
tronics (EEPROM) for automatic correction using
the 1D control panel or the Power Panel plus M.
Note
When the height gauge is switched on, the control
panel will read all stored values during the initialis-
ing procedure (display shows the Init sign).
 Loading...