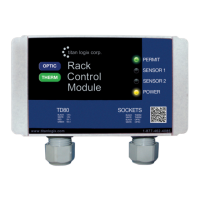
TD80™ Level Gauging and Overfill Prevention System Product Manual
Rev. 2, August 4, 2015/ TD80 and Overfill Prevention System Troubleshooting Page 73
3.2.2 Common Installation Wiring and Component Problems Overview:
1. Unable to offset calibrate the TD80.
2. Fuses keep blowing
3. Spill alarm stuck on.
4. Finch Display continuously shows “2 LO”.
5. Finch Display continuously shows a level in an empty tank.
6. Finch Display shows incorrect volume.
7. Finch Display continuously shows “OFF” until a Display push button is pressed.
8. Finch Display shows erratic level measurements.
9. Relay Module Shutdown system does not permit loading.
10. P2000 Shutdown system does not permit loading.
11. Fill alarm horn continuously sounds when power is turned on.
3.2.1 Common System Wiring and Component Failures
The following troubleshooting steps are organized by system or circuit function and
symptoms. These are some of the most common system wiring and component failures
along with suggested troubleshooting and repair steps.
1. Loss of power. No system operation, Finch Display is blank.
a. Check fuses, cable
connections, wiring and
power switches. See the
following examples and
suggestions.
i. Turn on the power/key switch
ii. Replace all blown fuses
iii. Repair all defective wiring
iv. Replace all defective components
b. Check the power
supply for adequate
operating voltage.
Provide power from a well charged battery or DC power
source, 8VDC to 28VDC, steady output. Confirm this voltage
using a Digital Multi Meter. Do not use a battery charger.
c. Use a test light to test
points for battery voltage
in the following sequence.
i. Check all points from the Finch Display back to the battery
ii. Inspect all junction boxes, plugs and sockets for broken wires
and corrosion
d. If power is at all points,
use a test light to check
for grounds at points in
the following sequence.
i. Check all points from the Finch Display back to the battery
ii. Inspect all junction boxes, plugs and sockets for broken wires
and corrosion
e. If fuses keep blowing:
i. Verify that the type and rating of the fuse is appropriate for
the application
ii. Continue by disconnecting power to
system components to isolate the short
circuit. Clip on battery power; probe each
component at the power terminal. A short
circuit to ground is indicated by the light
fully illuminating.
Repair or replace
the defective
component as
necessary

 Loading...