TD80™ Level Gauging and Overfill Prevention System Product Manual
Page 160 TD80 Programming/ Rev. 2, August 4, 2015
6.3.7 MDU (Birdfeeder) Programming
NOTE: The Birdfeeder 2 is the current and recommended software.
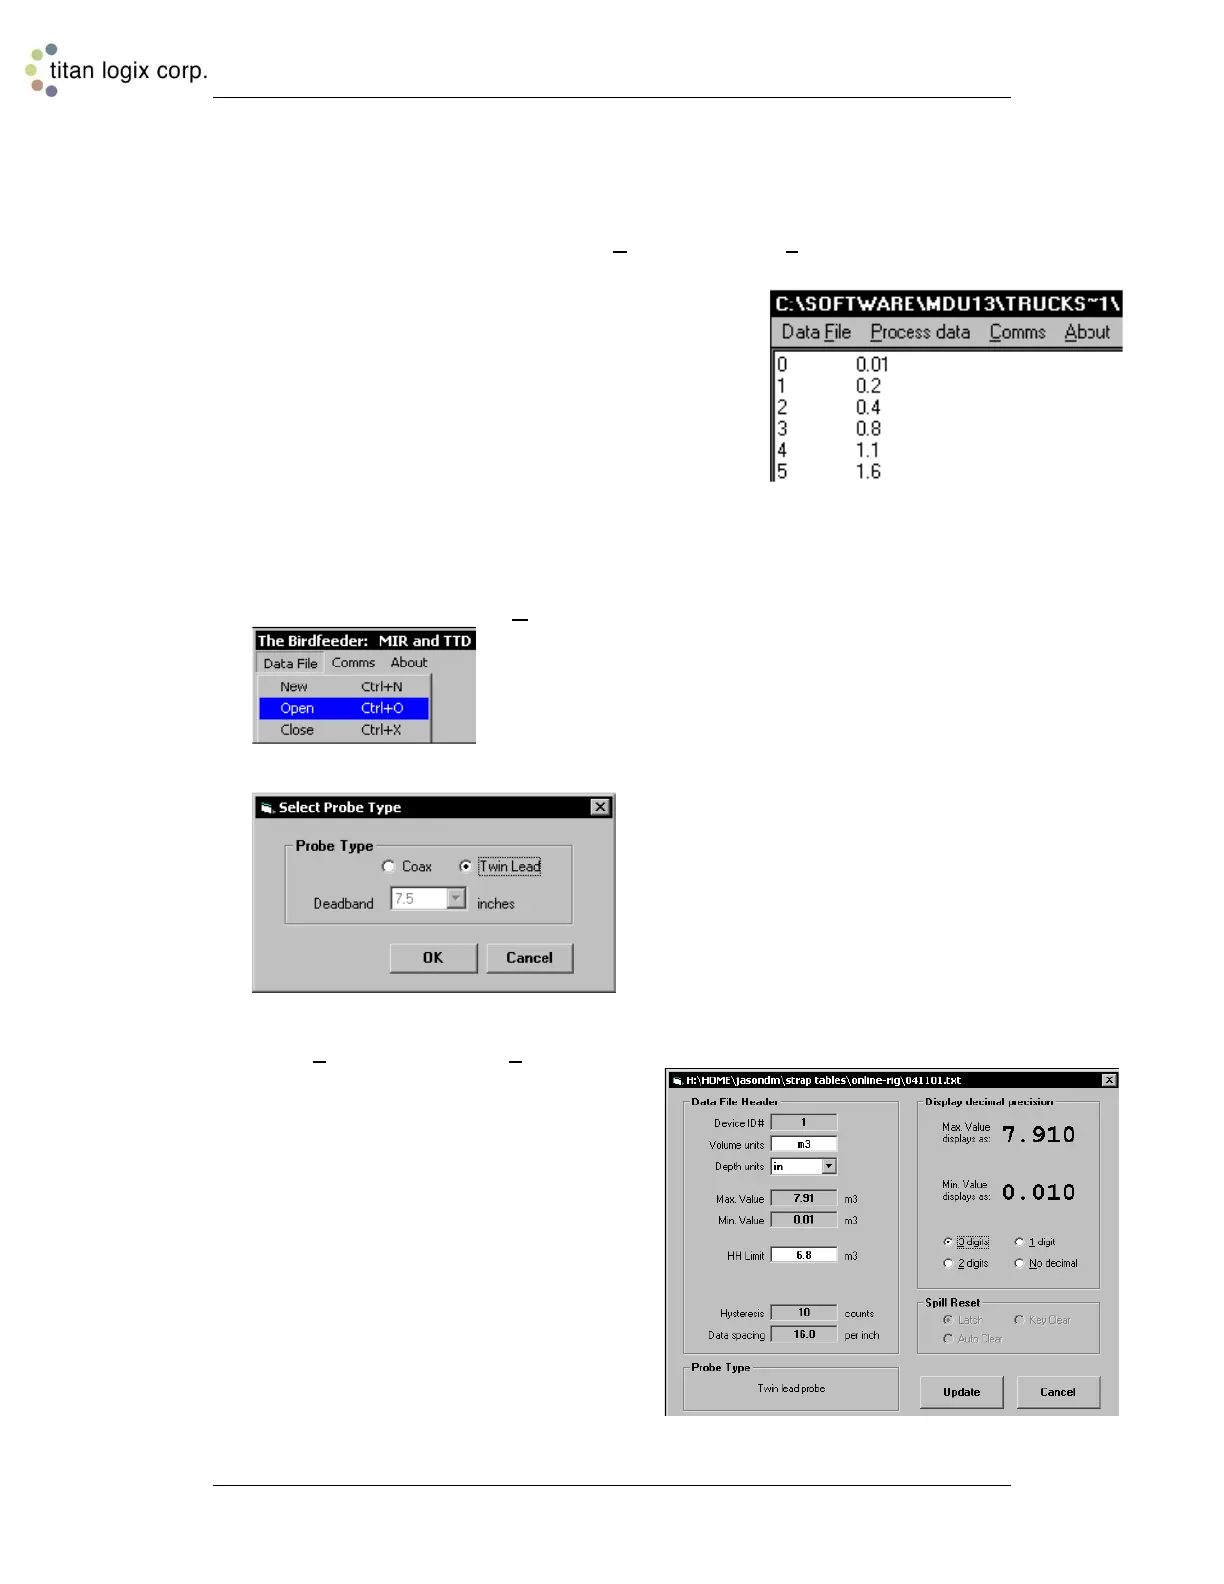
Open the MDU software program and select New from the Data File menu.
1. Once selected, blank screen will appear in which the
strap table can be entered. To enter the strap table,
enter in the Inch values in the left side of the screen
(always starting at 0), tab once and enter the
corresponding Volume (always starting at 0.01), then
press enter to continue the next values. (Strap tables
must be entered in inches.)
2. If a sump or a riser in installed in the tank, the height of
both must be accounted for in the strap table. (e.g. If
there is a 3” riser in the tank, 3” must be added to the top of the strap table. If there is
a 3” sump in the tank, 3” must be added to the bottom of the strap table.)
3. When the strap table has been completed, save the file according to the serial
number of tank or unit number and name of the customer for ease of future service
and exit the program.
4. Re-open the software, select Open and choose the strap table just created.
5. Select the type of probe being installed and press OK. If choosing a Coax probe,
select the Dead band desired.
6. Select Edit Header from the Process Data menu. If the software detects any points
of the strap table that are inconsistent, an
error window will pop up and display the
point of error to be corrected. When the
strap table is correct, two warning windows
will appear, one after the other, explaining
the HH and H level alarms. Select OK on
both of these and a screen will show up as
follows.
Device ID # remains 1.
Type in the volume units where asked.
Select inches for Depth Units.
Max Value, and Min Value remain
same.
HH Level and H Level remain same.
Hysteresis and Data Spacing remain
same.
 Loading...