ATTACHMENTS
10-17TX 413 Service Manual
Rev. 001
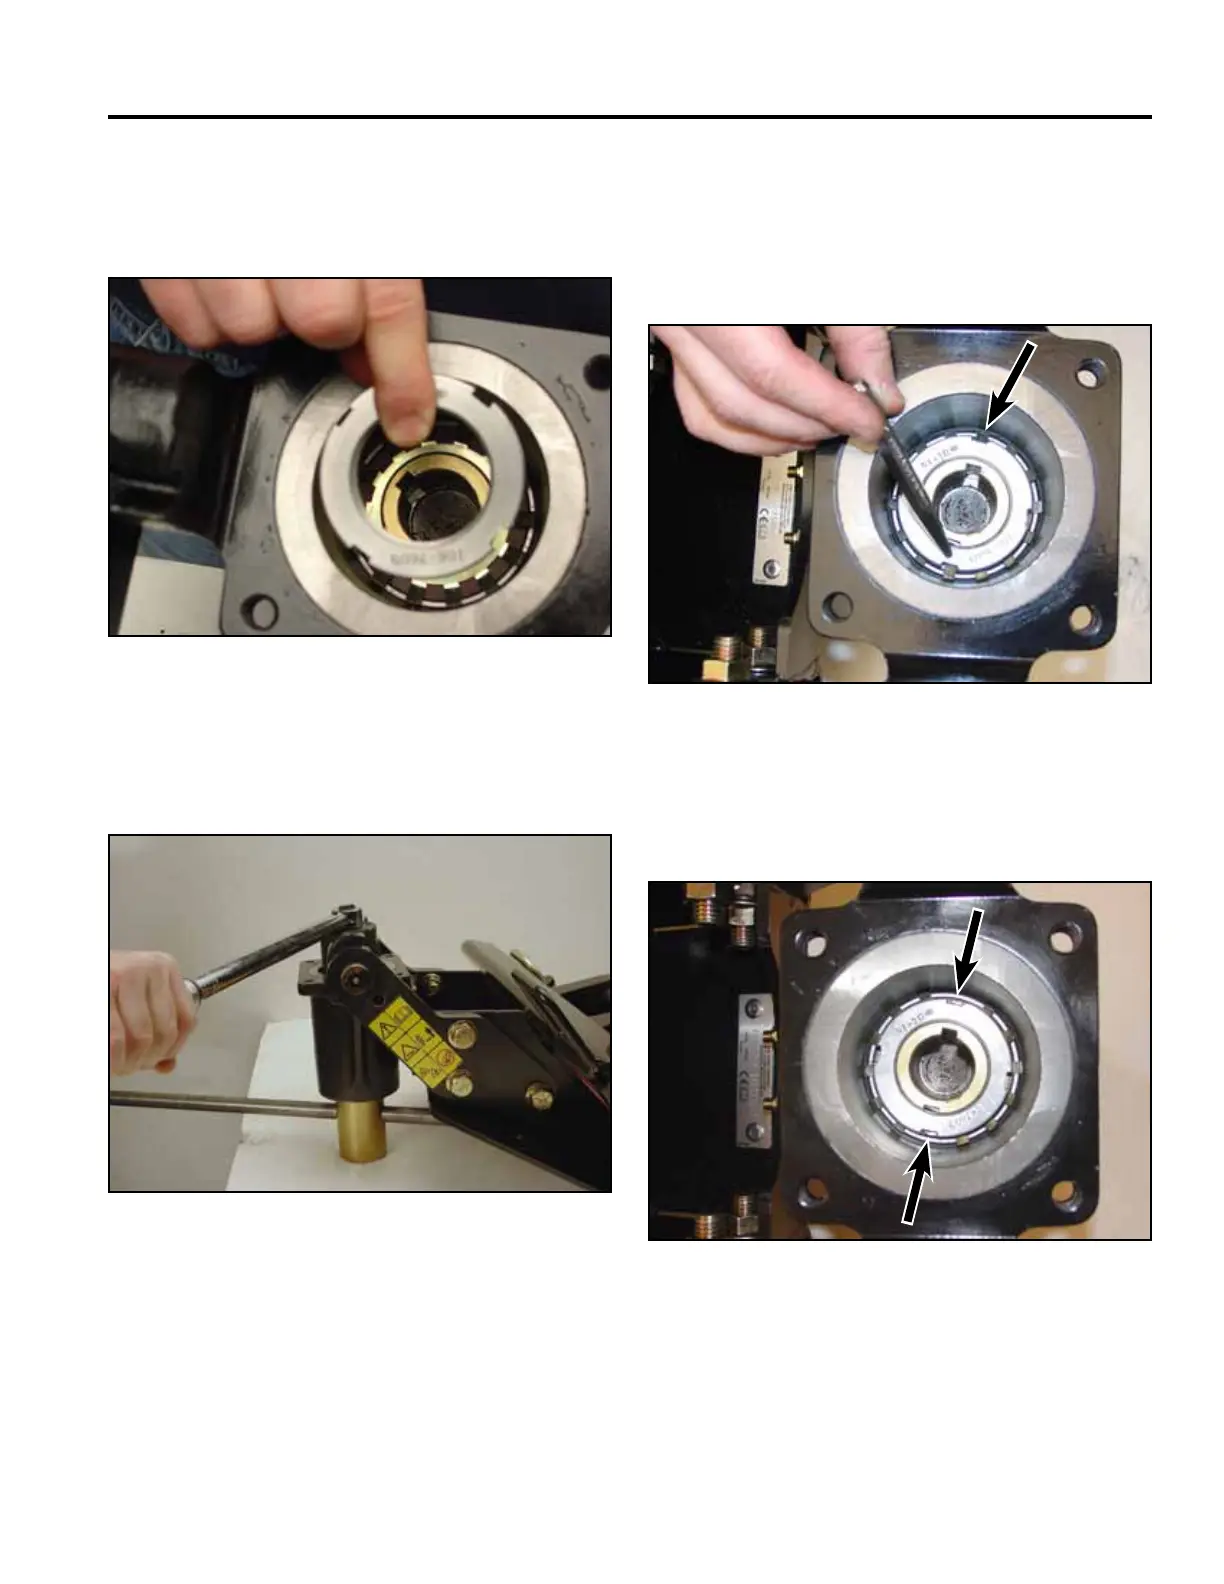
10. Install the bearing nut onto shaft with the chamfer
side of the nut facing down towards the bearing
lockwasher (Fig. 058).
Fig 058 CLR DSC-0166
11. Torquethebearingnutto150ft-lbs.(203.37Nm)
(Fig. 059).
Fig 059 CLR DSC-0171
Fig 061 CLR DSC-0189
13. Bend the tabs from the bearing lockwasher into the
notches of the bearing nut (Fig. 061).
Fig 060 CLR DSC-0185
12. Oncethetorquevaluehasbeenreached,ifthe
lockwasher tangs do not line up with the notches on
the bearing nut, continue to tighten the bearing nut
until two tangs from the bearing lockwasher line up
with the notches in the bearing nut (Fig. 060).