Rev. 000
11. Apply anti-sieze compound on the right drive
hydrostatic pump shaft. Also, apply a medium
strength threadlocking material to the pulley set
screws. Install the hydrostatic pump pulley on the
shaft and key, making sure the set screws are
facing outward and the pulley is flush with the end
of the pump shaft (Fig. 127). Then tighten the set
screws to 215 + 35 in-lbs. (24 + 4 Nm).
Figure 127 DSC-0889
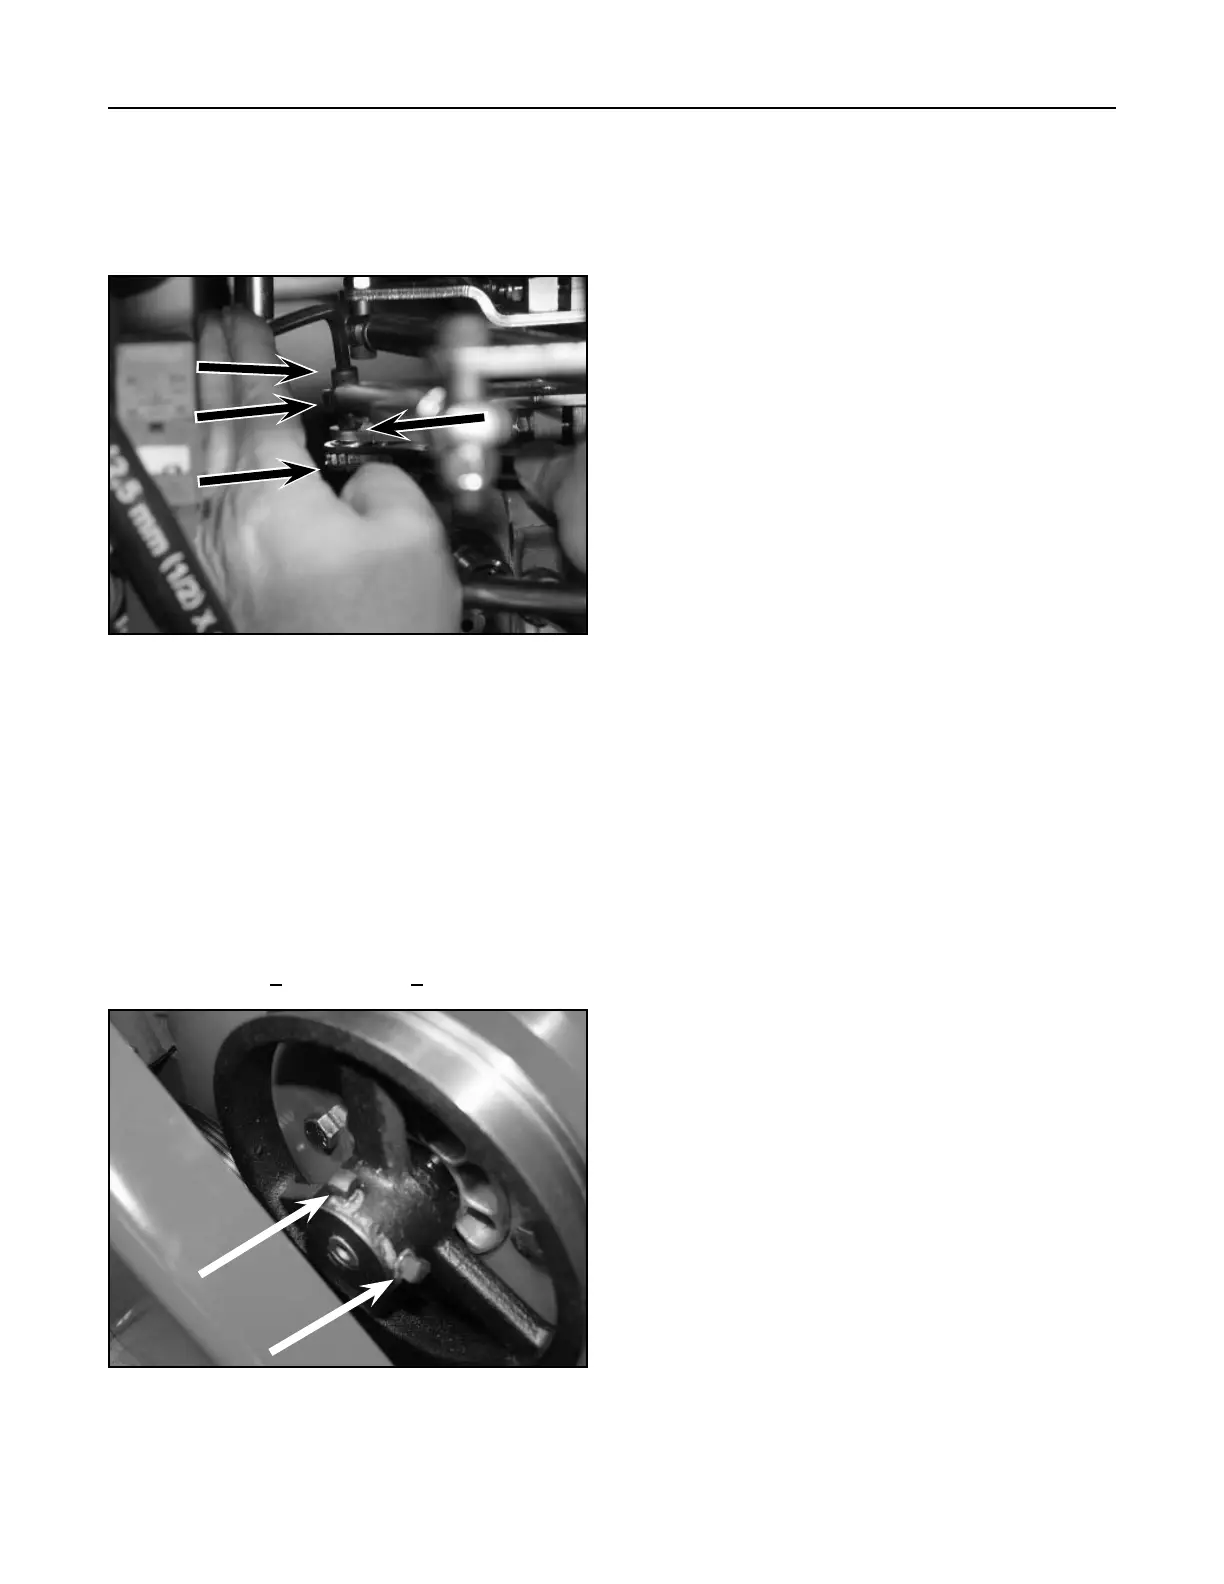
10. Position the control handle so the Allen head bolt
can be installed through the rod, linkage spacer,
pump lever assembly, and a nut. Tighten the
assembly and make sure the control handle is
moving freely (Fig. 126).
Figure 126 DSC-0876
A
B
C
D
A. Allen head bolt C. Pump lever assembly
B. Linkage spacer D. Nut
HYDRAULIC SYSTEM
6-12
TX 413 Service Manual
Hydrostatic Pump (Left Drive) Removal
12. Install drive belt; refer to the Drive Belt Installation
section on page 8-3.
13. Install battery and battery cables.
14. Follow the Purging Air Procedures; refer to the
Purging Air Procedures on page 6-4.
15. Check all of the hydraulic line connections for any
leaks.
16. Check the traction control for neutral, refer to the
Traction Control Neutral Position section on page
6-5.
17. Check the traction unit for tracking. If adjustment
is needed; refer to the Adjusting the Tracking of
the Traction Control, Full Forward Position section
on page 6-4.
18. Install drive belt cover and rear cover. Lower the
traction unit to the ground. Operate unit to make
sure everything is operating properly.
Note: Cleanliness is a key factor in a successful
repair of any hydrostatic system.
Thoroughly clean all exposed surfaces
prior to any type of maintenance. Cleaning
all parts by using a solvent wash and air
drying is usually adequate. As with any
precision equipment, all parts must be kept
free of foreign material and chemicals.
Protect all exposed sealing areas and open
cavities from damage and foreign material.
Upon removal, all seals, O-rings and
gaskets should be replaced. During
installation, lightly lubricate all seals, O-
rings and gaskets with clean petroleum
jelly prior to assembly.
1. Lift/support the unit so the tracks are off the
ground.
2. Raise the hood and remove the belt cover.
Remove the rear cover and disconnect the
battery cables and remove the battery.
3. Remove drive belt; refer to the Drive Belt
Removal section, page 8-2.
 Loading...


