EasyManuals Logo

Toro Dingo TX 413 User Manual

Toro Dingo TX 413
244 pages
To Next Page IconTo Next Page
To Previous Page IconTo Previous Page
Page #218 background imageLoading...
Page #218 background image
ATTACHMENTS
10-19TX 413 Service Manual
Rev. 001
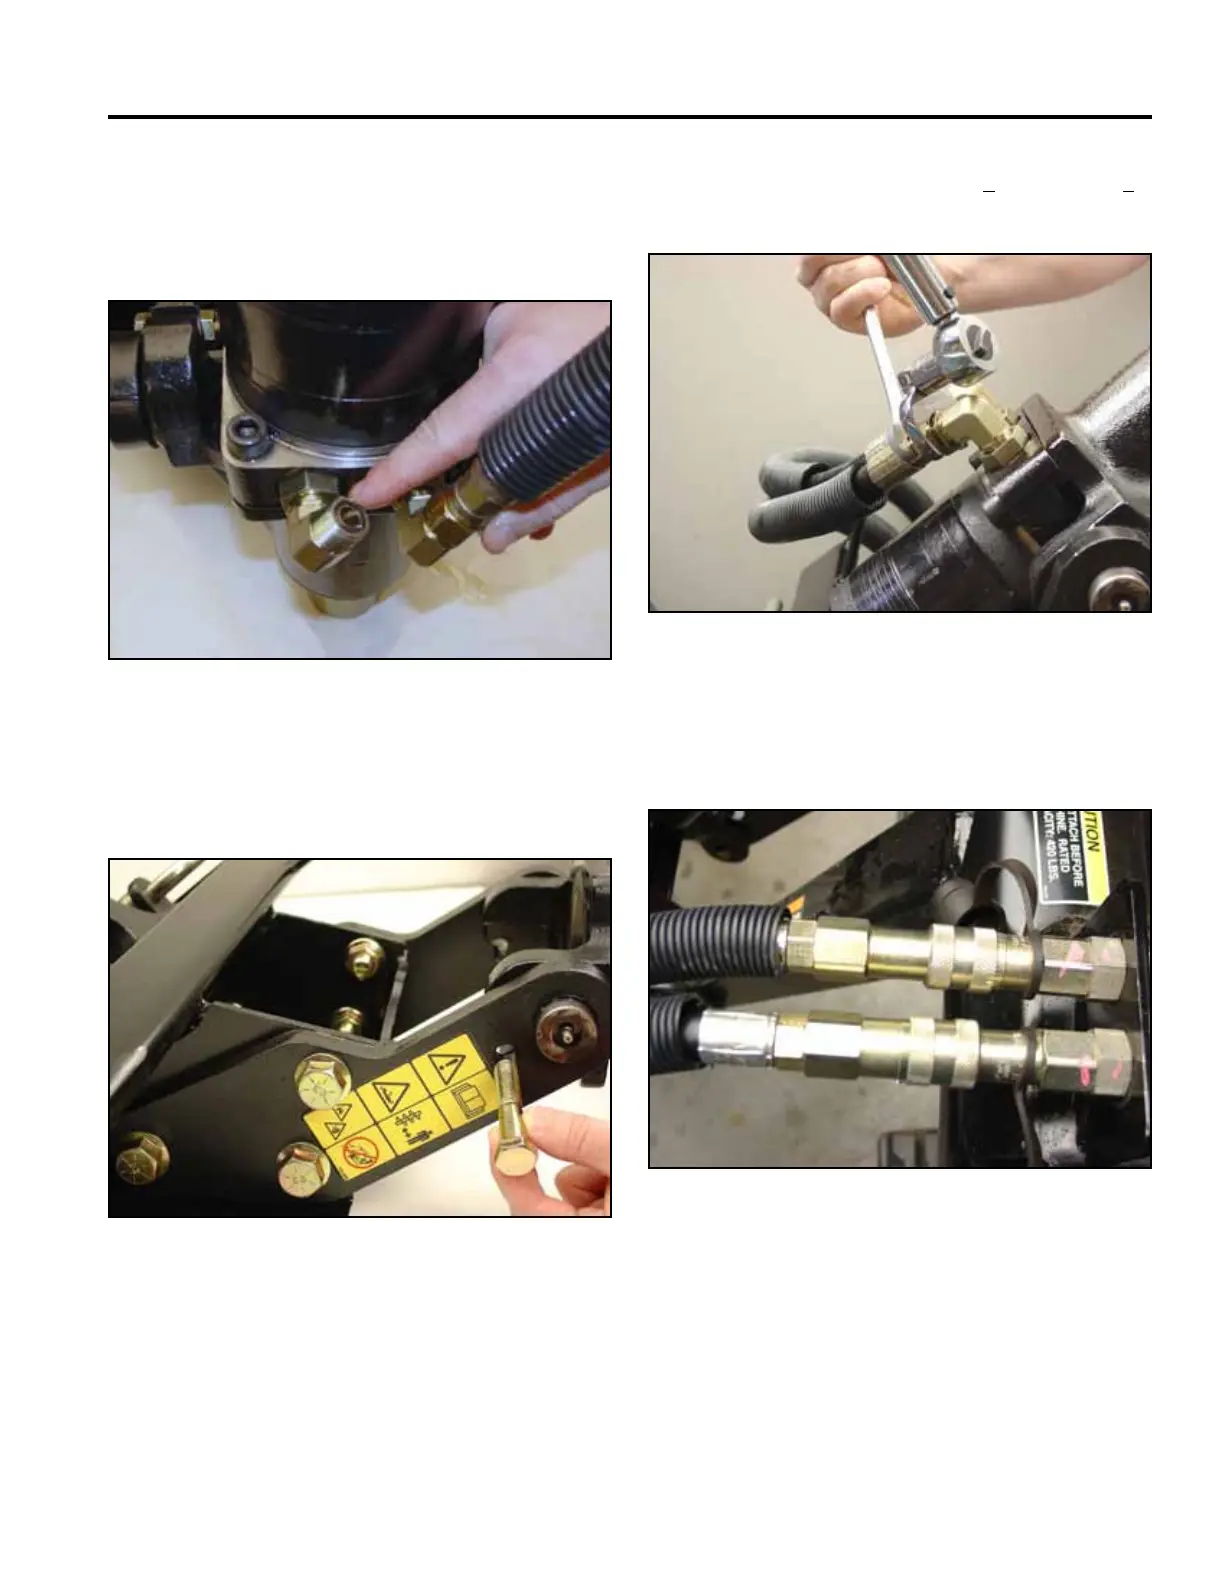
18. Install the hydraulic hoses to the hydraulic motor
Note: Replace the o-ring seals on the hydraulic
ttings (Fig. 066).
Fig 066 CLR DSC-0203
19. Stabilize the auger head by sliding the 1/2” x 2-3/4”
bolt into cradle arm (Fig. 067).
Fig 067 CLR DSC-0144
Fig 069 CLR DSC-0204
21. Install the other end of the hydraulic hoses onto the
ushfacecouplers(Fig.069).
Fig 068 CLR DSC-0206
20. Torquethehydraulicttingsto42+ 5 ft-lbs. (56.9 +
6.8 Nm) (Fig. 068).

Table of Contents

Other manuals for Toro Dingo TX 413

Questions and Answers:

Question and Answer IconNeed help?

Do you have a question about the Toro Dingo TX 413 and is the answer not in the manual?

Toro Dingo TX 413 Specifications

General IconGeneral
BrandToro
ModelDingo TX 413
CategoryCompact Loader
LanguageEnglish

Related product manuals