10.Squeezethesidesofthebatterycover,alignthe
tabsofthecoverwiththeslotsinthebattery
base,andreleasethebatterycover(Figure33).
g033557
Figure33
1.Slot(batterybase)2.Tab(batterycover)
13
LoweringtheTankSkid
Partsneededforthisprocedure:
2
Bolt(1/2x1-1/2inch
2
Locknut(1/2inch)
Procedure
1.Startthemachineandraisethetankskidslightly
withtheliftcylinders.
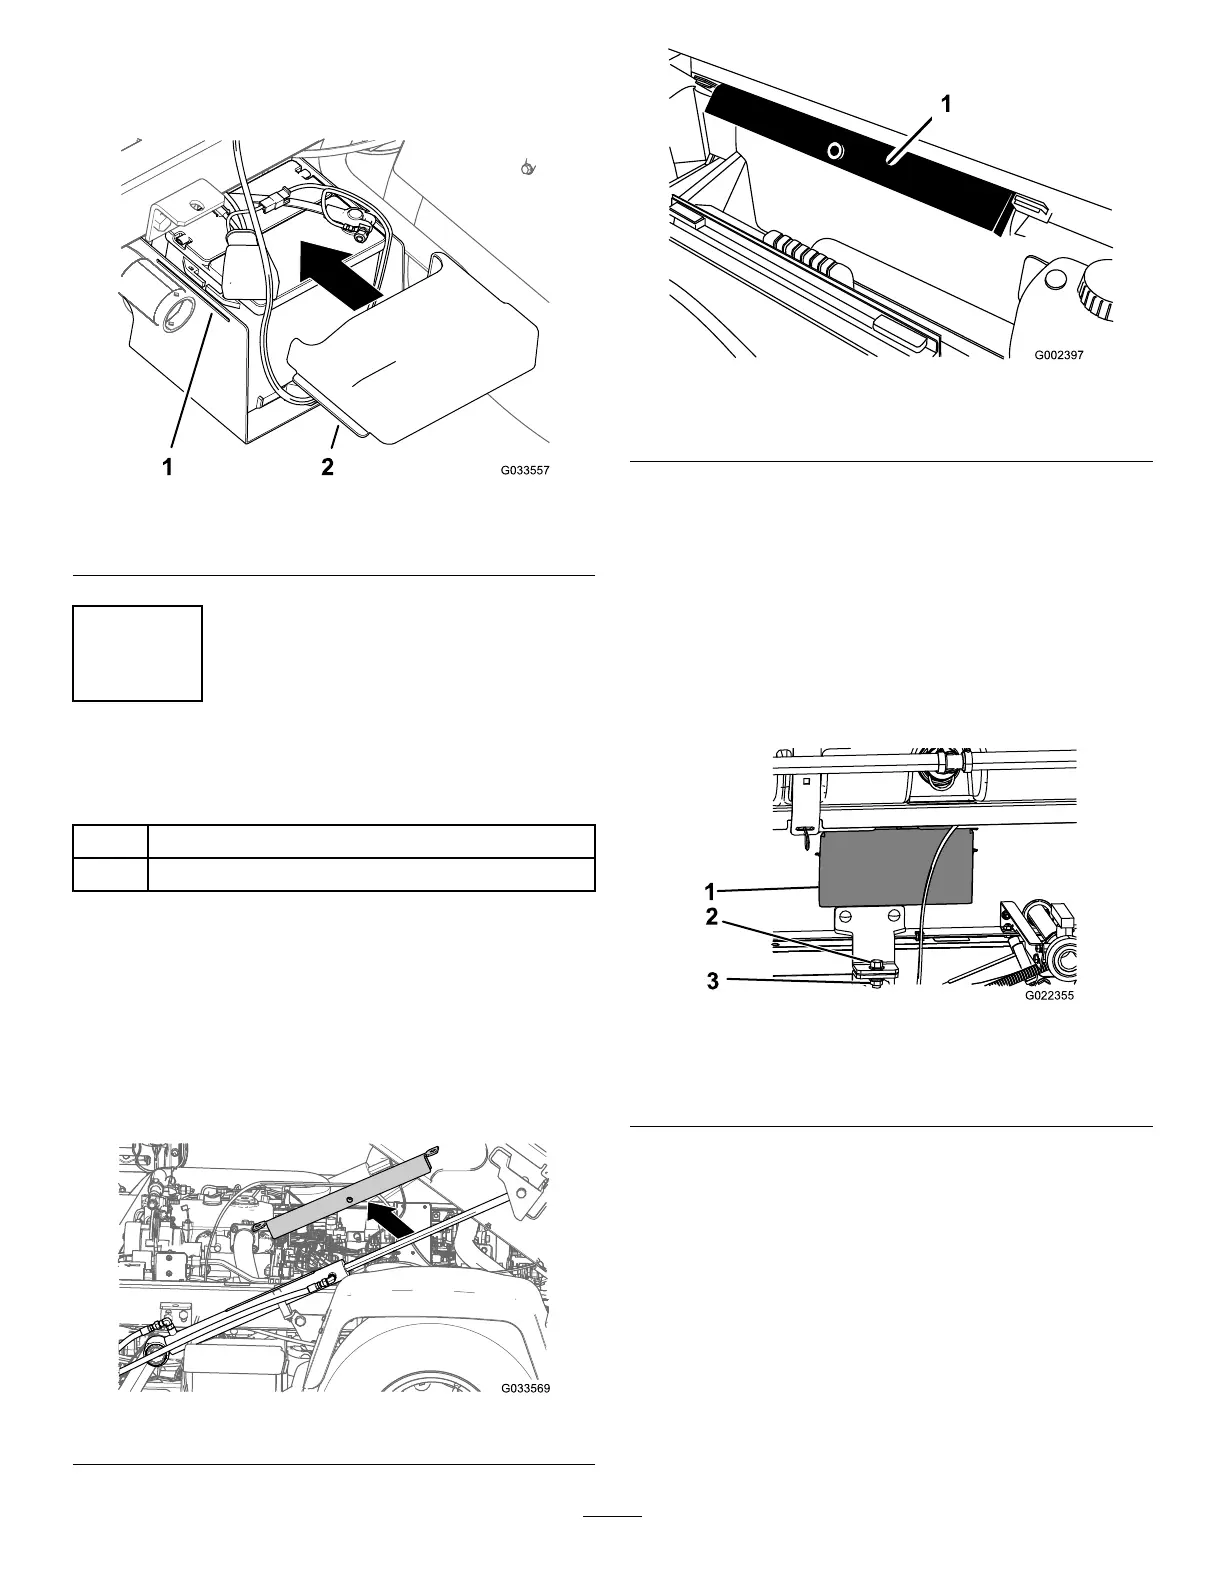
2.Removethebedsupportfromtheliftcylinder
andstowthesupportinthestoragebrackets
atthebackoftheROPSpanel(Figure34and
Figure35).
g033569
Figure34
g002397
Figure35
1.Bedsupport
3.Useliftcylinderstoslowlylowerthetanktothe
frame.
Note:Haveanotherpersonobservethetank
skidasitlowers.Lookforhosesandwiringthat
mightbecomepinchedorbent.
4.Checkthealignmentofthetankskidtothe
frameofthemachine.
5.Removetheaccesspanelsatbothsidesofthe
skidframe(Figure36).
g022355
Figure36
1.Accesspaneldoor
3.Locknut(1/2inch)
2.Bolt(1/2x1-1/2inch
6.Checkthehosesorwiringthatyoucansee
throughtheopeningintheskidframeforsigns
ofpinchingorbending.
Important:Ifanyhosesorwiringonthe
tankskidassemblyarepinchedorbent,
raisetheassemblyup,adjustitspositioning,
andtietheitemsback.
7.Alignthefrontmountingbracketswiththe
hold-downbracketsinstalledin3Installingthe
Hold-DownBracketsfortheT ankSkid(page18).
8.Securetheholddownbracketofthetankskid
assemblytothebedbracketontheframeat
30