g033582
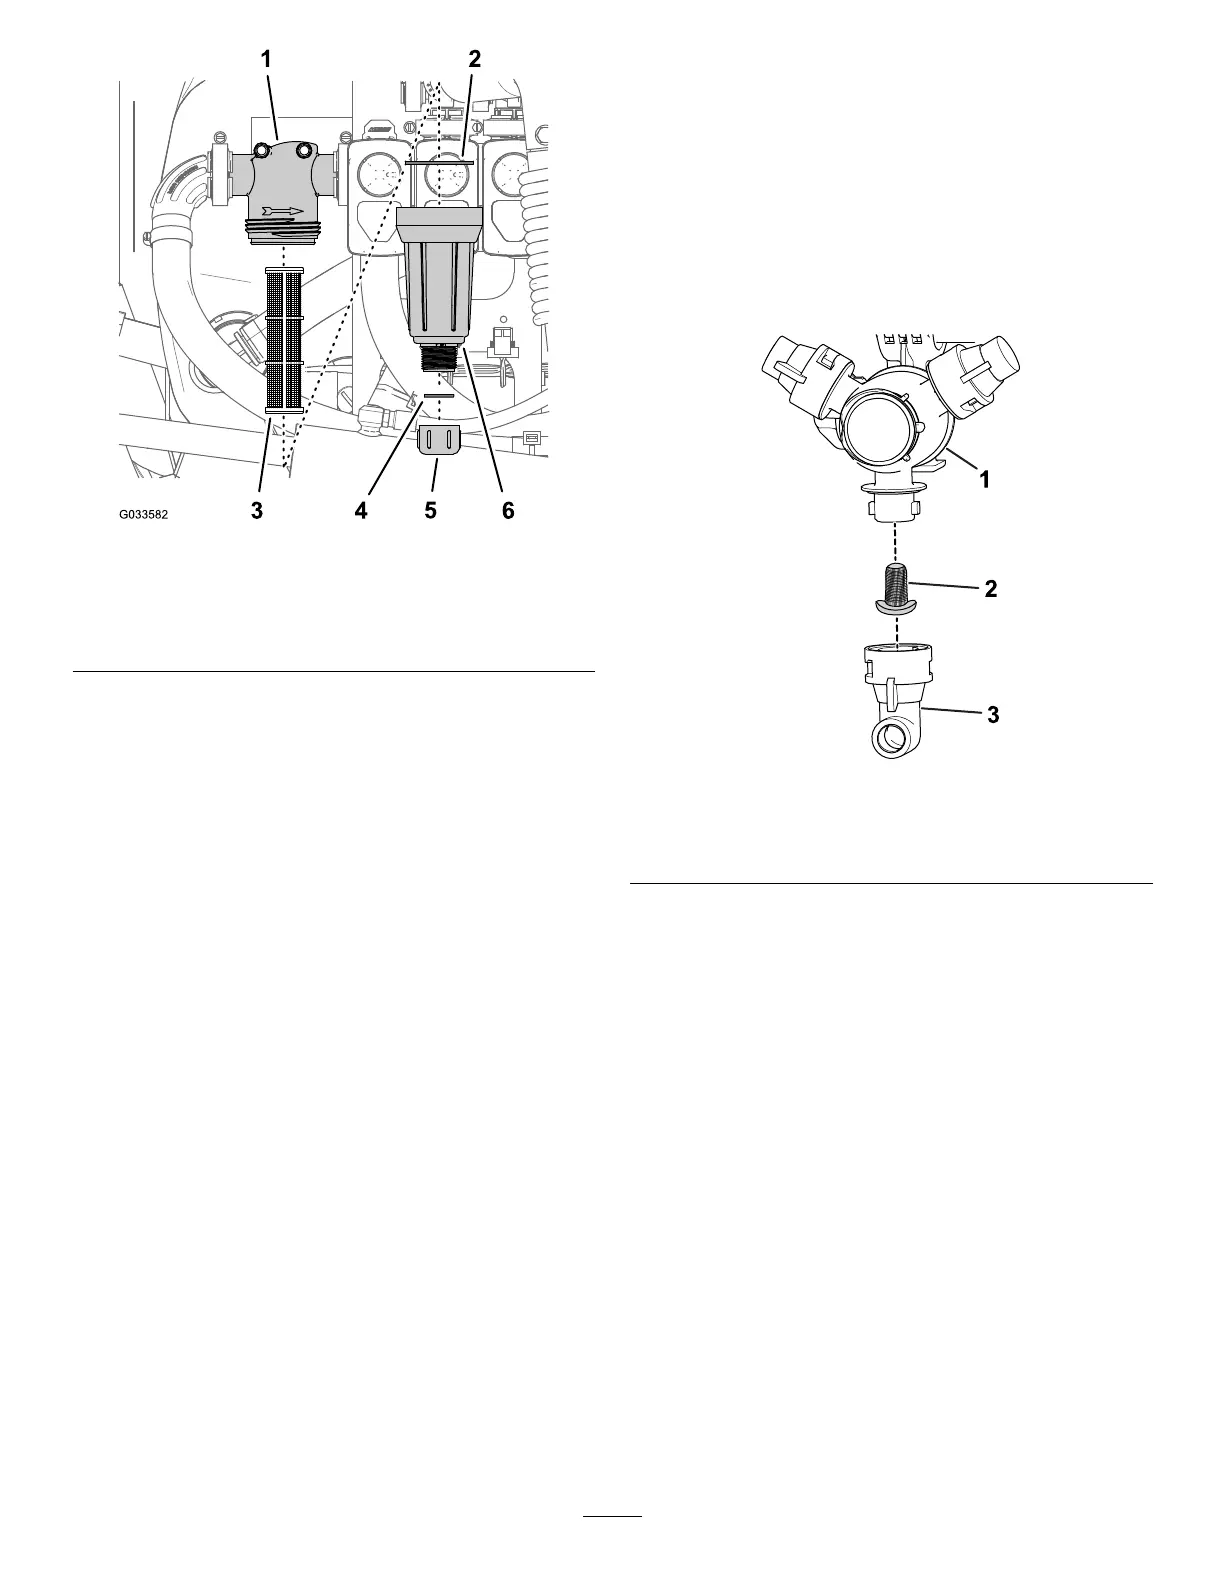
Figure103
1.Filterhead
4.Gasket(drainplug)
2.Gasket(bowl)
5.Draincap
3.Filterelement6.Bowl
3.Rotatethedraincapcounterclockwiseand
removeitfromthebowlofthepressurelter
(Figure103).
Note:Allowthebowltodraincompletely.
4.Rotatethebowlcounterclockwiseandremove
thelterhead(Figure103).
5.Removetheoldpressurelterelement(Figure
103).
Note:Discardtheoldlter.
6.Checkthegasketforthedrainplug(located
insidethebowl)andthegasketforbowl(located
insidethelterhead)fordamageandwear
(Figure103).
Note:Replaceanydamagedorworngaskets
fortheplug,bowl,orboth.
7.Installthenewpressurelterelementintothe
lterhead(Figure103).
Note:Ensurethatthelterelementisrmly
seatedintothelterhead.
8.Installthebowlontothelterhead,andtighten
byhand(Figure103).
9.Assemblethedraincapontothettingatthe
bottomofthebowl,andtightenthecapbyhand
(Figure103).
ChangingtheNozzleFilter
Note:Determinetheappropriatenozzleltermesh
sizethatyouneedforyourjob;refertoSelectinga
Nozzle-TipFilter(Optional)(page66).
1.Parkthemachineonalevelsurface,engagethe
parkingbrake,shutoffthesprayerpump,shut
offtheengine,andremovethekey.
2.Removethenozzlefromthesprayturret(Figure
104).
g209504
Figure104
1.Sprayturret
3.Nozzle
2.Nozzlelter
3.Removetheoldnozzlelter(Figure104).
Note:Discardtheoldlter.
4.Installthenewnozzlelter(Figure104).
Note:Ensurethatthelterisfullyseated.
5.Installthenozzleontothesprayturret(Figure
104).
InspectingtheSprayer
Pump
ServiceInterval:Every400hours/Yearly(whichever
comesrst)—Inspectthepump
diaphragmandreplaceifnecessary.
(seeanAuthorizedToroService
Distributor).
Every400hours/Yearly(whichevercomes
rst)—Inspectthepumpcheckvalvesand
replaceifnecessary.(seeanAuthorizedToro
ServiceDistributor).
73