Rev. A
Reelmaster 5200-D/5400-D4WD Rear Axle Page 9 - 6
(Unit Serial No. 80001 - 99999)
Installation
1. If front axle or traction shaft was removed:
A. Apply medium strength Loctite to coupler output
shaft on rear of hydrostatic.
B. Slide traction shaft through bearing bracket,
aligning the (2) bearing bracket mounting holes with
the holes in side and bottom of hydrostatic (Fig. 8).
C. Mount side of bracket to hydrostat with a caps-
crew, lock washer, flat washer and 1 or 2 shims
(Fig. 8).
D. Place top carriage bolt in bearing bracket and
mount bottom of bearing bracket to hydrostat with
socket head screw.
Note: Determine whether 1 or 2 shims are required
between bracket and hydrostat before tightening any
fasteners. After shim(s) are in position on capscrew,
tighten socket head bolt and capscrew.
E. Thread traction shaft (left hand thread) all the way
onto coupler output shaft.
F. Mount bearing assembly to bearing bracket
with
carriage bolts and locknuts. Tighten lock nuts.
G. Slide locking collar onto traction shaft.
2. Apply never-seize to splines of traction shaft and
rear axle input shaft.
3. Slide clutch end of drive shaft assembly onto shaft.
Tighten axle coupling capscrews and locknuts (Fig. 7).
4. Slide end yoke of drive shaft assembly onto traction
shaft and tighten end yoke capscrews and locknuts
(Fig. 7).
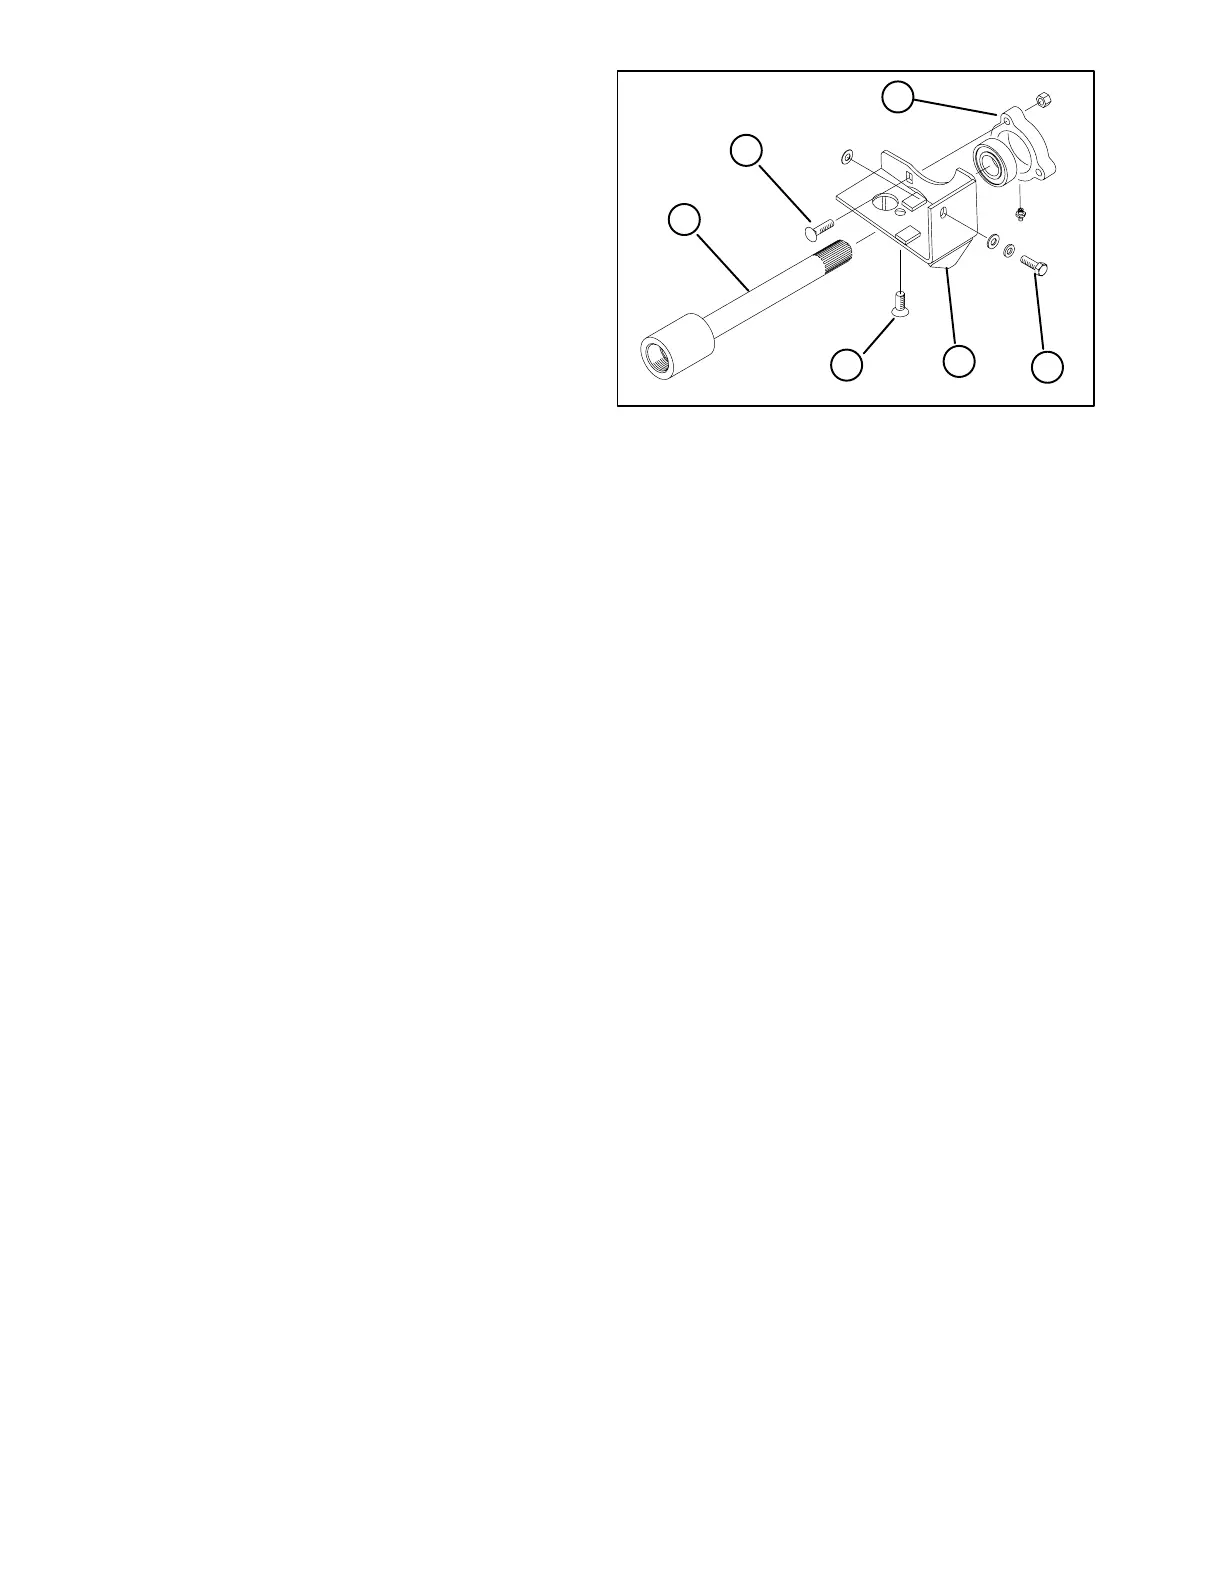
Figure 8
1. Traction shaft
2. Bearing bracket
3. Capscrew
2
1
3
4
5
6
4. Socket head screw
5. Carriage bolt
6. Bearing assembly
5. If front axle or traction shaft was removed:
A. Block front wheels to prevent the machine from
moving.
B. Jack up the rear of the machine until there is
about 1 in. (25 mm) clearance between the rear tires
and the ground. SECURELY SUPPORT THE VE-
HICLE FRAME.
C. Use an open end wrench on the square slip yoke
shaft and turn the shaft in a counterclockwise (left
hand threads) direction. Tighten shaft to 110 to 120
ft-lbs. (149 to 163 Nm).
D. Tighten locking collar to traction shaft by carefully
rotating it in a clockwise direction with a hammer and
punch. Tighten collar set screws (Fig. 7).

 Loading...


