Reelmaster 5200-D/5400-D Hydraulic SystemPage 4 - 45
Removal
1. Park machine on a level surface, lower cutting units,
stop engine, engage parking brake, and remove key
from the ignition switch.
2. Remove two (2) rear cutting units (see Chapter 8 -
Cutting Units).
3. To prevent contamination of hydraulic system during
removal, thoroughly clean exterior of transmission and
differential.
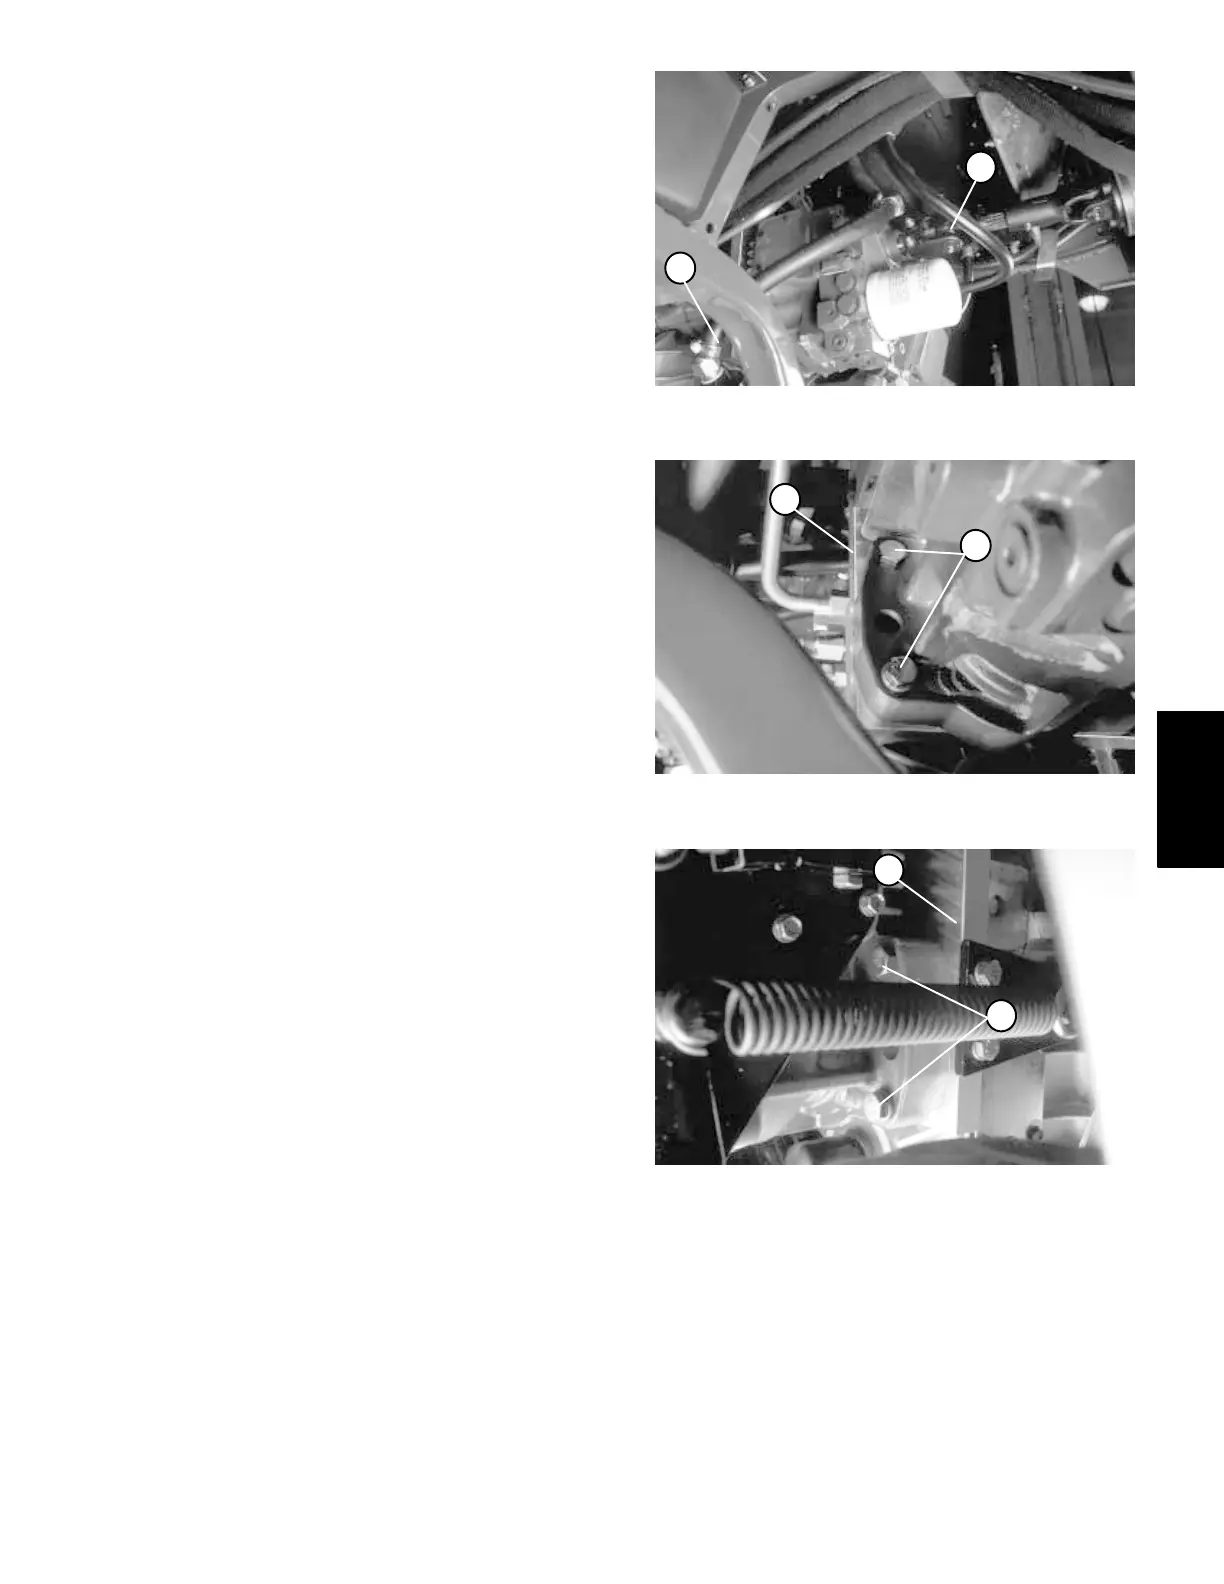
4. Put a drain pan below the transmission. Remove
suction line from bottom of in-line filter to let oil drain out
of differential (Fig. 39).
5. Remove transmission control linkage from the trans-
mission (see Transmission Control Linkage Removal).
6. Remove hydraulic hoses and fittings connected to
transmission. Put plugs or caps on disconnected hy-
draulic hoses to prevent contamination of the system.
Put plugs in open ports of transmission.
7. Disconnect drive shaft from transmission (Fig. 39).
8. Support the transmission to prevent it from falling
while carefully removing four (4) cap screws and lock-
nuts retaining transmission to support plate. Carefully
pull transmission off of support plate and lower it out of
the machine (Fig. 40 and 41).
Note: If the machine is going to be stored until trans-
mission is repaired or replaced, cover hole in support
plate with weatherproof tape to prevent contamination
of the reservoir.
9. Leave support plate installed and gear pump
installed on the support plate.
10.Remove retaining ring and remove pinion gear from
transmission output shaft.
11.Remove filter from the transmission.
Installation
1. Park machine on a level surface, lower cutting units,
stop engine, engage parking brake, and remove key
from the ignition switch.
2. Before installing transmission, install new O-ring
seal where transmission mates with support plate.
3. Install pinion gear and retaining ring to the transmis-
sion output shaft.
4. Uncover hole in support plate if necessary.
1. Suction line 2. Drive shaft
Figure 39
1
2
1. Cap screw & lock nut 2. Support plate
Figure 40
1
2
1. Cap screw & lock nut 2. Support plate
Figure 41
1
2
5. Carefully position transmission to the support plate
while raising it into the machine. Support transmission
to prevent it from falling while carefully installing four (4)
cap screws and locknuts securing transmission to sup-
port plate. (Fig. 40 and 41).
6. Connect drive shaft to the transmission (Fig. 39).
7. Remove plugs or caps from disconnected hydraulic
hoses and open ports of the transmission.
Hydraulic
Systems

 Loading...


