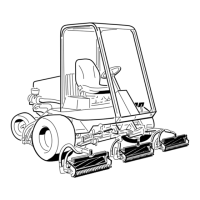
DisassemblingtheGroomerPlateAssembly
1.Parkthemachineonacleanandlevelsurface,lowerthecuttingunits
completelytotheground,shutofftheengine,settheparkingbrake,and
removethekeyfromthekeyswitch.
Note:Ifthecuttingunitisequippedwiththepoweredrearrollerbrush,
removaloftherollerbrushcomponentswillbenecessarytoservicethe
groomerplateassemblies;refertotheRearRollerBrush–Optional(cutting
unitswithpaintedsideplates)(page9–51).
2.Removethegroomerplateassemblyfromthegroomerdrivesideofthe
cuttingunitasfollows:
A.Removethegroomerbeltcoverandgroomerdrivebeltfromthegroomer
drive;refertoReplacingtheGroomerDriveBelt(page10–7).
Note:Topreventthecuttingreelfromturningwhenremovingthedrive
pulley,blockthereelwithapieceofwood.
B.Removetheange-headscrew(item12inFigure376)thatretainsthe
drivepulley.Pullthedrivepulleyfromthedriveshaft.Locateandretrieve
thesquarekeyfromthedriveshaft.
Note:T opreventthegroomershaftfromturningwhenremovingthe
drivenpulley,useawrenchonthegroomershaftatstoholdthegroomer
shaft.
C.Removetheangenut(item17inFigure376)thatsecuresthedriven
pulleytothegroomershaft.Slidethedrivenpulleyfromtheshaft.
D.Slidethewasher(s)(item19inFigure376)andpulleyspacerfromthe
groomershaft.
g215602
Figure377
1.Groomerplate2.Quick-upballjointrod3.Shoulderbolt
E.Removetheshoulderboltthatsecuresthequick-upballjointrodtothe
groomerplate(Figure377).
F.Disconnecttheextensionspring(item9inFigure376)fromthestud
onthegroomerplate.
G.Removethe2socket-headscrews(item2inFigure376)thatsecurethe
groomercomponentstothecuttingunitsideplate.
BeltDrivenGroomer(Optional):ServiceandRepairs
Page10–10
Reelmaster
®
5410/5510/5610Series
15216SLRevC

 Loading...


