INSTALLATION
Page
26
Copyright Trace Engineering Company, Inc.
5916 - 195th Street N.E.
Arlington, WA 98223
Telephone: 360/435-8826
Fax: 360/435-2229
www.traceengineering.com
PS Series Inverter/Charger
Part No. 3597
Rev. D: November 23, 1999
QUICK INSTALL
This section is provided for installers, licensed electrical contractors, and knowledgeable laymen as a
quick reminder on the essential steps to quickly install the Trace PS Series Inverter/Charger. If you
haven’t had experience with the PS Series Inverters/Charger, you are urged to read the entire
INSTALLATION section before installing the inverter/charger.
MOUNTING
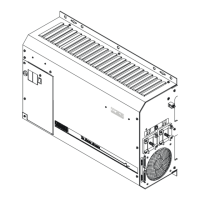
Mount the unit securely in a clean, dry, properly ventilated enclosure. Do not mount the unit in the same
enclosure as vented or maintenance-free type vented batteries. Bolt the unit securely. Allow adequate
clearance to allow access to the indicators or controls.
DC CABLING
1. Connect a cable from the positive terminal of the battery (or battery bank) to the battery positive (red)
terminal of the inverter. See Table 16 in the Appendix to determine the proper size cable and length
of run needed to use with your inverter model and for your specific application. The National Electric
Code (NEC) requires the use of a DC fuse or disconnects with this cable. See Table 13 in the
Appendix to determine the correct size fuse or breaker to use.
2. Connect an appropriate sized cable from the battery’s negative terminal to the negative (black)
terminal on the inverter. Torque all terminals to 10-15 foot-pounds. A 'snap' caused by charging the
internal capacitors may occur. This is normal.
3. Connect a cable from the DC Ground terminal on the inverter to the system ground.
AC IN CABLING
See Table 17, Recommended Minimum AC Wire Sizes (75° C in the Appendix to determine the
appropriate AC wire size.
1. Remove the knockout from the inverter chassis and install a strain relief or conduit in which to route
the AC cabling in and out.
2. Connect the black wire from the hot side of the AC power to the terminal labeled AC HOT IN on the
inverter.
3. Connect the white wire from the neutral side of the AC power source to the terminal labeled AC
NEUTRAL IN on the inverter.
4. Connect the green wire from the ground of the AC power source to the AC Ground Terminal of the
inverter/charger.
AC OUT CABLING
1. Connect the black wire between the terminal marked AC HOT OUT to the hot bus of your AC load
center or AC sub-panel.
2. Connect the white wire from the terminal marked AC NEUTRAL OUT to the neutral bus of your AC
load center or sub-panel.
3. Connect the AC Ground Terminal of the inverter to the safety ground bus of the AC load center or
sub-panel.
WRAP UP
1. Secure all wiring with wire ties or other non-conductive fasteners to prevent chafing or damage. Use
strain reliefs, grommets, or conduit to prevent damage to the wiring where it passes through any
apertures. Tighten all connections to the correct torque (AC Connections at 20 inch-pounds; DC
Connections at 10-15 foot-pounds).
2. Make a final check of all wiring, then reconnect to the AC power source.
Turn the inverter ON and check inverter operation (See the FUNCTIONAL TEST section on page 27).

 Loading...