FUNCTIONAL TEST
Copyright Trace Engineering Company, Inc.
5916 - 195th Street N.E.
Arlington, WA 98223
Telephone: 360/435-8826
Fax: 360/435-2229
www.traceengineering.com
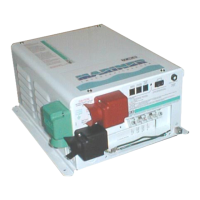
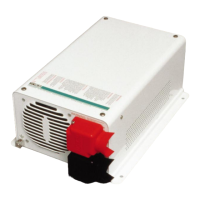
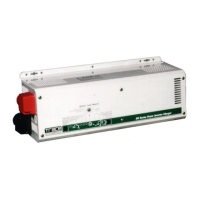
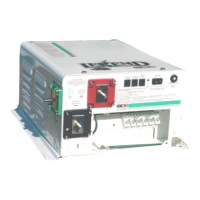
PS Series Inverter/Charger
Part No. 3597
Rev. D: November 23, 1999
Page
27
FUNCTIONAL TEST
Once the AC and DC wiring have been installed and connected, take a moment to go back over all
connections and make sure they are secure and have been installed properly. Ensure that there is no AC or
DC power provided to the inverter/charger and that all AC loads are disconnected from the output of the
inverter.
The below steps will complete a functional test of the inverter. If any area fails, figure out why before
proceeding. The TROUBLESHOOTING GUIDE section, starting on page 109, will hopefully help solve
problems you may encounter.
1. After ensuring the correct polarity, apply battery (DC) power to the inverter by turning on the
battery bank DC disconnect or connecting the proper fuse inline to the battery to complete the battery
circuit. The inverter will power up and the ERROR (red) LED will be on (indicates no AC output), but
the inverter will remain in the OFF mode. The ERROR (red) LED should be the only LED on at this
time – if not, troubleshoot before continuing.
2. Press the ON/OFF switch twice (SEARCH then ON) to turn the inverter on. Monitor your INVERTING
(yellow) LED to ensure what mode you are in:
• OFF – The Inverter/Charger is off. This is the default position of the inverter upon power-up. No
inverter or pass-thru power will be applied to the AC loads
• ONE BLINK/SEC – The Inverter/Charger is in Search mode and is looking for an AC load greater than
the SEARCH WATTS setting (default = 16 watts).
• DOUBLE BLINK/SEC - The Inverter/Charger is in the Charge Only mode. The inverter will operate
only as a charger (MAXIMUM AC AMPS IN switch must be in the AC1 position to use the Charge
Only mode).
• RAPID BLINK (4/sec) - Indicates that an operating error has occurred. The inverter is protected from
conditions caused by over-load, over-current, over-temperature (transformer or heatsink), high-battery,
low-battery, low AC dropout or an external (stacked) error. If the inverter senses one of these situations,
it will protect itself by disconnecting from the AC loads. This error condition also occurs from numerous
generator-related errors, but will not disconnect the AC loads. Refer to the TROUBLESHOOTING
GUIDE starting on page 109 to help determine your particular error cause.
• ON – Indicates the Inverter/Charger is on. The inverter will produce a low audible “buzz” is able to
provide power to the AC loads.
If the inverter does not produce a low audible “buzz” or come on, check all connections. Check the
inverter’s DC voltage on the positive (+) and negative (–) terminals. If the DC voltage is low, the
battery bank needs to be charged externally. Charge the battery bank and restart the functional test.
3. With the inverter ON, check the AC voltage on the AC output terminal of the inverter and ensure you
get the correct AC voltage for your particular unit. After confirming the correct AC voltage, connect
your AC output breaker and place a load on the inverter (plug in a light or other load to an outlet the
inverter is powering), and make sure it works.
4. Check your battery charger. To charge your batteries, provide AC power - by plugging in a power
cord or turning on the AC input breaker - to the AC HOT IN and NEUTRAL IN terminals on the inverter.
The AC IN (Green) LED should come on, indicating that AC power is getting to the inverter. After a
minimum 20 seconds delay, the CHARGE (Orange) LED on the inverter should be on, indicating the
charger is working properly. If you have an SWRC, it should indicate which charge stage (bulk or float)
the inverter is currently in. Any AC loads powered by the inverter should also work at this point since the
AC input power (Utility or Generator) is passed through the inverter to power the loads.
5. Disconnect AC power. Take away the AC input power by turning the AC power breaker off or
unplugging the AC power cord. The inverter should transfer to inverter mode immediately. The
INVERT (Yellow) LED should come on to indicate this. The inverter will begin to produce an audible
“buzz” as it takes power from the batteries and uses it to power the loads. The loads should continue
to operate uninterrupted.
6. This completes the functional test, if all areas pass, the inverter is ready for use. If any of the inverter’s
internal setpoints are to be adjusted, consult the MENU SYSTEM section starting on page 29.