4-5
COMMANDER / EMBASSY
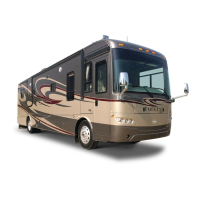
Fig. 4-8 COCKTAIL CHAIR
4.5 COCKTAIL SEAT
A cocktail chair is located behind the co-pilots seat and
is part of the living room furniture.
1. Swivel Lock:
This latch releases the swivel base. Pull on the
latch to release the lock and allow the chair to
swivel. When the seat returns to this position, the
lock will again engage. Be sure the swivel base is
locked and seat belt fastened if this seat is occu-
pied when travelling.
2. Forward-Back Position:
This Spring-loaded latch releases the lock on the
sliding base to allow the seat to be moved forward
or backward and is located under the seat. Pull on
the latch to release the lock and slide the seat to its
desired position. Release the latch to lock the seat
in posiiton.Several seats are equipped with lap or
lap/shoulder belts and are the only seats approved
for occupancy when travelling. Every occupant
must be seated in one of the approved seats with
the belt fastened whenever the motorhome is
moving. Accident statistics prove the importance
of the need to use seat belts. Vehicle occupants
not seated in an approved seat and restrained with
a seat belt received more injuries of a more serious
nature than those properly restrained.
4.6 SEAT/SHOULDER BELTS
Several seats are equipped with lap or lap/shoulder
belts and are the only seats approved for occupancy
when travelling. Every occupant must be seated in one
of the approved seats with the belt fastened when-
ever the motorhome is moving. Accident statistics
prove the importance of the need to use seat belts.
Vehicle occupants not seated in an approved seat and
restrained with a seat belt received more injuries of a
more serious nature than those properly restrained.
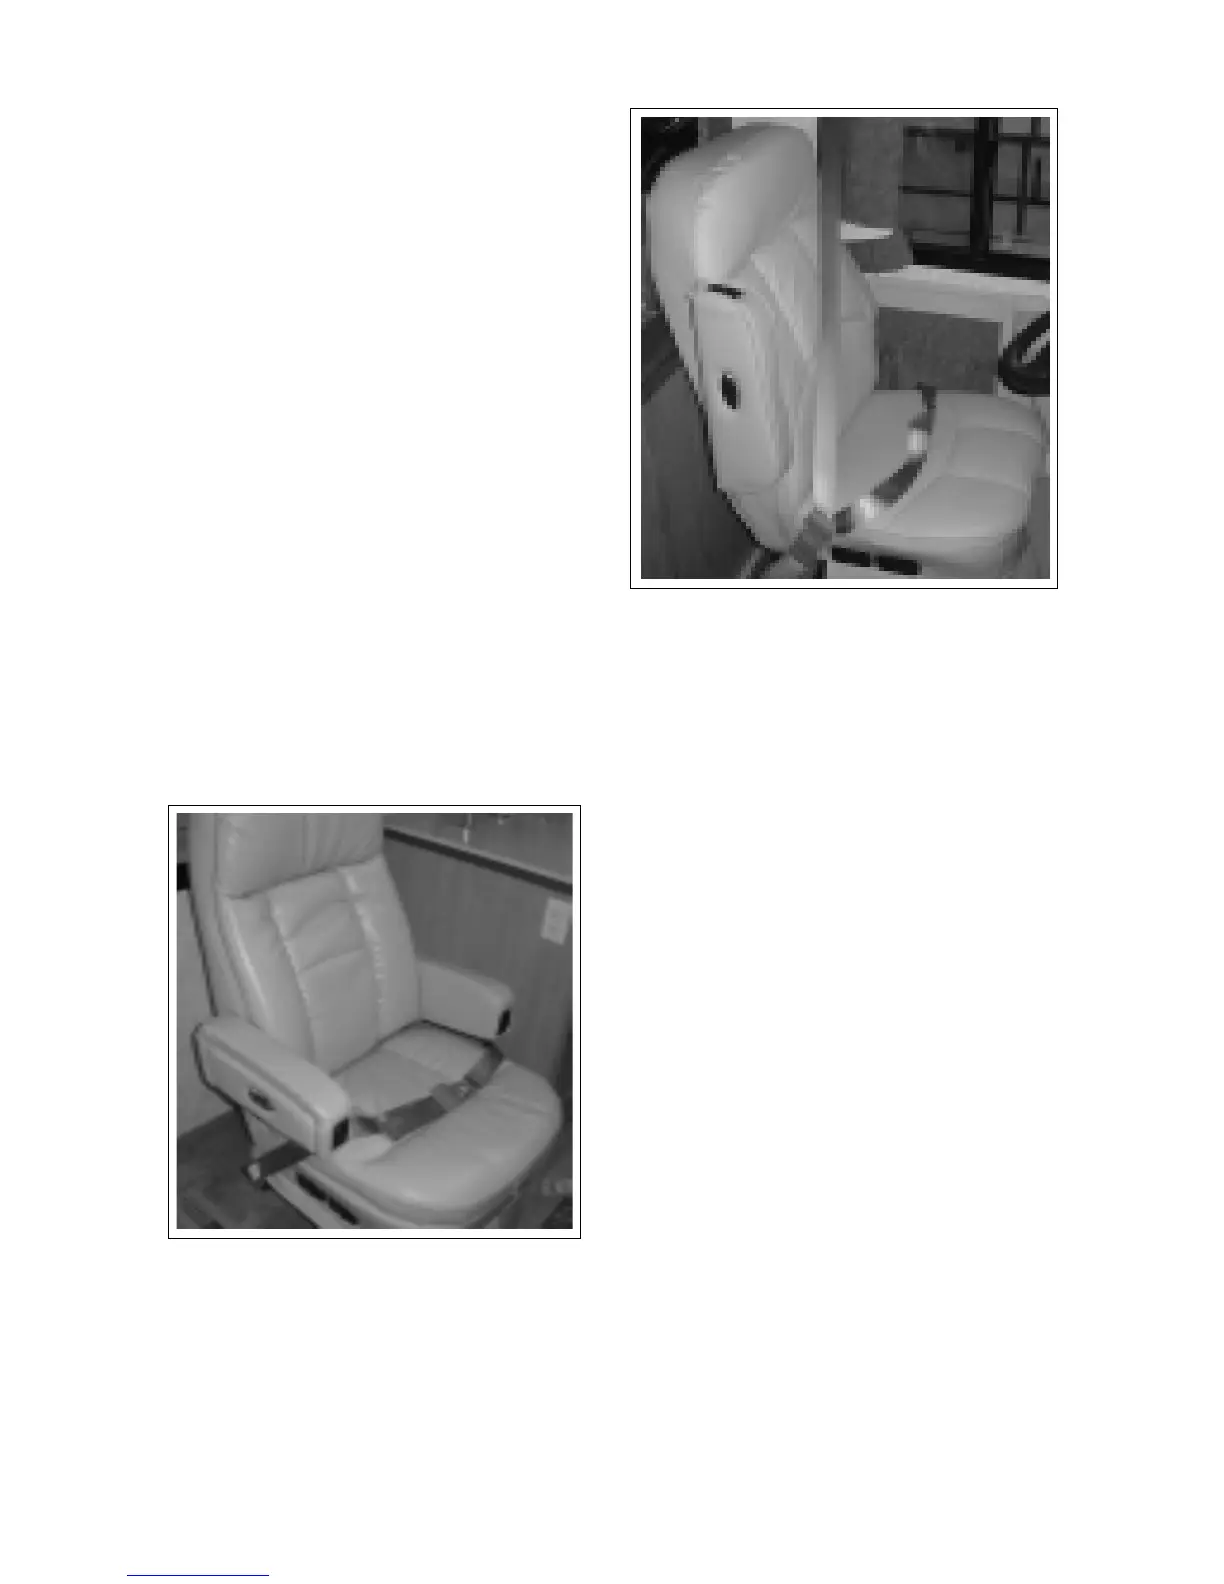
Lap/Shoulder Belts:
The driver and co-pilot seats are equipped with a
combination lap and shoulder belt for maximum
restraint next to the front of the unit.
a. Sit in the seat and rotate the seat until it is fac-
ing forward and lthe latch locks in place.
b Pull the spade end of seat belt across the
body and insert it into the buckle. Be sure
the buckle “clicks” to indicate that the spade is
locked securely in place.
c. Be sure the belt is not twisted to minimize
load concentrations during impact. A at belt
distributes impact loads over a wider area of
the body to reduce the chance of injury.
d. Slide the lap portion of the safety belt system
low on the torso to distribute the load across
the hip/pelvis area.
e. Slide the shoulder strap so it lays diagonally
across the chest and shoulder area. Do not lay
it against the neck.
f. Depress the button on the buckle to re-
lease the belt assembly. Hold the belt as it
is released to prevent it from retracting too
quickly.
IMPORTANT
All seat belt retractors are equipped with locks that
engage when the belt moves too fast. Move the spade
end slowly and steadily when fastening to prevent
locking. If belt locks while fastening, release end and
let it retract fully. Then pull again to fasten.
1
2
Fig. 4-9 LAP/SHOULDER BELT
4-5
COMMANDER / EMBASSY
Fig. 4-8 COCKTAIL CHAIR
4.5 COCKTAIL SEAT
A cocktail chair is located behind the co-pilots seat and
is part of the living room furniture.
1. Swivel Lock:
This latch releases the swivel base. Pull on the
latch to release the lock and allow the chair to
swivel. When the seat returns to this position, the
lock will again engage. Be sure the swivel base is
locked and seat belt fastened if this seat is occu-
pied when travelling.
2. Forward-Back Position:
This Spring-loaded latch releases the lock on the
sliding base to allow the seat to be moved forward
or backward and is located under the seat. Pull on
the latch to release the lock and slide the seat to its
desired position. Release the latch to lock the seat
in posiiton.Several seats are equipped with lap or
lap/shoulder belts and are the only seats approved
for occupancy when travelling. Every occupant
must be seated in one of the approved seats with
the belt fastened whenever the motorhome is
moving. Accident statistics prove the importance
of the need to use seat belts. Vehicle occupants
not seated in an approved seat and restrained with
a seat belt received more injuries of a more serious
nature than those properly restrained.
4.6 SEAT/SHOULDER BELTS
Several seats are equipped with lap or lap/shoulder
belts and are the only seats approved for occupancy
when travelling. Every occupant must be seated in one
of the approved seats with the belt fastened when-
ever the motorhome is moving. Accident statistics
prove the importance of the need to use seat belts.
Vehicle occupants not seated in an approved seat and
restrained with a seat belt received more injuries of a
more serious nature than those properly restrained.
Lap/Shoulder Belts:
The driver and co-pilot seats are equipped with a
combination lap and shoulder belt for maximum
restraint next to the front of the unit.
a. Sit in the seat and rotate the seat until it is fac-
ing forward and lthe latch locks in place.
b Pull the spade end of seat belt across the
body and insert it into the buckle. Be sure
the buckle “clicks” to indicate that the spade is
locked securely in place.
c. Be sure the belt is not twisted to minimize
load concentrations during impact. A at belt
distributes impact loads over a wider area of
the body to reduce the chance of injury.
d. Slide the lap portion of the safety belt system
low on the torso to distribute the load across
the hip/pelvis area.
e. Slide the shoulder strap so it lays diagonally
across the chest and shoulder area. Do not lay
it against the neck.
f. Depress the button on the buckle to re-
lease the belt assembly. Hold the belt as it
is released to prevent it from retracting too
quickly.
IMPORTANT
All seat belt retractors are equipped with locks that
engage when the belt moves too fast. Move the spade
end slowly and steadily when fastening to prevent
locking. If belt locks while fastening, release end and
let it retract fully. Then pull again to fasten.
1
2
Fig. 4-9 LAP/SHOULDER BELT