40
OPERATING CONTROLS AND FUNCTIONS
METERS, INDICATORS AND LAMPS (cont’d)
CLOCK AND HOUR mETER DISPLAY (cont’d)
Setting/Correcting the Minutes
When the minutes are selected (the numbers are highlighted and
ashing), press the mode selection
button or button to set the
minutes. the minutes can be set from 00-59.
After setting is completed, press the
button. “COMPLETE” appears
and ashes 3 times, and then the screen returns to the basic screen.
NOTE:
Each time the
or button is pressed, the seconds display is
corrected to 00.
The clock and hour meters are accumulated and stored in the EPS
controller. If the EPS controller is replaced, the clock will have to be set.
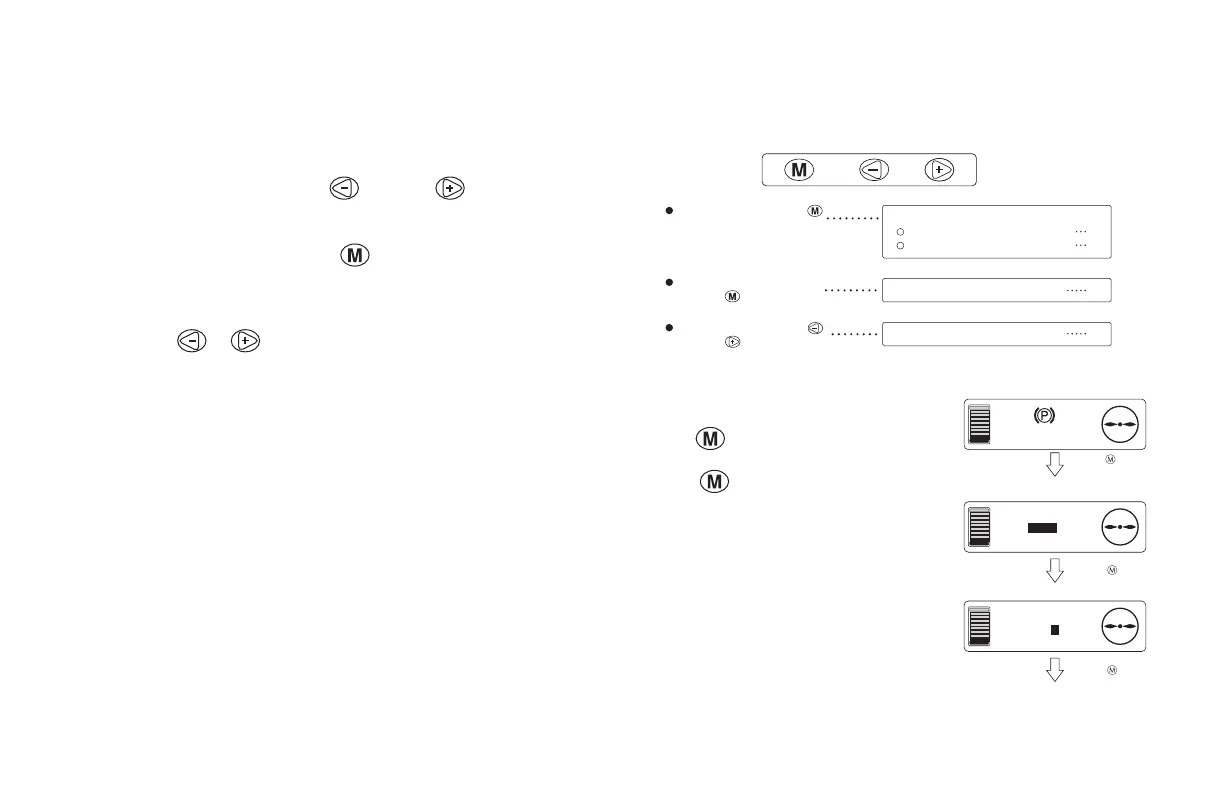
mODE SELECTION bUTTONS
The mode selection buttons are used for checking the value shown on
the hour meter, changing the display or setting the clock.
Setting screens
From the basic screen, press the mode
selection
button to display the various
setting screens.
Press the
button again to return to
the basic screen.
If a travel or hydraulic operation occurs
while a settings screen is displayed, the
screen immediately returns to the basic
screen.
Press and hold the mode
selection button for 3
seconds or longer.
Press the mode selection
button or button.
Press the mode selection
button. (Release it within 3
seconds.)
Settings screens
Selecting the clock and hour meter display
7
Adjusting the display brightness . 8
Clock setting screen 9
Hour meter check screen 10
F
E
AM 10:00
F
E
METER
TIME/HR/
PDL/LIFT
Basic screen
Clock and hour meter
display selection screen
F
E
BRIGHT
0
Display brightness adjustment screen
The screen retur
Press the button.
(Release it within
3 seconds.)
Press the button.
Press the button.