44
5. Do not lift the load at this time.
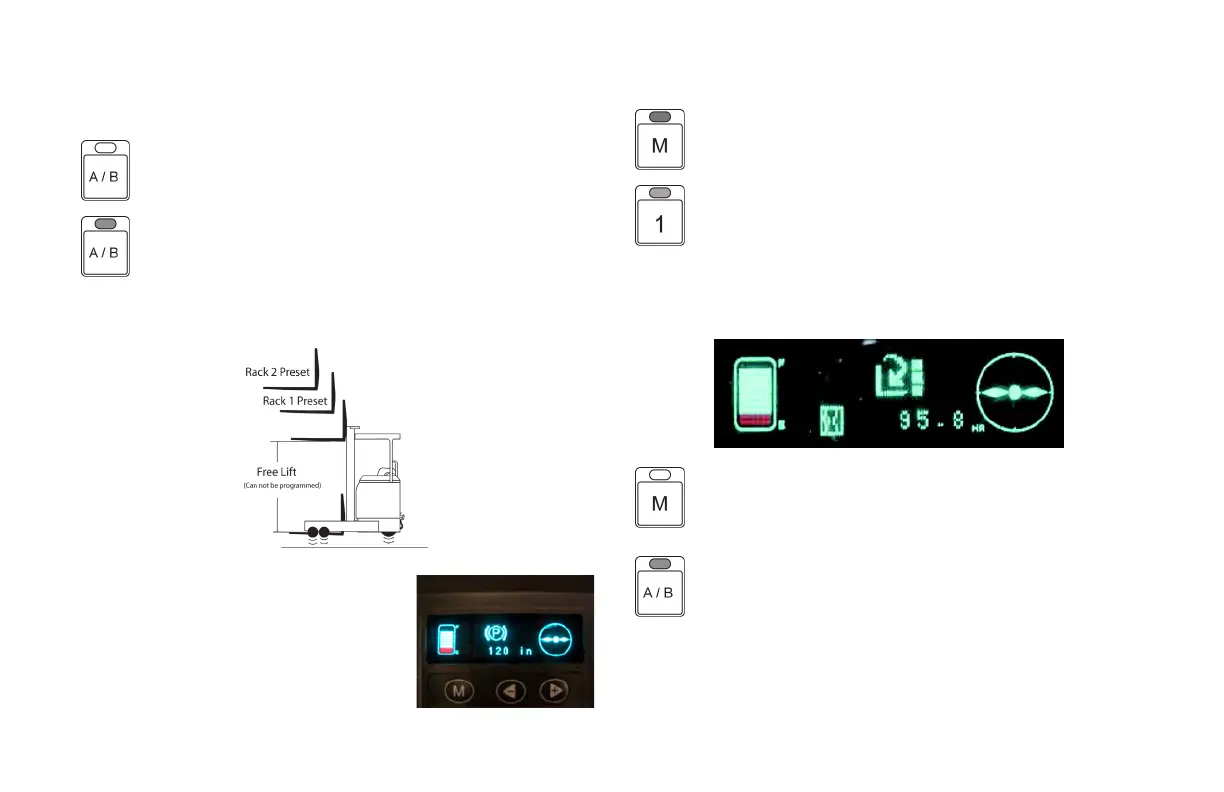
6. Press and hold PB M down until the LED on the
switch lights up.
7. Press PB 1, the LED for PB 1 is now on.
NOTE:
If the mast is below free lift, the following warning will be displayed on
the meter panel display.
8. Press and release PB M, the LED for PB M is
now off and the LED for PB 1 is on, indicating the
preset no load fork height for rack A, position 1 is
set.
NOTE:
To set fork heights for another rack conguration press
PB A/B and perform steps 1 thru 8.
OPERATING CONTROLS AND FUNCTIONS
METERS, INDICATORS AND LAMPS (cont’d)
AFHS PROGRAMMING
NOTE:
If the LED for the A/B switch is off, you are setting the
fork height presets for the A rack.
If the LED for the A/B switch is on you will be setting
the fork height stop setting for the rack presets.
1. Take the truck to rack type that will be used with the Automatic
Fork Height Select feature.
2. Use the multifunction handle and raise
the forks to the rst racking level above
the free lift height of the mast.
3. The fork height indicator on the meter
panel display will now display the height
of the forks inches.
4. Place the forks under the load.