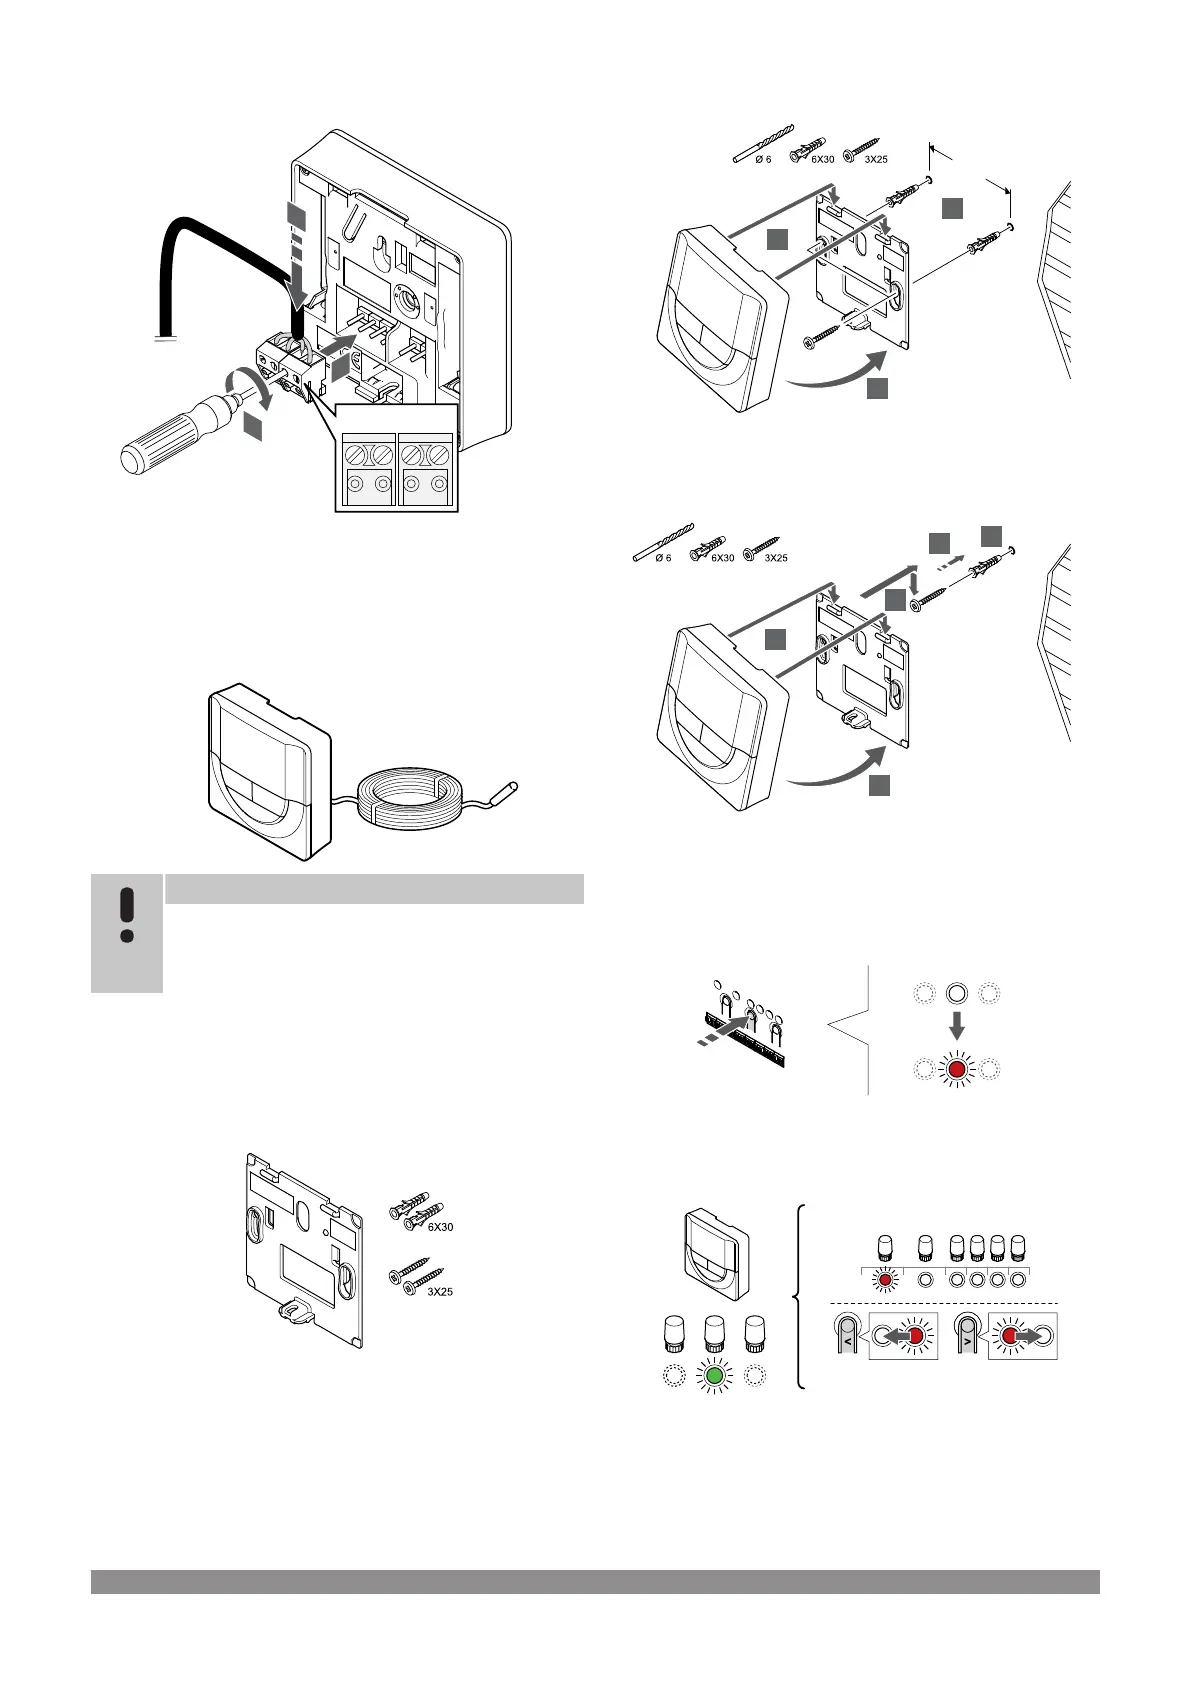
Connect communication cable to thermostat
1. Insert the four wires into the removable connectors marked (A,B,
+ and -) on the thermostat.
2. Tighten the screws fixing the wires in the connector.
3. Insert the connectors on the input pegs on the thermostat.
Select thermostat control mode
Note
If no button on the thermostat is pressed for about
8 seconds, while in a submenu, the current values will be
saved and the software exits to the settings menu. About
about 60 seconds later, it exits to run mode.
If an external sensor is connected to the thermostat, a control mode
must be selected to accommodate the extra functionality of the
sensor.
See 04 Control mode, Page 79, for how to change the setting.
Attach thermostat to the wall
The thermostat is delivered in a kit with screws, wall plugs, and a wall
bracket, presenting several options of attaching the thermostat to the
wall.
Wall bracket (recommended)
Attach the thermostat to the wall using the wall bracket, screws and
wall plugs.
Screw and wall plug
Attach the thermostat to the wall using the screw and wall plug.
Register thermostat to room controller
1. Enter registration mode
Press and hold the OK button on the room controller until the LED for
channel 1 (or the first unregistered channel) flashes red.
2. Select a channel
Use buttons < or > to move the pointer (LED flashes red) to a
preferred channel.
Uponor Smatrix Base PULSE
|
Installation and operation manual
|
45