NOTE!
If you do power-down to the last device, there is no bus termination.
6.4 INSTALLATION OF OPTION BOARDS
CAUTION!
Do not install, remove, or replace option boards on the drive when the power is on.
Doing this can cause damage to the boards.
Install the option boards into the option board slots of the drive. Refer to Table 32.
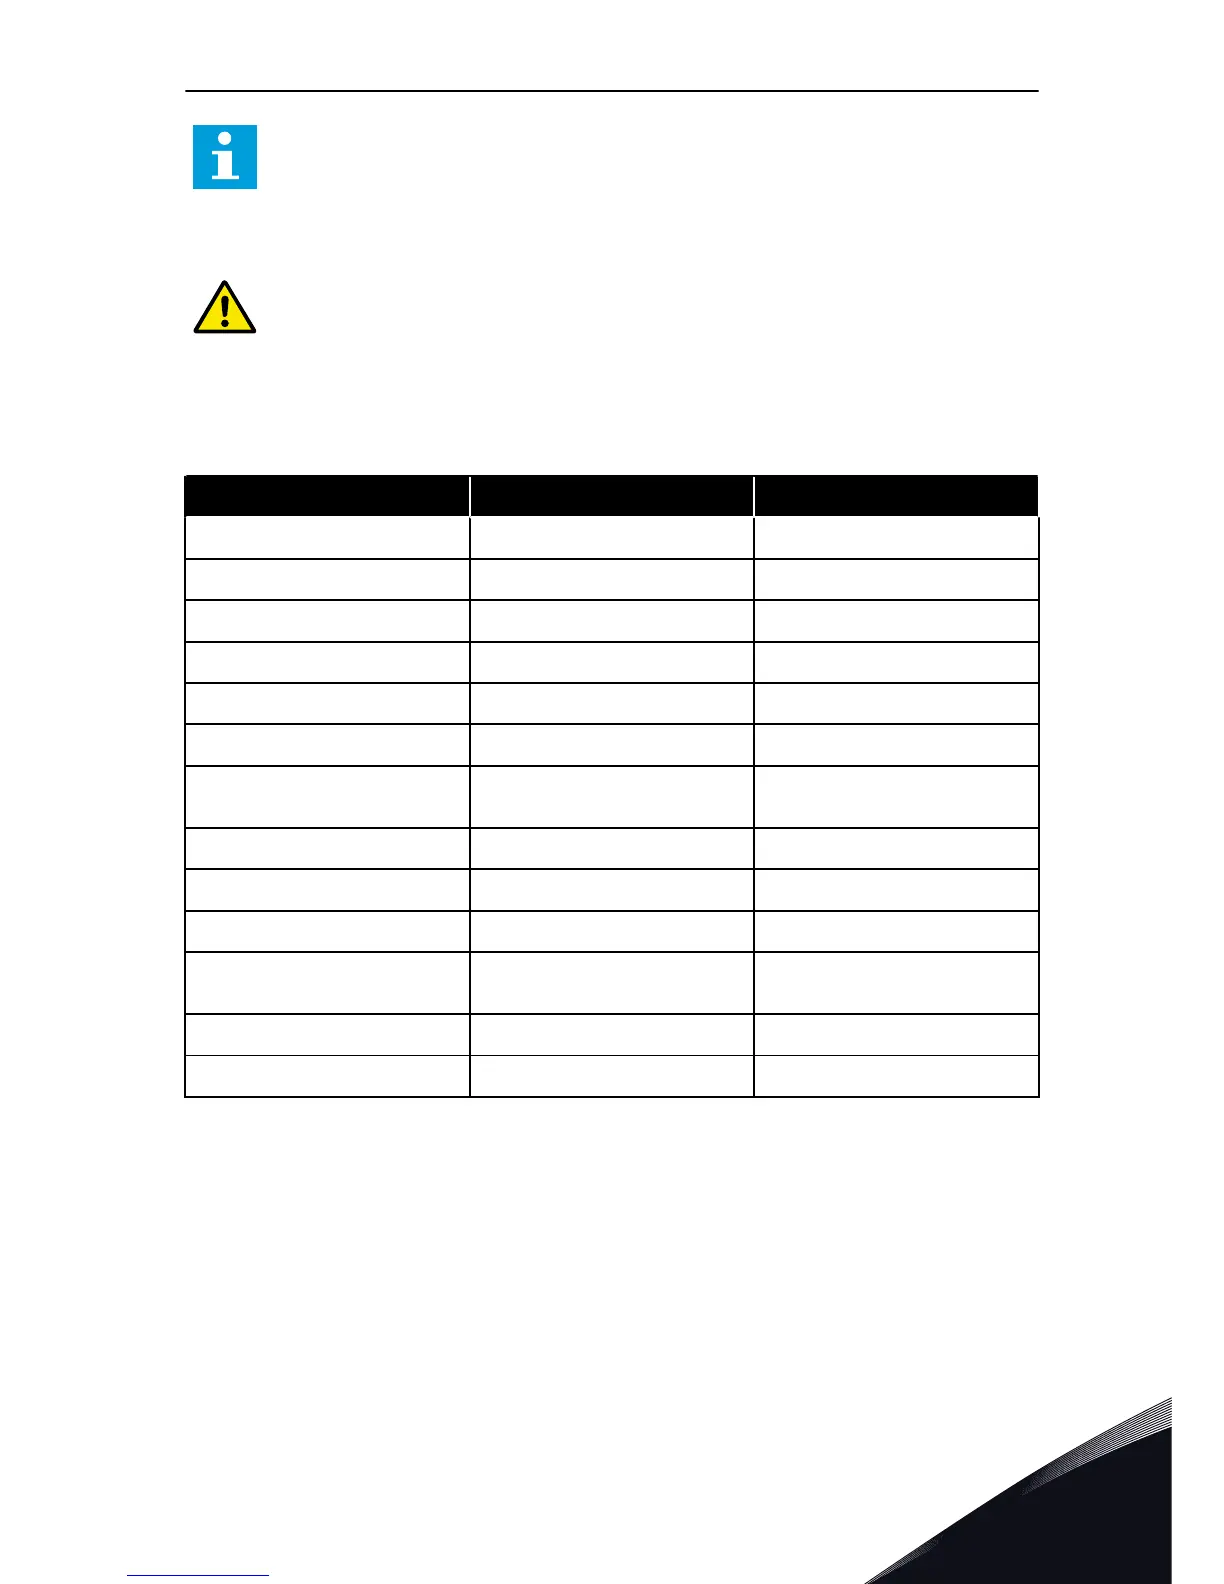
Table 32: The option boards and their correct option board slots
Type of the option board Description of the option board The correct slot or slots
OPTB1 The I/O expander board C, D, E
OPTB2 The Thermistor relay board C, D, E
OPTB4 The I/O expander board C, D, E
OPTB5 The Relay board C, D, E
OPTB9 The I/O expander board C, D, E
OPTBF The I/O expander board C, D, E
OPTBH The Temperature measurement
board
C, D, E
OPTBJ The Safe Torque Off board E
OPTC4 The LonWorks fieldbus board D, E
OPTE3 The Profibus DPV1 fieldbus board D, E
OPTE5 The Profibus DPV1 fieldbus board
(with a type D connector)
D, E
OPTE6 The CanOpen fieldbus board D, E
OPTE7 The DeviceNet fieldbus board D, E
CONTROL UNIT VACON · 103
24-HOUR SUPPORT +358 (0)201 212 575 · EMAIL: VACON@VACON.COM
6

 Loading...