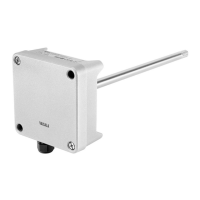
3.5.2 Drilling Instructions for Duct Installation Kit
Figure 8 Drilling Instructions
1 Mounting screw
2 Tension screw
3 HMP110 assembled in duct installation kit plastic pipe
To drill the holes for the duct installation kit:
1. Use a 24-mm drill bit to drill a hole to the duct wall for the humidity probe.
2. Drill holes for the duct installation kit mounting screws around the hole in a square
arrangement, 42 mm apart from each other. Use a 3.2-mm drill bit to drill the holes for the
mounting screws (four ST4.2×16-C-Z DIN 7981 screws).
3.6
Probe Mounting Clamp
The optional mounting clamp makes it easy to install the probe on the wall of the
measurement environment. The probe can be detached for calibration simply by loosening the
lower screw. You can order a single clamp (Vaisala order code 225501) or a set of 10 clamps
(226067).
Installing the entire probe in the measurement environment prevents heat conduction to the
sensor, and is the recommended installation method.
Chapter 3 – Installation
19

 Loading...