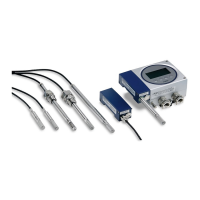
5. Press the ADJ button on the transmitter's motherboard to open the adjustment mode.
Both LEDs on the motherboard remain in OFF state and the text "Starting adjustment
mode for HMP110" is shown on the MI70 display.
In transmitters with the optional display, the text MI70 adjustment mode is
shown on the upper row of the display.
From this point onward, the transmitter's local adjustment buttons are
disabled and adjustment is carried out using the MI70 indicator. The
transmitter display and analog outputs will always follow the actual
measured RH/T value when in MI70 adjustment mode. When operating the
MI70, do not press the buttons too quickly or the calibration may fail. Wait for
one second between each press.
6. Press OK to start the adjustment.
7. Check the environment settings if needed. Otherwise, press NO. Select RH adjustment or
T adjustment.
8. Continue according to the instructions for one of the following adjustment methods:
• Field Checking and Adjustment Using a Calibrated Reference Probe (page 57)
• 1-Point Adjustment Using a Calibrator (page 58)
• 2-Point Adjustment Using a Calibrator (page 58)
• LiCl-NaCl Adjustment (page 59)
• Temperature Field Check and Adjustment Using a Calibrated Reference Probe
(page 60)
6.3.1 Field Checking and Adjustment Using a Calibrated
Reference Probe
Complete the steps listed in Adjusting RH and T with MI70 Hand-Held Indicator
(page 56) before continuing with this adjustment option.
1. Check that the probes are located in equal conditions and wait until the readings have
stabilized (can take 30 minutes or more). If you are close to the probes, do not breathe in
their direction.
2. Press ADJUST to continue adjusting.
3. Choose To same as RHI/II from the MI70 adjustment menu and press SELECT. MI70
automatically recognizes which port the HMP70 series probe is connected to.
4. Press YES to
confirm the adjustment.
5. Turn o the MI70 and detach the connection cable.
Chapter 6 – Calibration and Adjustment
57

 Loading...