705
Model Code Page
42. Gearbox
6000--8750 423 1
1. 8. 1998
8. 11. 1990
Reconditioning gearbox (Op. no. 423)
1. Removing gearbox
Note! The gearbox is easiest to remove if it is possible to
remove the cabin (removing and fitting cabin, see Op. 811
1A). In the instructi on below the cabin, however is in place. In
addition, on E---models the sensor wires must be disconnec-
ted.
A. Splitting tractor between ge arbox and
fuel tank (cab attached to front frame)
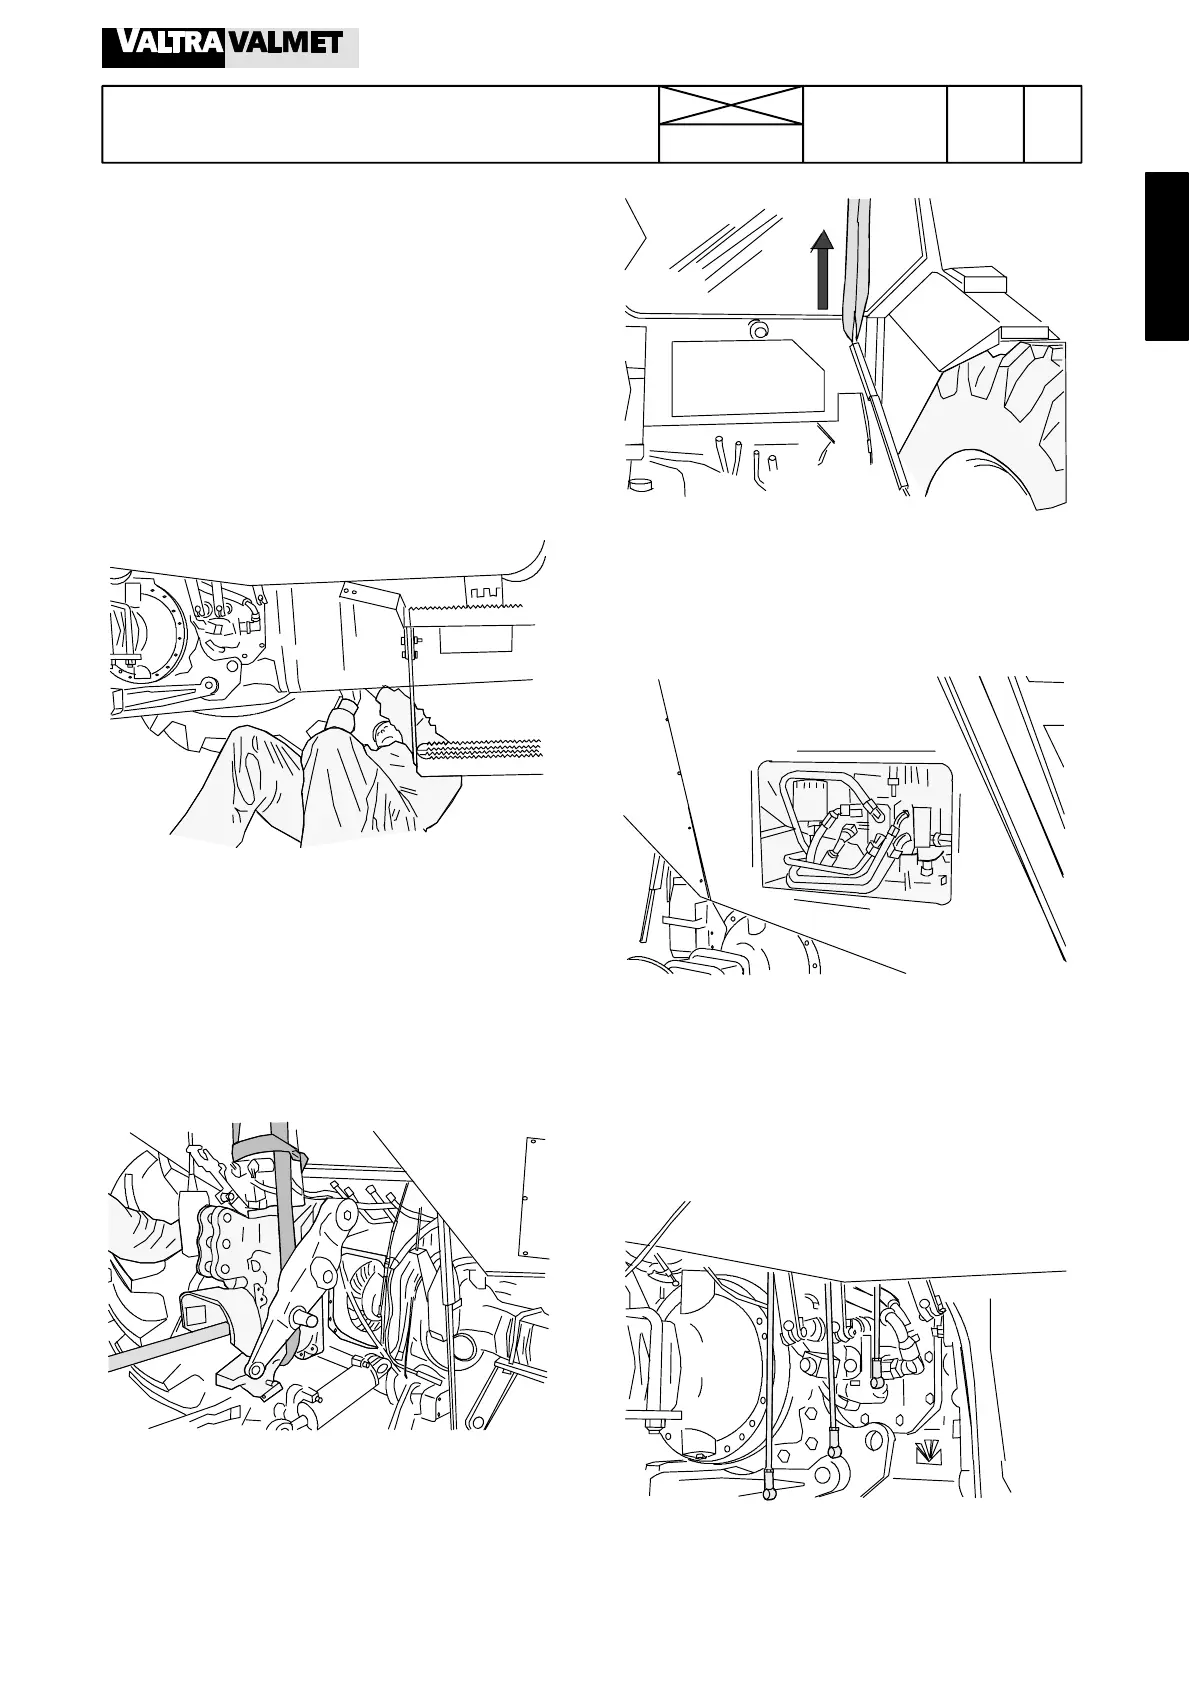
1. Remove all engine hood plates.
2. Remove the propeller shaft guard and disconnect the pro-
peller shaft rear end flange joint (on tractors with Delta
Powershift, there is not a flange joint at the rear end of the pro-
peller shaft).
3. Drain the oil in the transmission.
4. Release the lower end of the P TO control cable, lower end
of the pick---up hitch release contro l and the joint at the lower
end of the lewelling screw control rod (these att at the rear of
the tractor).
5. Remove the power take---off unit (see Op. 462 1A).
6. Unscrew the cab rear fastening bolts and raise the cab rear
part about 6 cm.
6cm
Note! Lifting rope can be fastened to the levelling screw cont-
rol rod support according to the figure above.
7. Remove the RH side rear wheel and open the hatch on the
RH side rear mudguard.
8. Disconnect the oil pipes from the rear and front sides of the
valve blocks for the auxiliary hydraulics.
9. Unscrew the fixing bolts for the valve block bracket on the
gearbox and lift the valve blocks upwards.
Note! Thevalveblockscanbefastenedtothecabwithwire.
If necessary, extra valve blocks must be detached for easier
opening of the bracket bolts.
10. Disconnect the shifter rods from the lower ends of the gear
levers. Disconnect the cable from the shifter levers and from
the gear lever lower ends. Remove the gearbox housing brea-
ther filter by disconnecting its pipe through the mudguard
opening.