787
Model Code Page
44. Delta Powershift
15. 5. 1996
6000--8750 444 1
15. 4. 1995
3 --- s t e p q u i c k --- s h i f t g e a r, t r a n s m i s -
sions 300 and 460
(Op. no. 444)
1. Reconditioning Delta Powershift
A. Reconditioning planetary gear and its
multi---disc clutch
Dismantling:
1. Split the tractor between gearbox---fuel tank (see Op. 441
1A)
2. Disconnect the oil pipes from the gear housing.
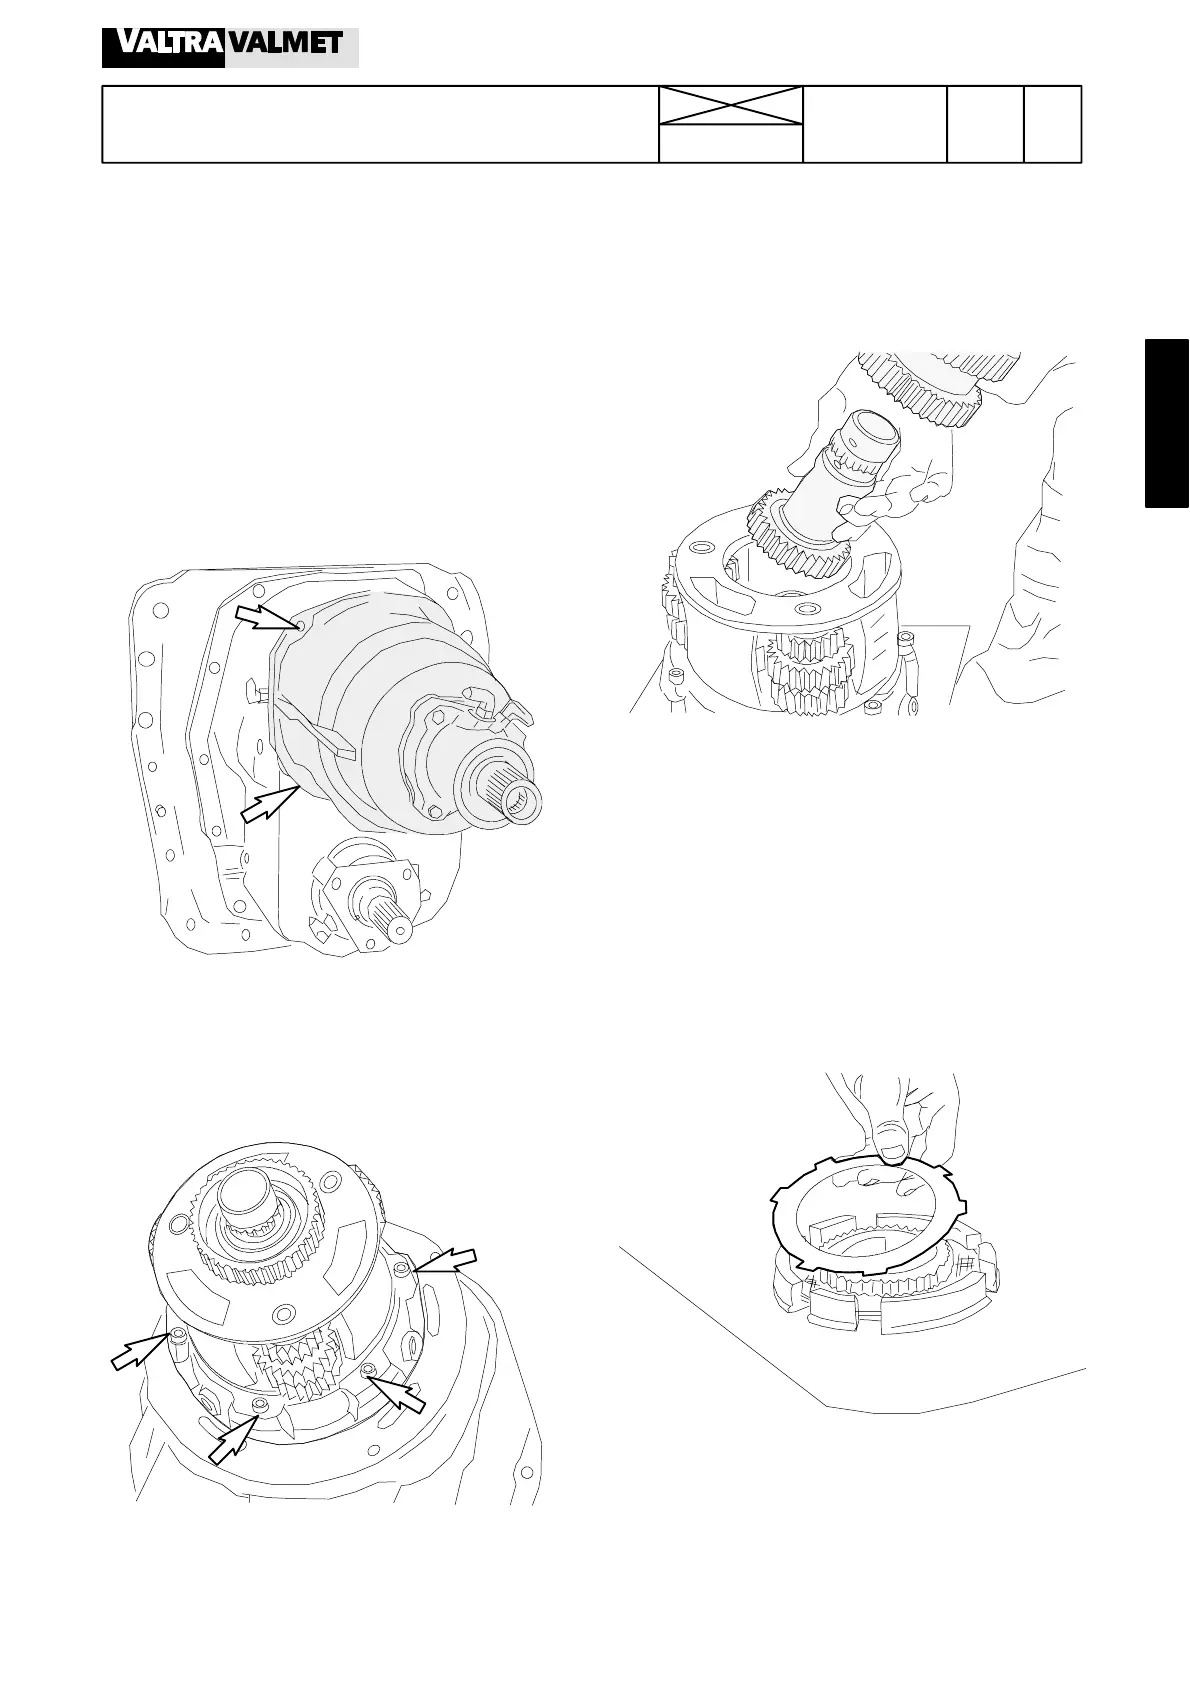
3. Unscrew four attaching bolts of the housing (see arrows)
and carefully pull off the housing.
Note! The planetary gear and its multi---disc clutch remain on
the front face of the reverse shuttle. Also the foremost and
middle sun gear may remain inside the planet gears.
4. Unscrew the planetary carrier fixing bolts (see arrows) and
remove the planetary gear. At the same time it is releasing the
multi---disc clutch cup springs (2 pcs)
Note! If one of the planet gears prevents unscrewing of the
carrier bolts, the planetary gear cannot be rotated but in this
case, connect a hydraulic hand pump to the pipe connector
on the reverse shuttle housing and pump up pressure into the
clutch until the planetary gear c an be rotated.
5. Remove the foremostand middle sun gears from the plane-
tary gear, if they remained inside the planet gears.
6. Remove the planetary carrier rearmost ball bearing using
two pinch bars. Remove the pressure plate on the clutch disc
pack. Remove the discs and the hub.
Note! 8200---8400: From serial no 668103 incl, there are six
springs between the ring piston and the pressure plate.
Remove the springs as well, when you remove the pressure
plate.
7. Remove the foremost ball bearing circlip. Pull out the plane-
tary gear attaching flange together with the bearing.
8. If the clutch discs are worn so much that the grooves on the
friction discs have disappeared, change the complete disc
pack at the same time.