862
Model Code Page
46. Front PTO
1. 4. 1997
8450--8750 463 14
3. Front PTO 8450-- 8750,
repair instructions
A. Maintenanc e
See page 463/9.
B. Fault tracing
See page 463/10.
C. Adjusting engaging time
See page 463/10.
D. Removing front PTO unit
--- Release the clutch pressure hose on the unit front face
--- Release the oil cooler hoses (oil draining) and remove
the oil cooler
--- Unscrew the elastic joint bolts, which are fitted radially
--- Remove the top link bracket of the front lift
--- unscrew the front unit fixing bolts (4 pcs)
Note! It is possible to remove separately the PTO housing
front half while the unit is attached to the tractor, at which
time the PTO shaft, gear wheels and bearings are access-
ible. There is a paper gasket with thickness of 0,4 mm
between the housing halves.
E. Changing V---belts / elastic joint
V --- b e l t s :
--- Remove the top link bracket of the front lift.
--- Remove the oil cooler and its return hose
--- Unscrew the elastic joint bolts, which are fitted radially
--- Unscrew the PTO unit two lo wer fixing bolts and fit in
place screws with length of 100mm (M14)
--- Unscrew the two upper fixing bolts
--- Pull the unit forwards along the lower bolts
--- Pull the drive shaft front end out of its spline joint
--- Pass the V---belts onto the shaft through the hole on the
cowl
Note! Refitting is done in the reverse order. In order to
make the r efitting easier, push the drive shaft front end
into the rear end splined joint before fitting the unit
Note! In addition the viscous fan must be detached on
thecoolantpumpsideandpossibleaircompressor
V---belt should be slackened.
Elastic joint:
Before changing work, the front PTO unit must be removed.
When refitting the rubber coupling, tighten the 4 radial and
4 axial bolts to a torque of 140 Nm. Apply a little grease
onto the bolt head lower surfaces. (also see picture 16 on
page 463/4).
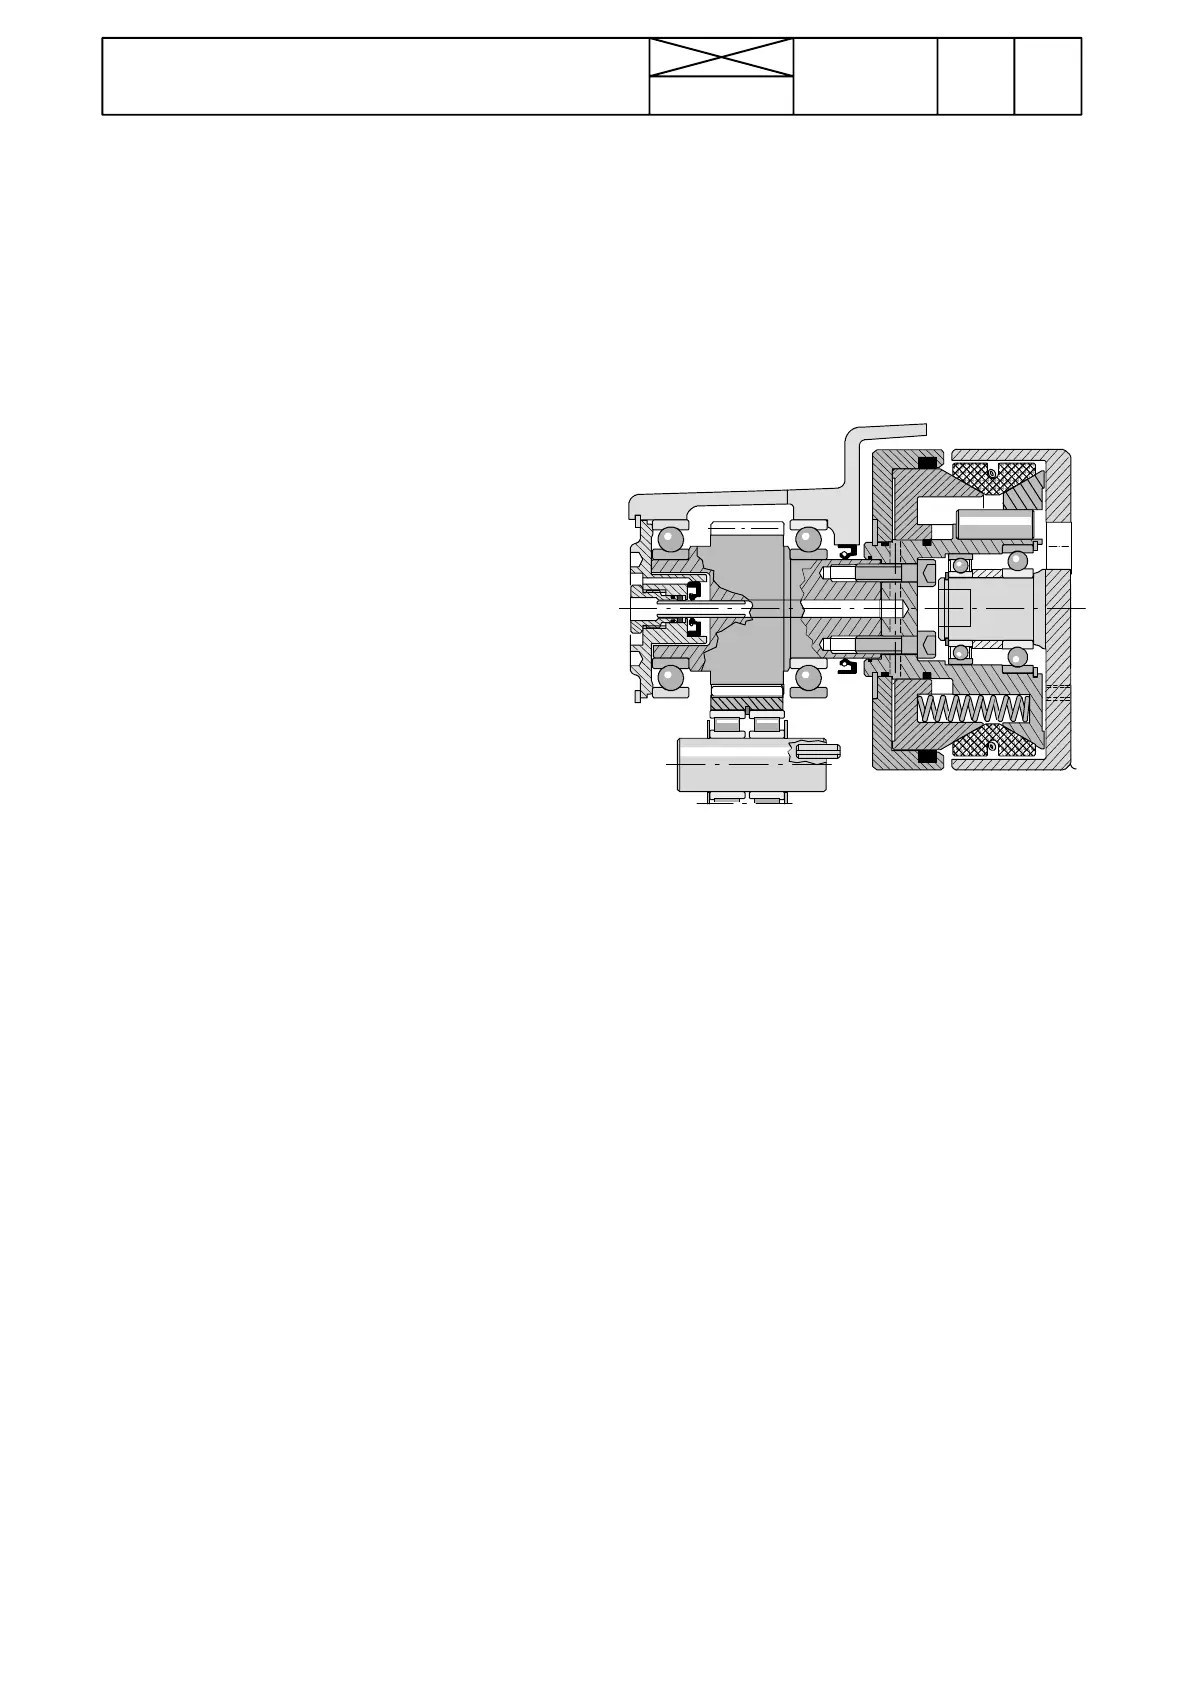
F. Cone clutc h
Before the cone clutch can be dismantled the PTO unit
must be removed.
The cone clutch is dismantled as follows:
--- r e m ov e t h e el a st i c j o in t
--- release the clutch bearing circlip through the holes in the
clutch drum end
--- pull out the drum with aid of puller screws (M10) after
which the friction pieces are accessible. The bearings
loosen when the clutch drum is pulled out.
--- If the clutch piston seals or the upper shaft oil seal have
to be changed, unscrew the clutch hub six bolts, after
which the seals can be changed.
G. Others
The PTO shaft oil seal as well as the upper shaft flange
seals can be changed without removing the front PTO or
thePTOshaft.Thepumpdrivesleeveinthefrontendof
the PTO s haft has a press---fit. In addition, locking fluid
has been used.