220
Model Code Page
45. Final drives
6000--8950
451 4
1. 8. 2000
1. 9. 2002
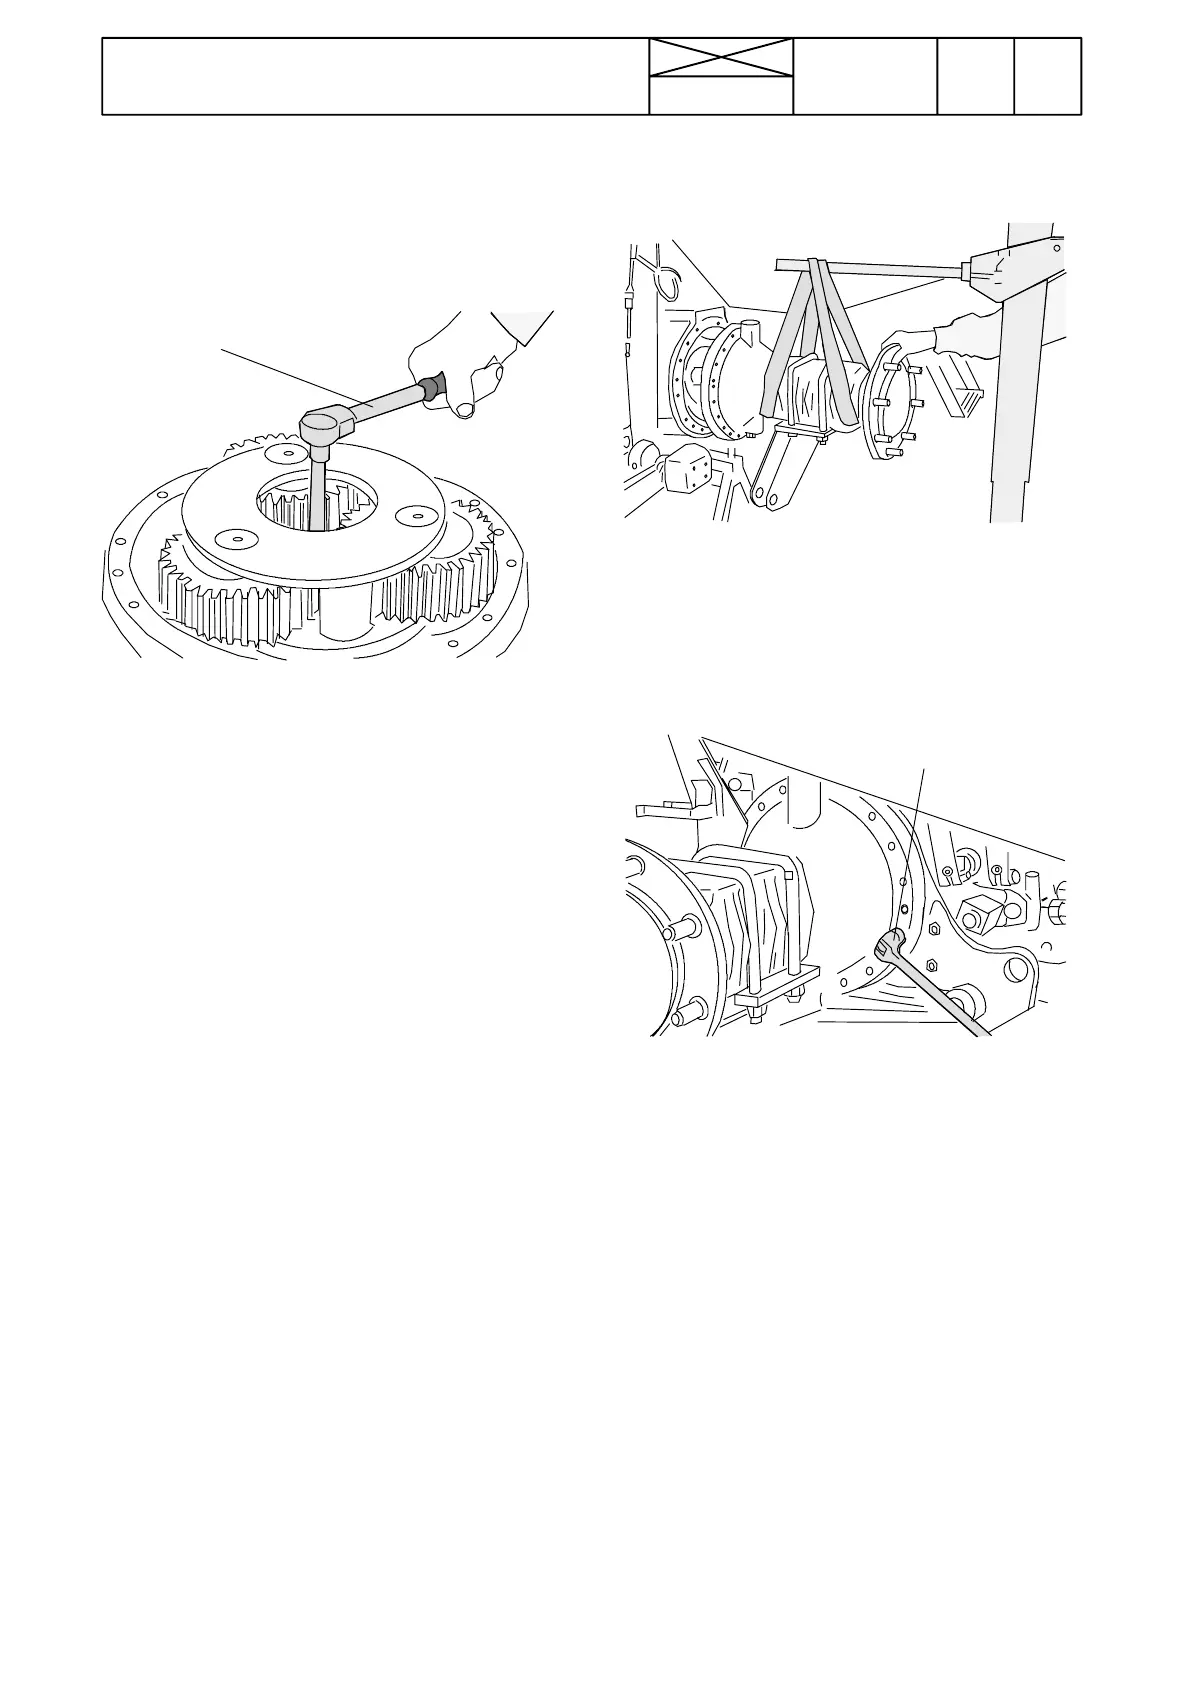
D. Adjusting outer drive shaft bearing
clearance
1.Placethedriveshaftwiththewheelflangeonthefloor.Bed
in the bearings by rotating the axle housing 20---30 turn.
10 ---20 Nm
2. Tighten the centre screw to a torque of 3 --- 5 N m .Again
rotate the axle housing and check the torque.
Note! After some time of operation the correct bearing clear-
ance will be established.
3. Turn the lock washer for the centre screw so that the notch
on the washer locates in the recess in the planetary retainer.
Note! The lock washer can be fixed with a small amount of
grease before fitting the final drives.
E. Fitting final drive
Note! Push the inner drive shaft fully home into the brake
housing so that it is pushed through brake discs and its
splines engage the differential.
1. a) 300: Place a new o ---ring between the rear axle housing
and the brake housing. Fix the o---ring in pos itio n with a little
grease. Apply sealing compound Hylosil RTV silicone Grade
102 (UK 0067) to the contact surfaces.
b) 450/650: Apply sealing compound Hylosil RTV silicone
Grade 102 Black (UK 0067) to the ring gear sides and place
theringgearagainsttherearaxlehousing.
Note! Make sure that the bolt holes align.
2.Liftuptherearaxlehousingandmoveitinwardsatright
angles so that the inner drive shaft locatesbetween the planet-
ary gears.
80 Nm (8.8)
125 Nm (10.9)
3. Tighten the bolts to 80 Nm (final gears 300) or 125 Nm
(450/650).
4.Pressgreasethroughthenippletothedriveshaftouter
bearing.
5. Connect the check link t o its bracket on the rear axle hous-
ing. Fit the rear wheel and tighten the nuts to 550 Nm.Fillthe
transmission with oil.
6. Lower the cab rear end and tighten the attaching bolts to
200 Nm.
7. Connect the PTO control cable, pick---up hitch release con-
trol and the joint at the lower end of the lewelling screw contro l
rod. Fit the engine hoo d plates.
8. Test---drive the tractor and check for leaks.
Note! On E ---models, ensure that the speed sensor and its
wiring have been connected and check the function of the
AC---III/IV units.