833
Model Code Page
46. Power take ---off
1. 4. 1997
6000--8750 462 3
1. 1. 1995
C. Reconditioning PTO clutc h
2486
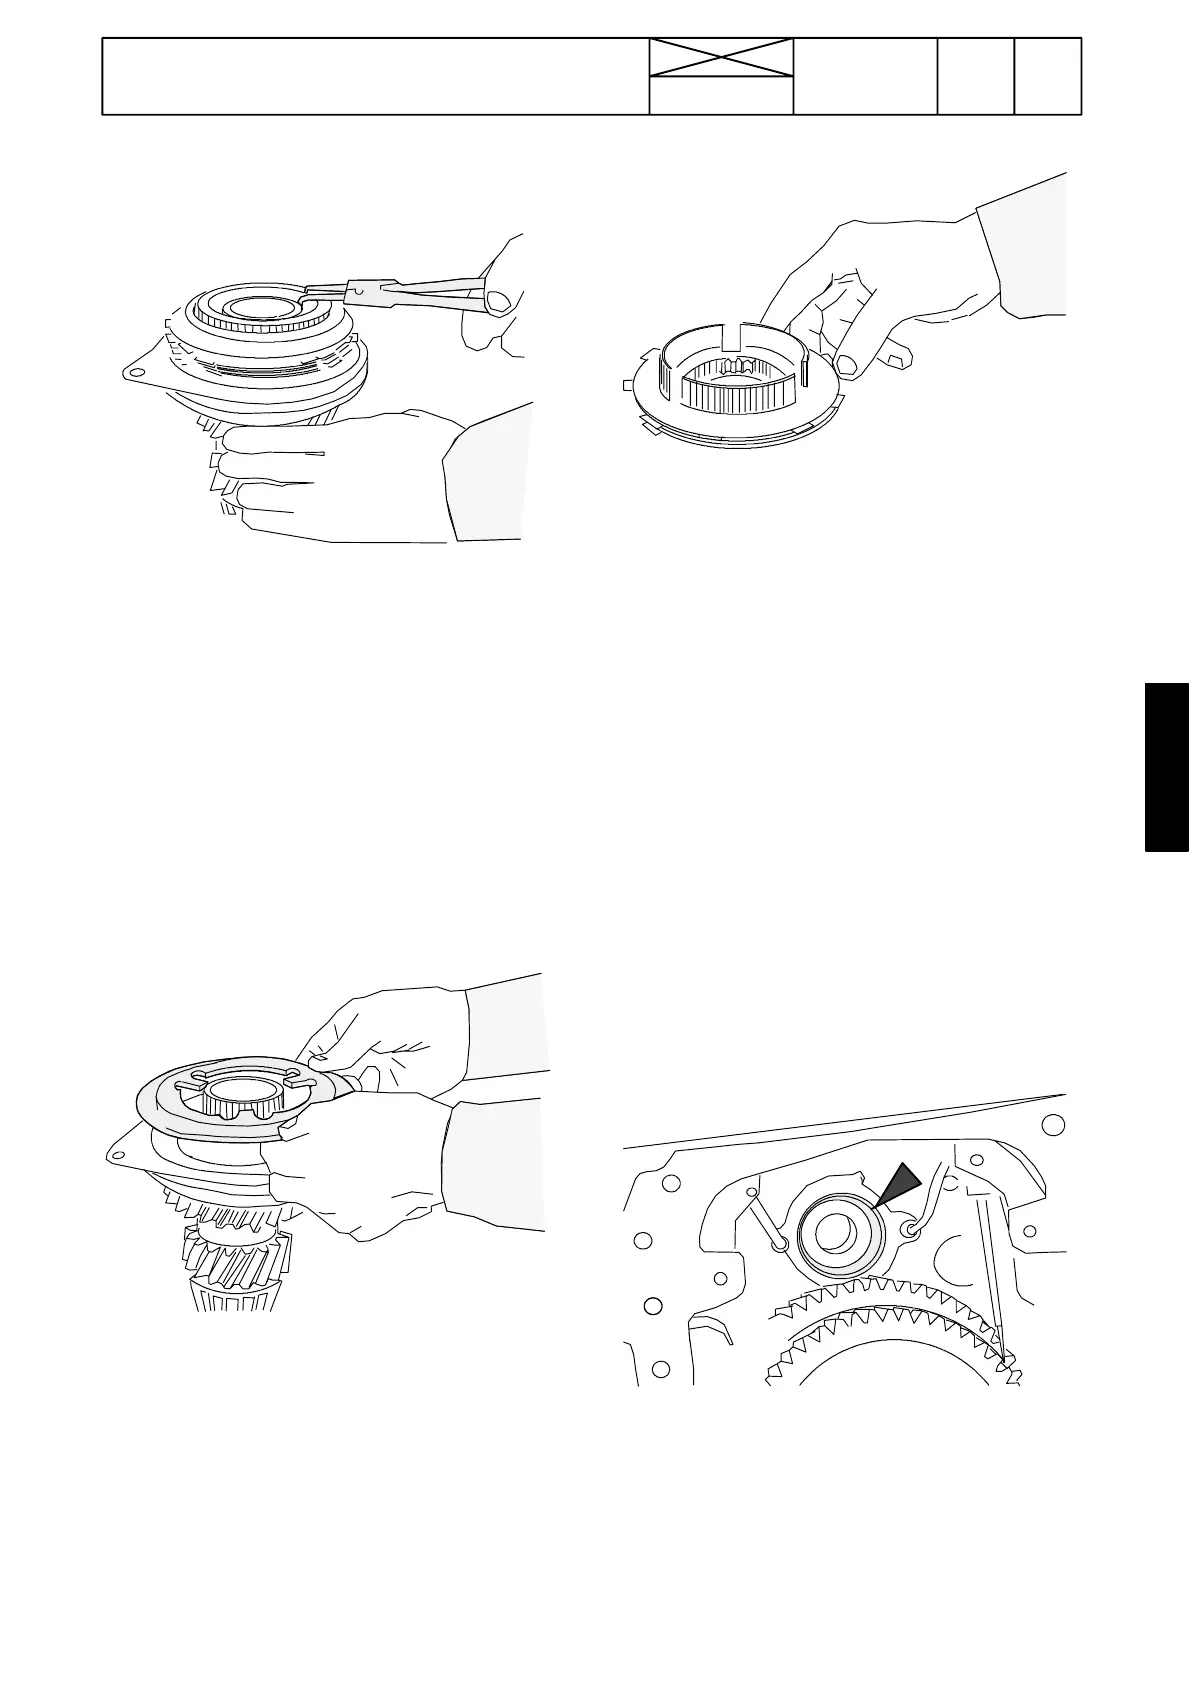
1. Remove the oil deflector plate from the PTO clutch hub and
remove the circlip under the plate and the clutch cup springs
release.
2. Remove the clutch discs. Check the condition of the friction
and steel discs and the PTO brake plate. Replace damaged
parts.
Note! The friction discs and steel discs must be renewed as
a complete set. The friction disc must be changed if the
grooves on it have disappeared.
3. Remove the piston, if necessary, with compressed air or
knock the shaft end against the table. Change the piston
seals. Push in the piston
2487
4. Assemble the clutch by fitting the brake plate on the piston.
Then place on the brake plate a plate which has internal lugs.
5. Place the cup springs (5 pcs) on the i nternal lugs. The first
spring concave side against the lugs and then other springs
in pairs the concave sides against each other.
Note! The cup spring convexity is 3 mm.
2488
6. Place the friction and steel discs by turns onto the hub (first
friction disc). Number of discs, see page 460/2.
Important! From ser. no. 660477 the disc linings were
changed from ceramic to organic type. At the same time
number of the discs were changed as follows: 6100---6400 6
pcs and 6600---8400 8 pcs. It is recommended that in repair
works organic discs are used. The organic linings are thicker
and if you fit these onto the earlier tractors, the hub 32267900
should be machined to 3,9 mm (see page 460/9) or a new hub
32267910 should be used. Number of the discs is the same
as earlier. On the latest 6000---8750 tractors, there are 8 fric-
tion discs and 7 steel discs in the PTO clutch.
7. Fit then the hub/disc pack onto the plate which has internal
lugs (and on the cup springs) so that the grooves on the hub
engages with the lugs on the plate.
8. Fit the circlip into the hub and force the circlipinto its groove
by striking with sleeve ET 894 090. Fit the oil deflector plate
onto the hub.
Note! Place the clutch shaft on a table and assure that the
clutch drum grooves are enough deep. The discs (steel disc)
mustnotbeagainstthegroovebottomswhentheshaftisin
the working position.
2489
9. Check the clutch shaft rear taper roller bearing and its race
in its location on the housing. Change the parts if necessary.
10. Check also condition of the piston ring type seals at the
rear end of the clutch shaft.
11. Check and change, if necessary, the taper roller bearings
at the front end of the shaft. Fit all bearings fully home.