837
Model Code Page
46. Power take ---off
1. 10. 1999
6000--8950 462 7
1. 6. 1999
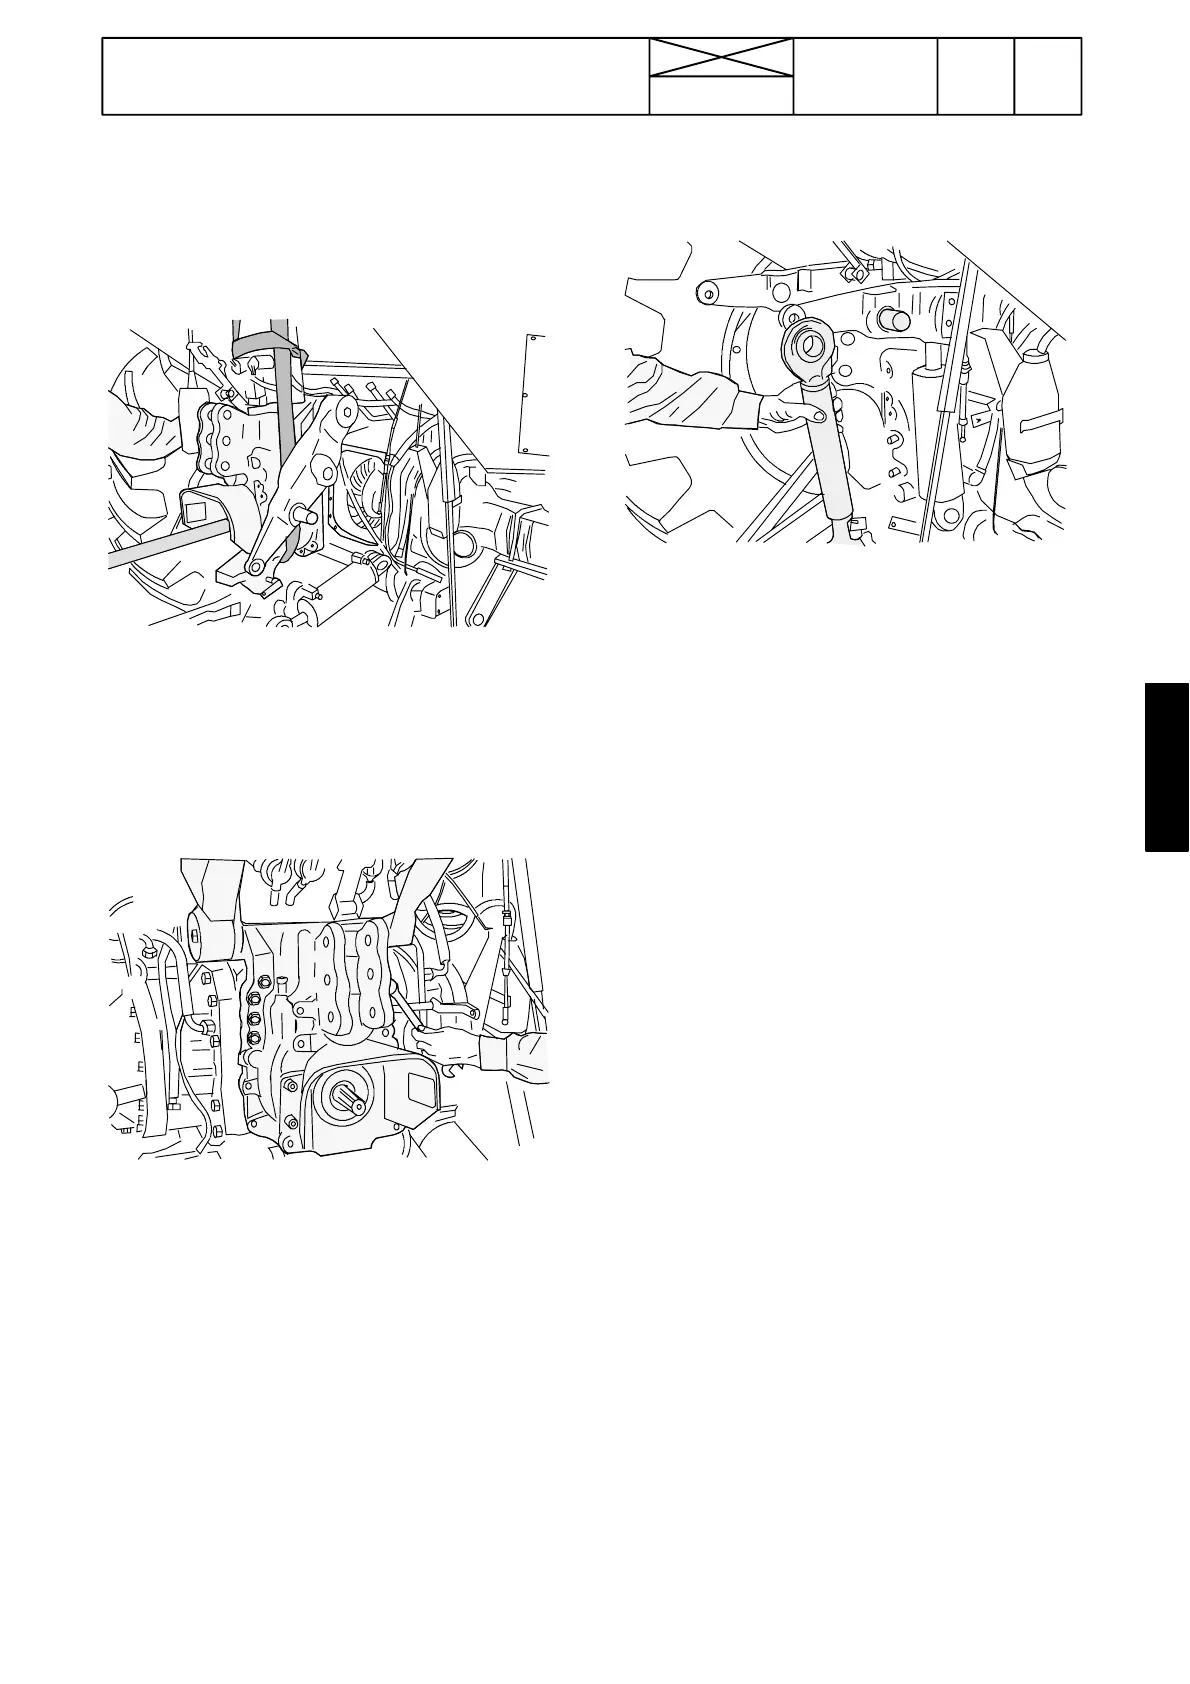
G. Fitting PTO unit
1. Clean contact surfaces between the PTO housing and the
gearbox and apply sealing compound to the surfaces.
2. Push the PTO unit straight into place so that the PTO clutch
shaft front end (and ground speed PTO shaft front end) en-
gages with their splines.
Note! Before fitting the PTO unit, put the ground speed PTO
shaft coupling sleeve o nto the rear end of the ground speed
PTO output shaft in the gearbox.
3. Tighten the PTO housing bolts to a correct tor que. Connect
the hoses to the lifting cylinders. Connect the lifting cylinder
upper ends with pins to the lifting arms.
4. Connect the draft sensor connectors. Fit the leak oil reser-
voir hoses and the reservoir cap.
5. Connect the pipes to the quick---action couplings. Slacken,
if necessary, the quick---action couplings in their bracket for
easier work.
6. Fit the PTO contr ol cable. Connect the pick---up hitch re-
lease control. Connect the lower joint of the levelling screw
control rod.
7. Connect the lifting link upper ends to the lifting arms. Fit the
top link. Connect the pick---up hitch lifting links.
8. Fill the transmission with oil.
9. Fit the position sensor and adjust it, see page 320/6 (AC
Power lift) or page 321/9 (ACB/ACD Power lifts).
Note! On E---models, connect the PTO speed sensor wires
and check that the AC---III/IV unit functions properly.
Note! On HiTech models, connect the wire of the speed sen-
sor B7. If the PTO speeds have been changed, AC V control
unit must be reprogrammed (parameter files), ---J38342,or
PTO parameters (ratios) must be set in the setting mode,
J38343---, see under code 370.