Page 166 of 244
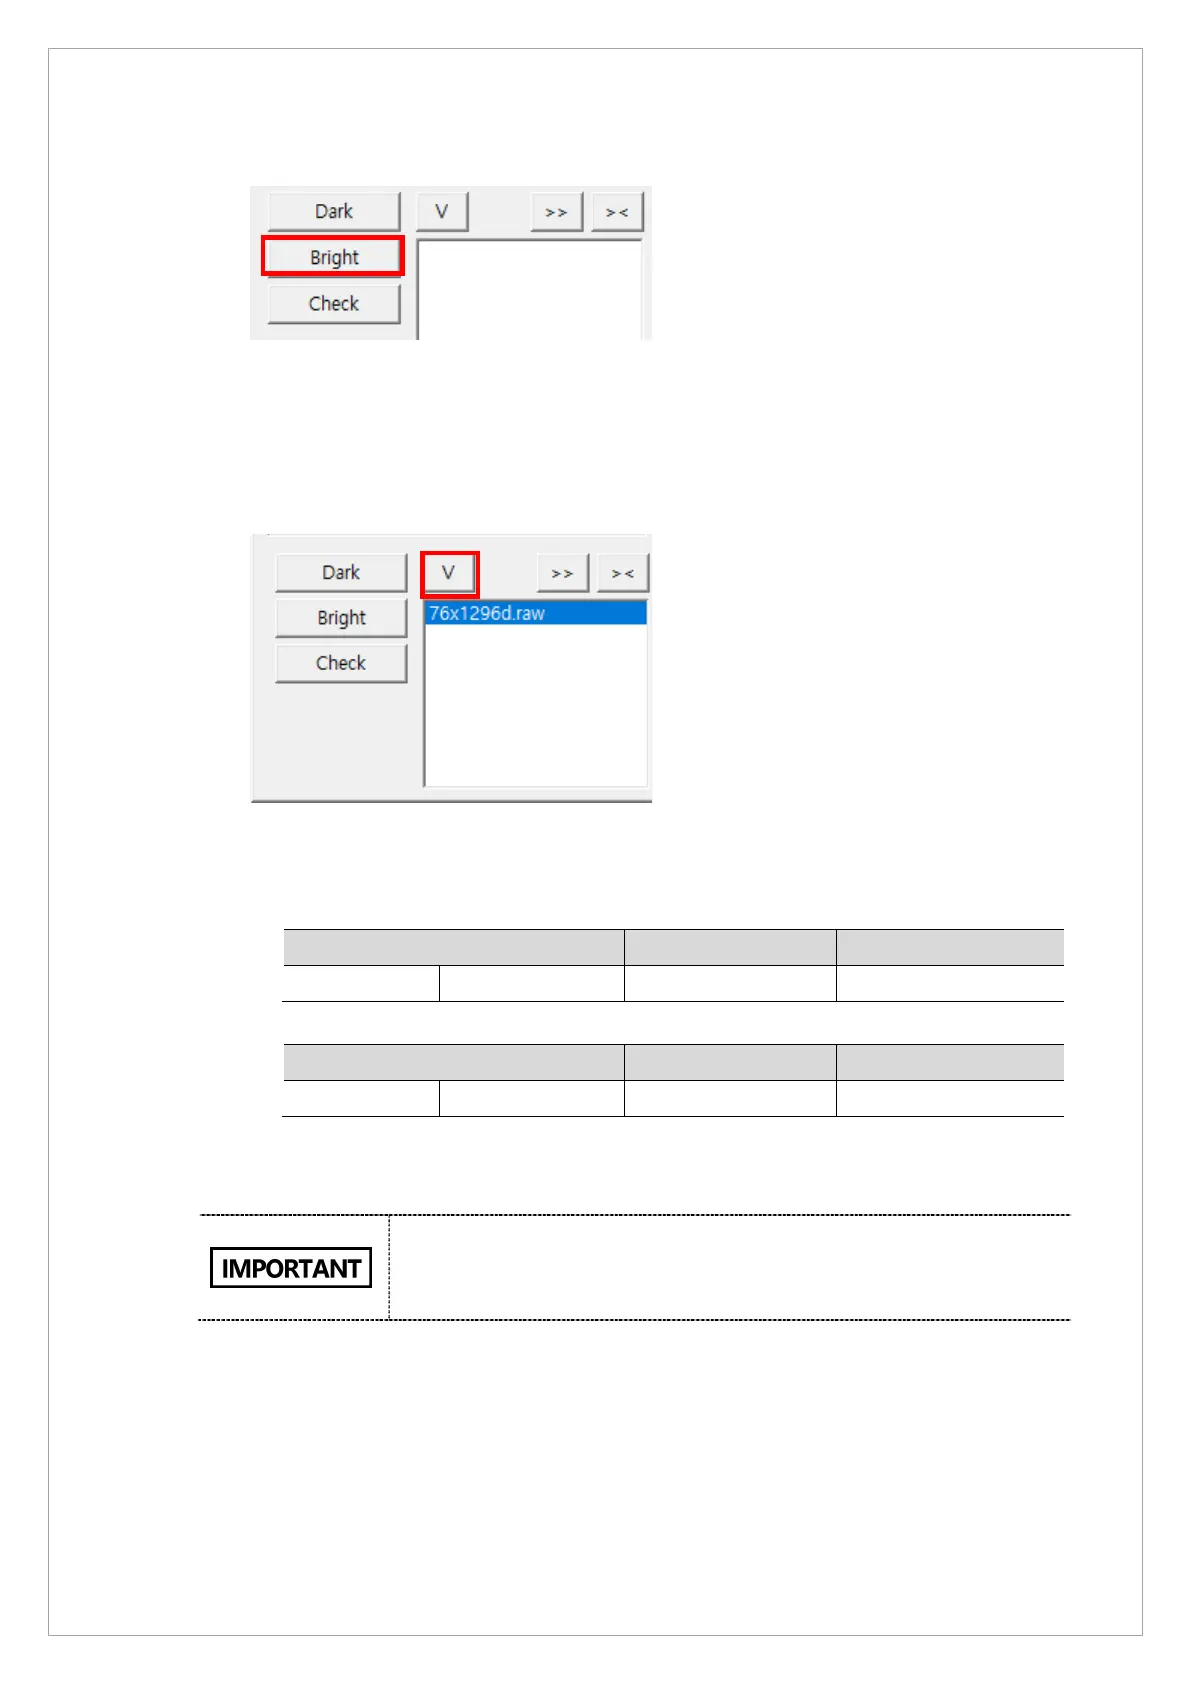
7. Click Bright.
8. When you see the message, “HOLD THE BUTTON FOR ~3 SEC” on the status window,
press the X-ray exposure switch.
9. Release the switch when the message, “RELEASE THE BUTTON” shows up in the
status window.
10. Click V to open View16.
11. Click the bright calibration data file in View 16; check if the median value of the data meets
the standards below.
※ Norm Mode Bright Standard Value: 1-Point Bright w/o filter
Bright Min Max
Median value Cal Point 5 1200 1400
※ Fast Mode Bright Standard Value: 1-Point Bright w/o filter
Bright Min Max
Median value Cal Point 5 600 800
If the median value does not satisfy the standards, adjust the kVp0 value and repeat the
calibration procedure. (Adjustment range: ±10)
The bright calibration data is saved in the folder below:
Norm: C:\VCaptureSW\Acquisition\CEPH\WideCEPHG\Norm\CAL
Fast:C:\VCaptureSW\Acquisition\CEPH\WideCEPHG\Fast\CAL
12. Create a new folder in the CAL folder and name it ‘OPEN’
13. Copy the captured data files to the OPEN folder.