EasyManuals Logo

Vertiv NetSure 7100 Series Installation Manual

Vertiv NetSure
7100 Series
222 pages
To Next Page IconTo Next Page
To Previous Page IconTo Previous Page
Page #34 background imageLoading...
Page #34 background image
Vertiv | NetSure 7100 Series -48V DC Power System Installation Manual (IM582127000) | Rev. BB
34
Installing a 582127000 List 93 Battery Tray (Relay Rack Installation Only)
Perform the following procedure to install a 582127000 List 93 Battery Tray into a relay rack.
DANGER! The relay rack must be securely anchored to the floor before a battery tray is installed.
Installing a Battery Tray
Procedure
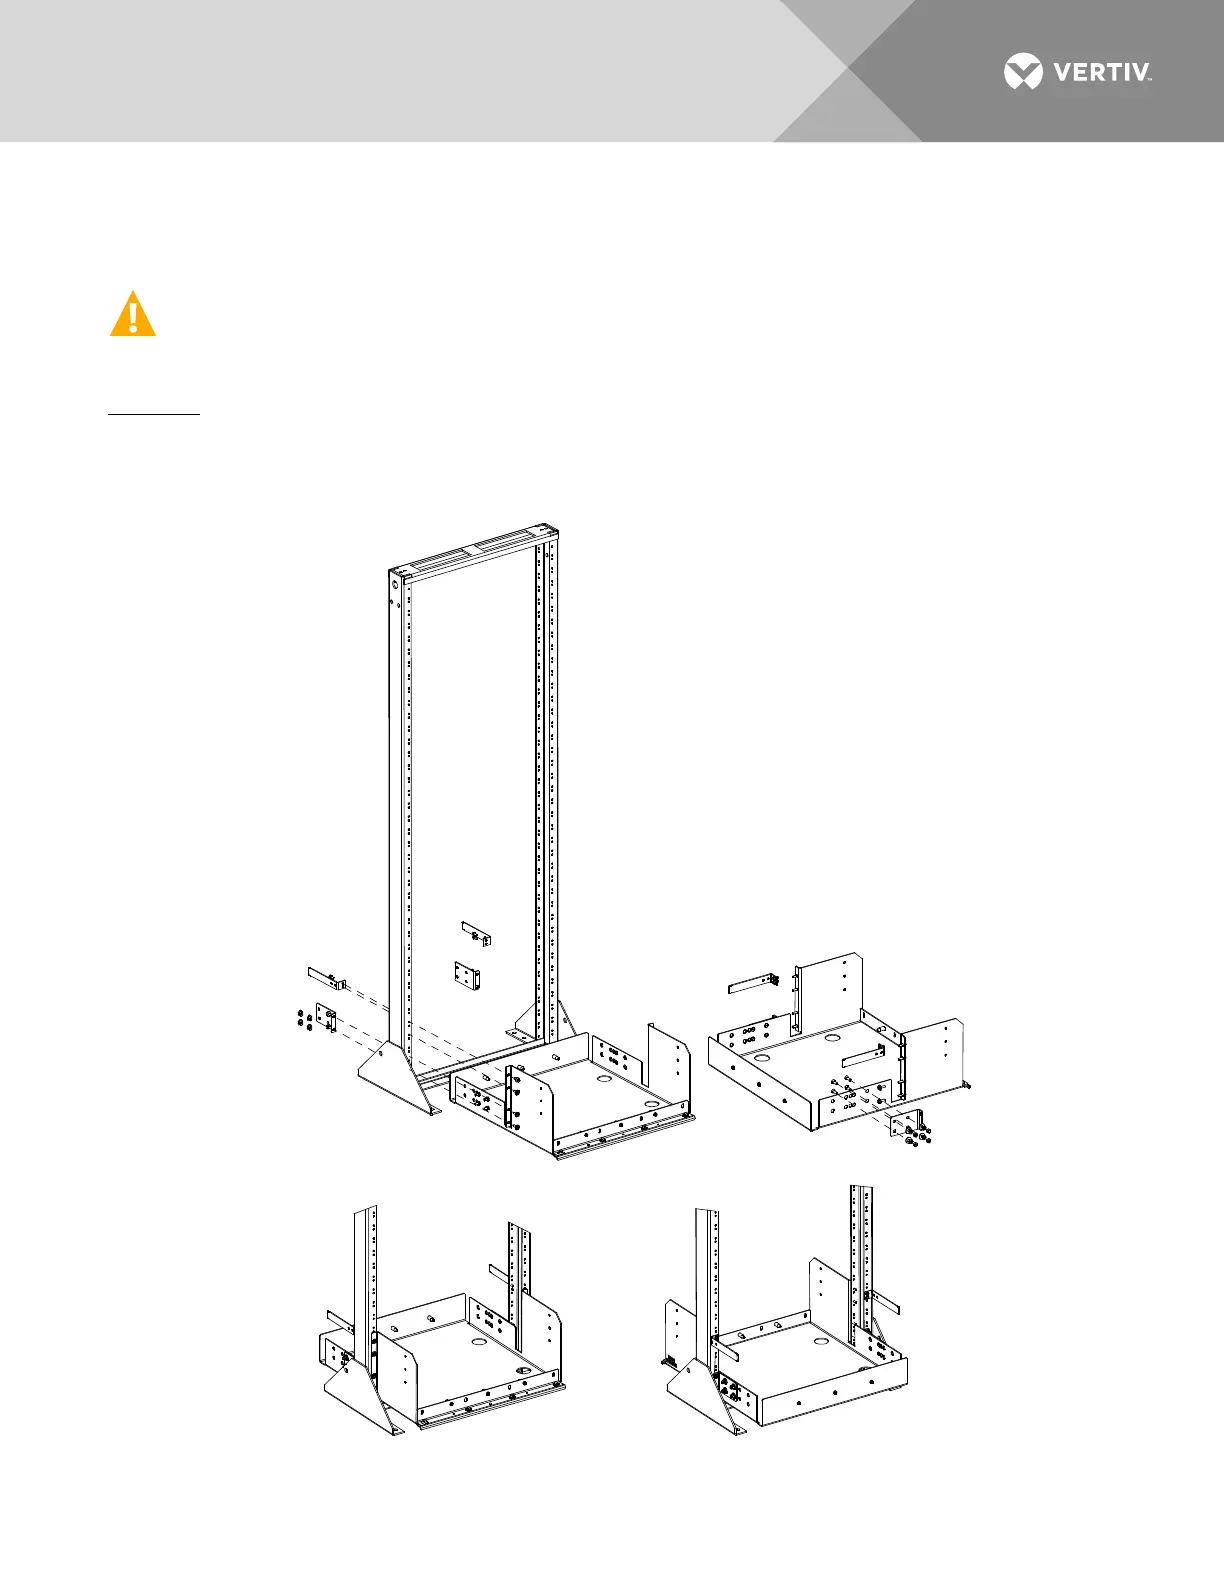
1. To install a 582127000 List 93 Battery Tray, perform the procedure in Figure 12.
Figure 12:
Installing a 582127000 List 93 Battery Tray
Battery Tray
Rear
Angle
Bracket
Rear Angle Bracket
Cabling
Bracket
Front Rear
1. Slide battery tray into relay rack and
secure to relay rack with 12-24 x 3/4"
thread forming hex head screws and
#10/12 ground washers (1 place per
side) or #12 flat washers (3 places per
side). (Torque to 70 in-lbs).
2. Secure rear angle brackets (both sides)
to battery tray with 1/4-20 x 3/4” bolts,
1/4” flat washers, 1/4” lock washers, and
1/4” nuts. (Torque to 84 in-lbs).
3. Secure rear angle brackets (both sides)
to relay rack with 12-24 x 3/4" thread
forming hex head screws and #10/12
ground washers (1 place per bracket)
or #12 flat washers (1 place per bracket).
(Torque to 70 in-lbs).
4. Secure cabling brackets (both sides) to
relay rack with 12-24 x 1/2" thread forming
hex head screws. (Torque to 70 in-lbs).

Table of Contents

Other manuals for Vertiv NetSure 7100 Series

Questions and Answers:

Question and Answer IconNeed help?

Do you have a question about the Vertiv NetSure 7100 Series and is the answer not in the manual?

Vertiv NetSure 7100 Series Specifications

General IconGeneral
BrandVertiv
ModelNetSure 7100 Series
CategoryPower Supply
LanguageEnglish

Related product manuals