Appendix VI—CE Racked Assembly LTN Assembly
wc_tx001217gb.fm 106
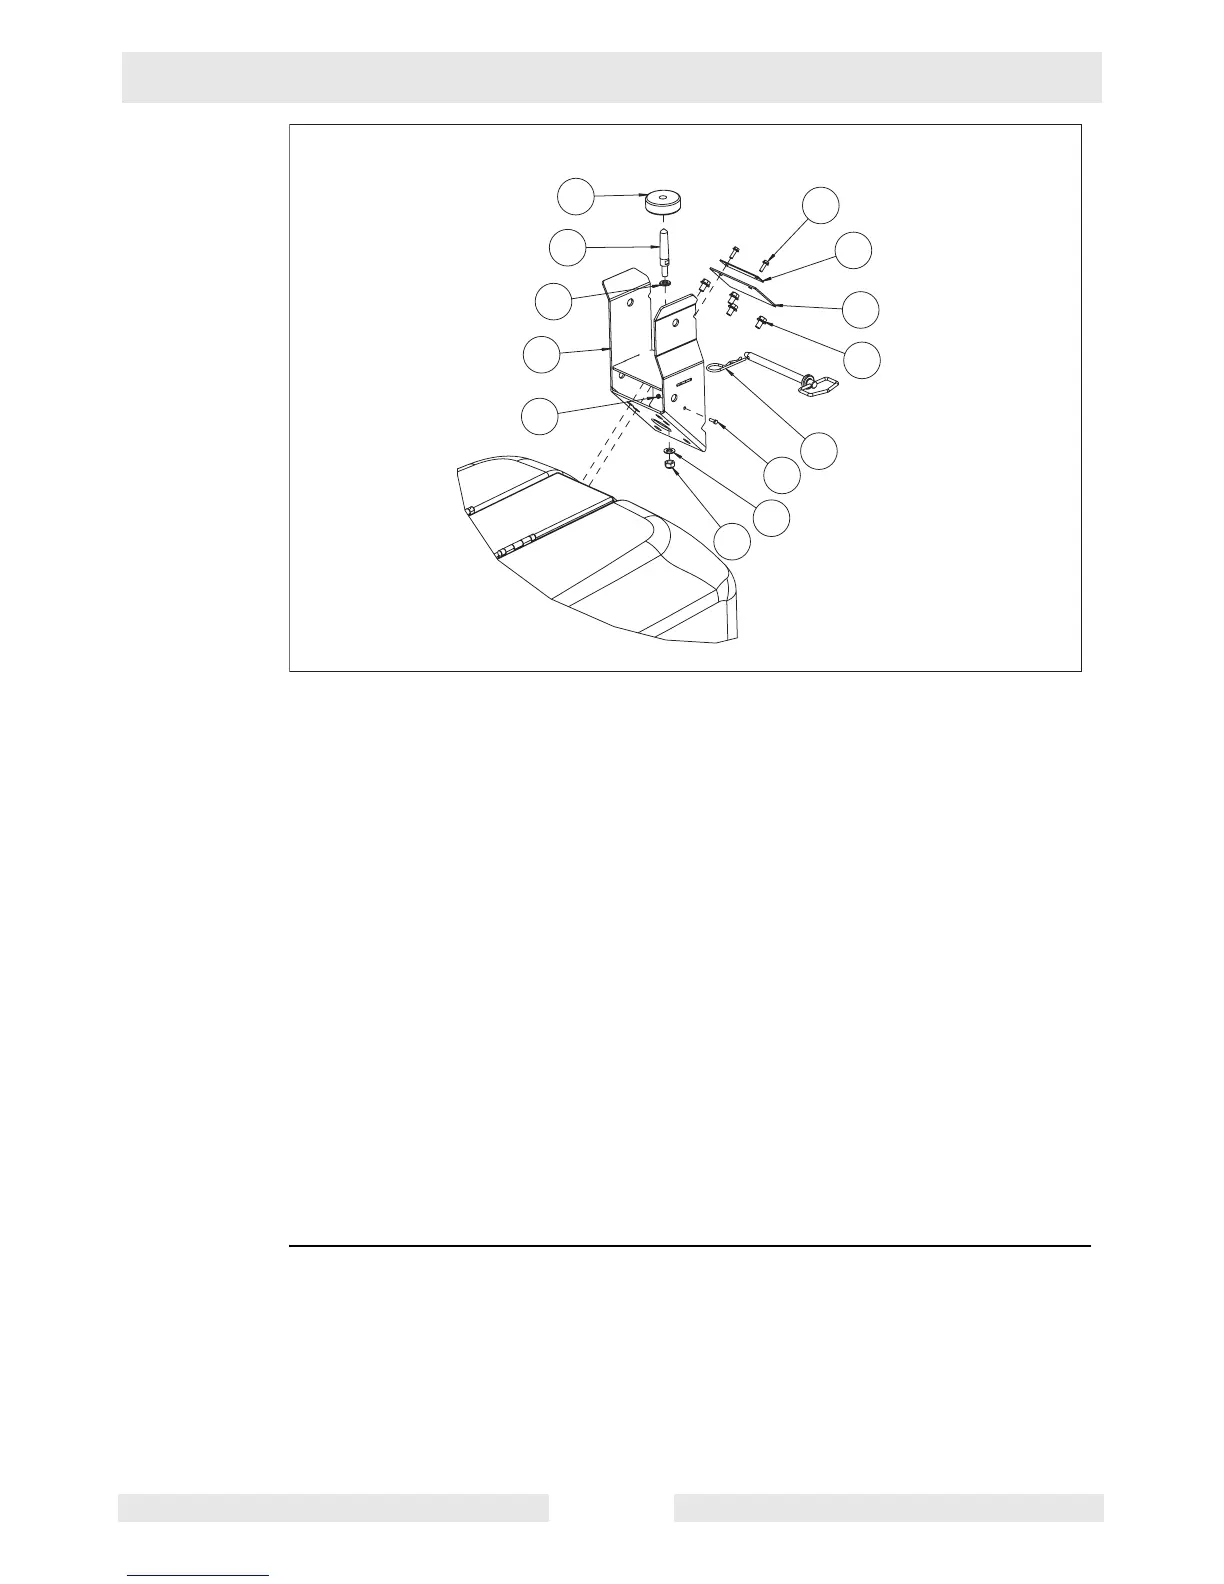
1. Using (4) M10 x 16 serrated flange screws (Y1), install the tower cradle to the
Light Tower upper frame. Torque the screws to 58 Nm (42.8 ft.lbs.)
2. Using (2) M6 x 20 serrated flange screws (Y4), install the radiator access cover
(Y2) and radiator cover plate (Y3) to the tower cradle. Torque the screws to 16
Nm (11.5 ft.lbs.).
3. Using (2) M12 washers (Y9) and the M12 locknut (Y10), install the tower lock
pin (Y8) on the tower cradle
Note: Do not tighten locknut Y10 until the next assembly topic (“Installing the
Tower”).
4. Place the tower damper (Y7) over the tower lock pin.
Note: The large hole on the tower damper must face down.
5. Install the hitch pin assembly (Y11) to the tower cradle using the M5 x 16 screw
(Y5) and the M5 locknut (Y6).
14.5 Installing the Tower
Materials
needed
Tower assembly
Hardware bag 8 (tower install assembly)
Installing the
tower
Follow the procedure below to install the tower.
wc_gr00653
Y
Y6
Y9
Y8
Y7
Y4
Y3
Y2
Y1
Y11
Y5
Y9
Y10
 Loading...