LTN Appendix V—Standard Racked Assembly
wc_tx001216gb.fm 95
13.12 Connecting the Wiring at the Junction Box
Special tools
and materials
needed
Coil cord (GG)
Panduit® crimper CT-100
Panduit® crimper CT-1550
Hardware bag 6
Procedure
Follow the procedure below to connect the wiring at the junction box.
Installing the
coil cord
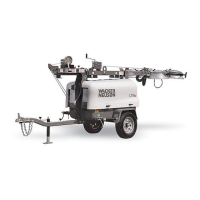
1. Remove the screws and the cover plate from the junction box (DD).
2. Use two wrenches to loosen the connector (DD1) at the bottom of the junction
box.
3. Insert the end of the coil cord through the connector so that approximately 1 cm
(3/8 in.) of coil cord jacket extends into the junction box. Retighten connector
DD1.
Installing the
fixture cords
4. Use two wrenches to loosen the four connectors (DD2) on the sides of the
junction box.
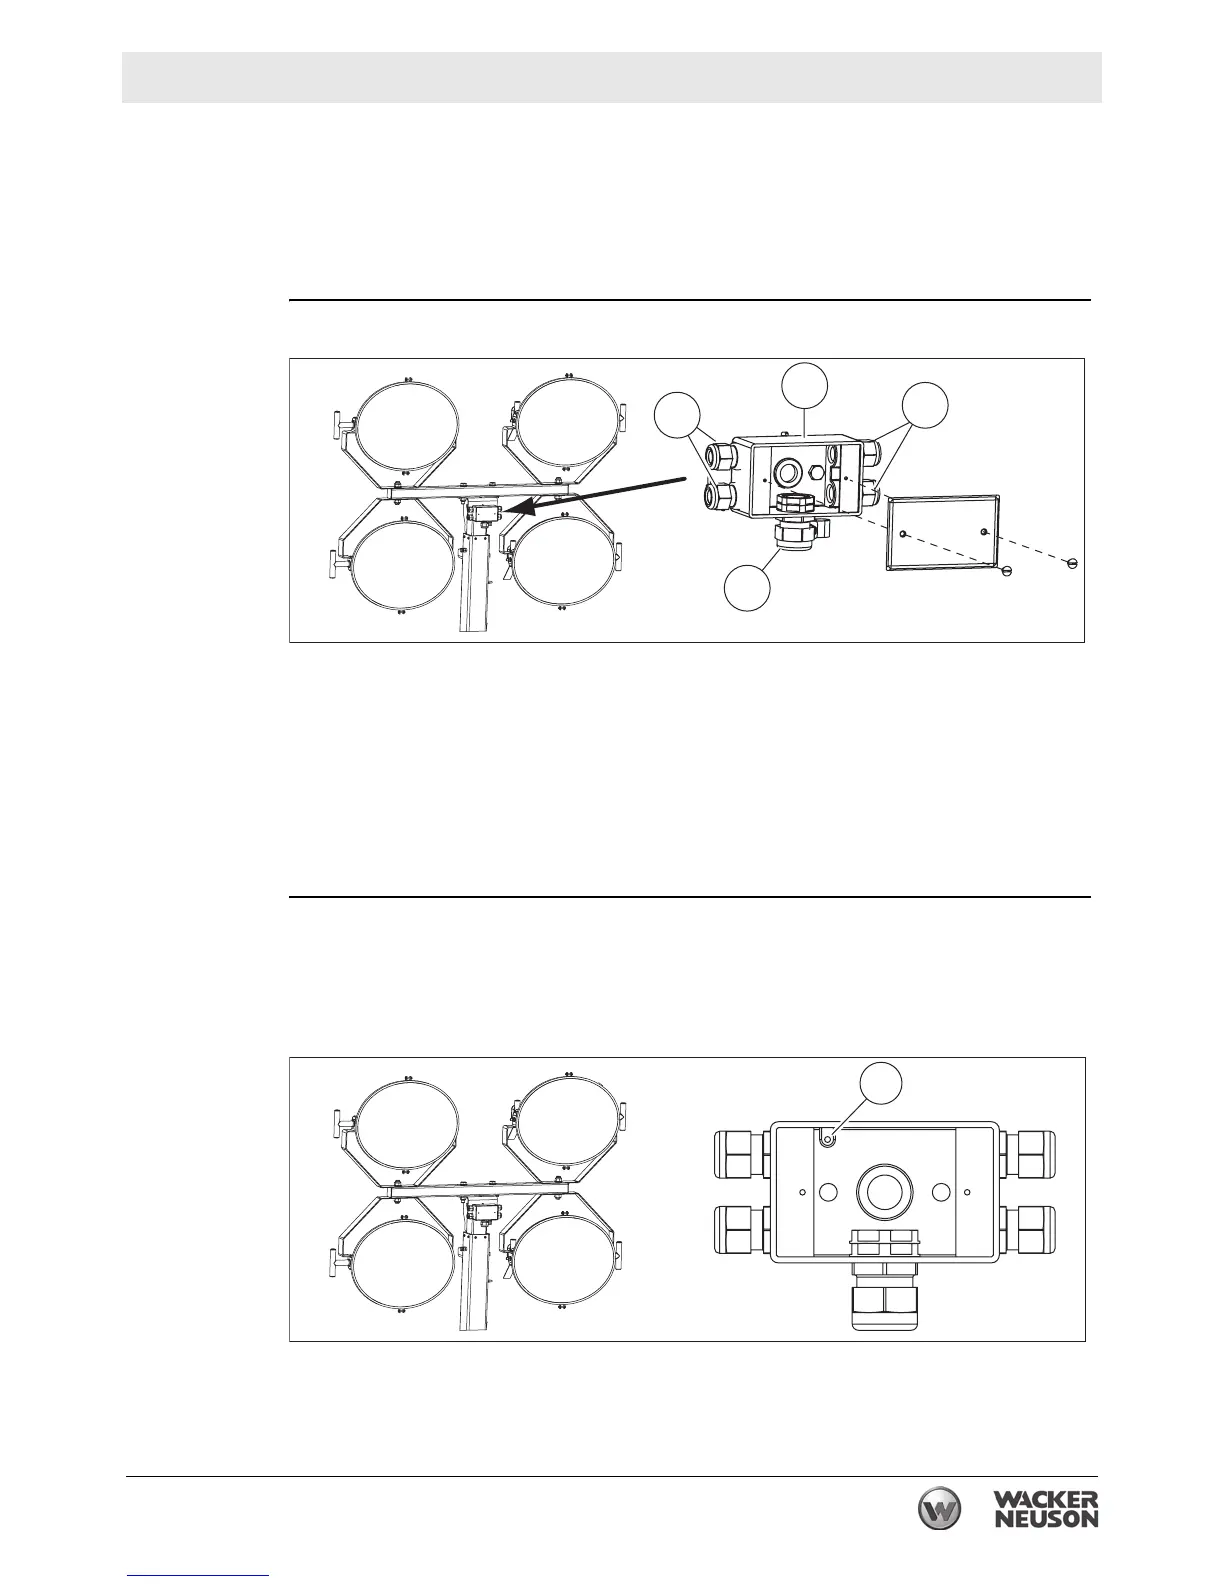
5. Refer to the diagram below and insert the fixture cords through the appropriate
connectors. Approximately 1 cm (3/8 in.) of each fixture cord jacket should
extend into the junction box. Retighten connectors DD2.
This procedure continues on the next page.
wc_gr00653
DD
DD2
DD2
DD1
wc_gr00653
L1
L2
L3
L4
L1
L2
L3
L4
FF