IntroductIon
© WASP S.r.l.
6
41
First use of the printer
6
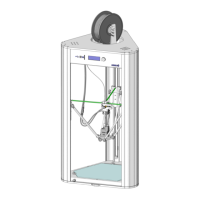
6.4. Calibration
NOTE:
• The calibration procedure is carried out by the manufacturer’s qualified operator during the
installation of the machine. This procedure is just necessary in case the machine is moved or if
instructed by the Manufacturer’s technical support.
Manual leveling is necessary to ensure good adhesion of the first layer to the printing surface.
To perform good leveling, you must first calibrate the value of Z max (height), which represents the distance
between the nozzle and the printing surface.
Z MAX CALIBRATION
1. Turn on the printer
2. Remove the printing surface from the vacuum bed
3. Select the ADVANCED>TOOLS>SET Z MAX command.
4. Select from the top bar the unit of measurement 100 mm
5. Use the -Z button to move down gradually
6. Once near the vacuum bed select a smaller value (10 mm)
7. Continue moving downward with the -Z button until you are in the proximity of the vacuum bed.
The recommended distance between the nozzle and the print plane is approximately 1mm
MANUAL LEVELING
1. Before this procedure, be sure to perform Z MAX CALIBRATION correctly.
2. Select the ADVANCED>TOOLS>MANUAL LEVELING command.
3. Select the center position on the printing table (the extruder will descend downward)
4. Select all outer positions in sequence
5. Adjust the control screws near each position to achieve a distance of about 1mm between nozzle and vacuum
bed
6. Repeat the adjustment in all positions at least 2 times
Learn more on the Calibration procedure on paragraph 7.3.3 “Manual Leveling”.
6.5. Loading of the material
For better understanding of the components mentioned in the procedure below read carfully the paragraph 2.4
“Tank (material storage)” and the paragraph 8.6 “Loading/unloading the material”.
To load the material, proceed as follows:
1. Verify the discharge opening is closed and the tank is empty
2. Open the tank’s lid by using the opening handle
3. Load with the pellets
4. Use the pressure gauge inside the tank to increase the pressure to 5 BARs
5. Force the loading of the pellets by pressing the loading material button on the tank until the extruder is filled
6. Set the temperatures for nozzle and barrel compatibly with the material loaded
7. Wait for the temperatures to be reached
8. Use the command PRINT>CLEAN EXTRUDER
9. The machine will start extruding, stop the procedure when the extruded material flow is consistent
If another material is already stored inside the tank unload it before starting the procedure.
During the CLEAN EXTRUDER command the machine will purge the previous material. In case there’s a consistent
difference (more than ± 20°C) consider using a average temperature between the two for purging.
Learn more on the loading material procedure in paragraph 8.7 “Loading the material”.