IntroductIon
© WASP S.r.l.
6
42
First use of the printer
6
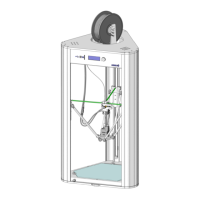
6.6. Placing the printing plate on the vacuum bed
Before positioning the print plate, the compatibility with the print material must be checked.
It is possible to consult the documentation visiting www.3dwasp.com/en/support/
With the machine switched on, check the cleanliness of the aluminum vacuum bed.
The possible presence of debris can compromise the system’s ability to reach the vacuum.
Place the silicone gasket in its slot.
Open the door and place the removable surface on the gasket centered
Help yourself with the surface positioning clips, making sure that each of them will press down the surface on the
gasket.
With the door closed, activate the vacuum with the PRINT> VACUUM command.
Once clicked, the command will show the switch to ON and the pump will start working.
Verify that the operation was successful by testing the adhesion of the plate.
For the full instructions with image consult paragraph 8.12 “VACS (Vacuum Active Control System)”.
6.7. Selecting gcode
Select the printing file from: PRINT>GCODE .
Choose USB DRIVE to navigate the file in the external drive or PRINTER DRIVE to navigate the files saved in the
internal storage of the printer.
CHOOSE PLATE HEIGHT
Before the print starts it’s necessary to select the correct layer height.
In the “Choose height” panel the + and - buttons allow to adjust the value to the correct one for the plate in use.
For the correct value check the technical informations of the product or measure it with a caliper.
Printing will start as soon as the printing bed and the extruder reach the pre-set temperatures.
After launching the print the USB drive can be removed as the .gcode is copied in the internal drive.
6.8. Function during the print
During the print, other functions such as tune, pause, change filament, stop and save and stop are available.
Check the paragraphs 5.2.7 “PRINTING board” and 5.2.8 “TUNE menu” to learn more.
6.9. Removal of the printing plate
Deactivate the vacuum system with the PREPARE> VACUUM command.
Once clicked, the command will show the switch to OFF and the pump will stop working.
Wait 5-10 minutes to ensure a gradual release of the print plate.
6.10. Detaching of the printed parts
Hold the printing plate and detach the print by practicing a slight bending on the plate or with the help of a spatula
if neccessary.
For information and support please visit F.A.Q. section on our website: www.3dwasp.com