EasyManua.ls Logo

White W3300 User Manual

Default Icon
73 pages
To Next Page IconTo Next Page
Page #1 background imageLoading...
Page #1 background image
01/22/2008
WMITh
Embroidery
Machine
W3300
v,_w
wJ
0
iii

Table of Contents

Question and Answer IconNeed help?

Do you have a question about the White W3300 and is the answer not in the manual?

White W3300 Specifications

General IconGeneral
Maximum Stitch Length5mm
Maximum Stitch Width7mm
TypeElectronic
Needle ThreaderAutomatic
Weight7.3 kg
Dimensions44.5 x 20.3 x 36.8 cm

Summary

Important Safety Instructions

DANGER: Electric Shock Hazards

Warnings related to electric shock hazards.

WARNING: General Safety Precautions

Warnings for burns, fire, electric shock, or injury.

Please Read Before Using Your Embroidery Machine

For Safe Operation

Guidelines for safe machine usage.

Main Power Switch and Connectors

Start/Stop Button

Machine Knowledge

Principal Parts and Their Description

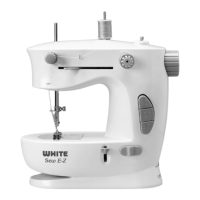
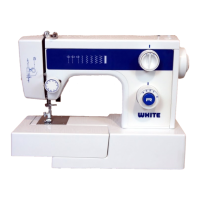
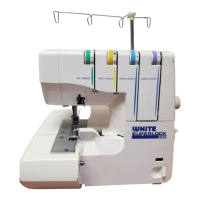
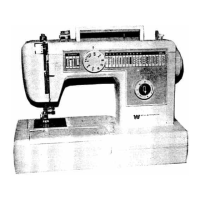
Detailed identification of machine parts.

Operation Examples

Example: How to Wind a Bobbin

Step-by-step guide for bobbin winding.

To Use the Language Selection Key

Bobbin Winding and Installation

Bobbin Winding and Installation

Start Bobbin Winding

How to begin and manage bobbin winding.

Setting the Bobbin

Insert Bobbin into Bobbin Case

Correct insertion of the bobbin.

Upper Threading

Thread According to Machine Marks

Following numbered thread guides.

Auto Needle Threading Device

Preparation Before Embroidering

Fitting the Fabric in the Embroidery Frame

Align and Clamp Fabric

Securing fabric with outer and inner frames.

Fitting the Fabric in the Embroidery Frame

Fitting the Embroidery Frame to the Machine

Removing the Embroidery Frame

Thread Tension Adjustment

Upper Thread Tension Dial

Explanation of the tension dial settings.

Correct Thread Tension

How to achieve proper thread tension.

If Upper Thread Tension is Too Strong

Troubleshooting strong upper tension.

If Upper Thread Tension is Too Weak

Troubleshooting weak upper tension.

Adjusting the LCD Screen Contrast

Changing the Needle

Checking for a Bent Needle

How to identify a bent needle.

Embroidery

Place and Attach Fabric Frame

Attaching the fabric-filled frame to the machine.

Start the Machine

Initiating the embroidery process.

Start Embroidering

Lower Presser Foot and Start

Initiating and temporarily stopping the stitch.

Embroidering Advice

Recommended Thread and Needle

Guidelines for thread and needle selection.

How to Select Patterns

Selecting Built-in Embroidery Patterns

How to choose patterns stored in the machine.

Selecting Alphabetic Characters

Changing the Character Size

Correcting Characters

Selecting Frame Patterns

Selecting One Point Patterns

Displaying Embroidery Time for One Point Patterns

Displaying Color Names for One Point Patterns

Selecting Patterns from a Memory Card

Important Card Handling Warnings

Crucial warnings regarding card handling.

Memory Management

Saving a Pattern Combination in Memory

How to store patterns in the machine's memory.

Retrieving a Pattern Which Has Been Saved

Changing the Settings for the Selected Pattern

Moving the Position (Layout)

Adjusting pattern placement on fabric.

Changing the Embroidery Position

Checking the Embroidery Area

Use TRIAL Function to Check Area

Tracing the embroidery area before stitching.

Embroidering From a Specific Starting Point

Changing the Pattern Direction

Mirror Imaging Patterns

Changing the Size of Characters and Frame Patterns

Changing Thread Density of the Stitch

Sewing a Basic Embroidery Pattern

Embroidering Multi-Color Patterns

Procedures for designs with multiple thread colors.

Embroidering Single Color Patterns

Steps for single-color designs.

Embroidering Characters That Extend Beyond One Frame

Embroidering Appliques (Using a Frame Pattern)

Attach Applique to Base Fabric

Securing the appliqué onto the project.

Embroidering Onto Small Pieces or Corners

If Thread Breaks During or After Embroidery

While Embroidering

Actions to take during a thread break.

If Thread Breaks During Embroidery

Re-thread and Adjust Position

Steps to re-thread and move back.

Restart Embroidering

How to resume sewing after a break.

Re-embroidering From the Beginning

Maintenance

Changing the Light Bulb

Procedure for replacing the light bulb.

Cleaning

Error Message

Error Message

Troubleshooting

Upper Thread Breaks

Causes and remedies for upper thread breakage.

Lower Thread Visible on Fabric

Causes and remedies for visible lower thread.

Lower Thread Breaks

Causes and remedies for lower thread breakage.

Upper Thread is Loose

Causes and remedies for loose upper thread.

Skipped Stitches

Causes and remedies for skipped stitches.

Embroidered Pattern is Out of Shape

Causes and remedies for distorted patterns.

Fabric Puckers

Causes and remedies for fabric puckering.

Threading is Not Possible

Causes and remedies for threading failures.

Mechanical Problems

Slow and Noisy Operation

Causes and remedies for slow, noisy machine.

Machine Does Not Start

Causes and remedies for machine not starting.

Needle Breaks

Causes and remedies for needle breakage.

One Point Embroidery Pattern

Embroidering Using a Small Frame

Embroidering Using a Large Frame

Combining Two or More Patterns (90° Rotation)

Set Start Position with 90° Rotation

Using rotation and start position for sequence.

Related product manuals