RJ-901C/RJ-900C Maintenance Manual 4 Parts Replacement
4-17
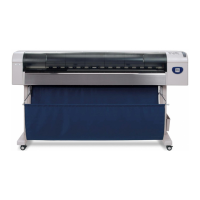
3. Remove the connector panel screw (tapping screw M3 × 6, S cup: 2pcs) bracket network interface card
screw (tapping screw M3
× 6, S cup: 2pcs).
4. Remove the connector panel.
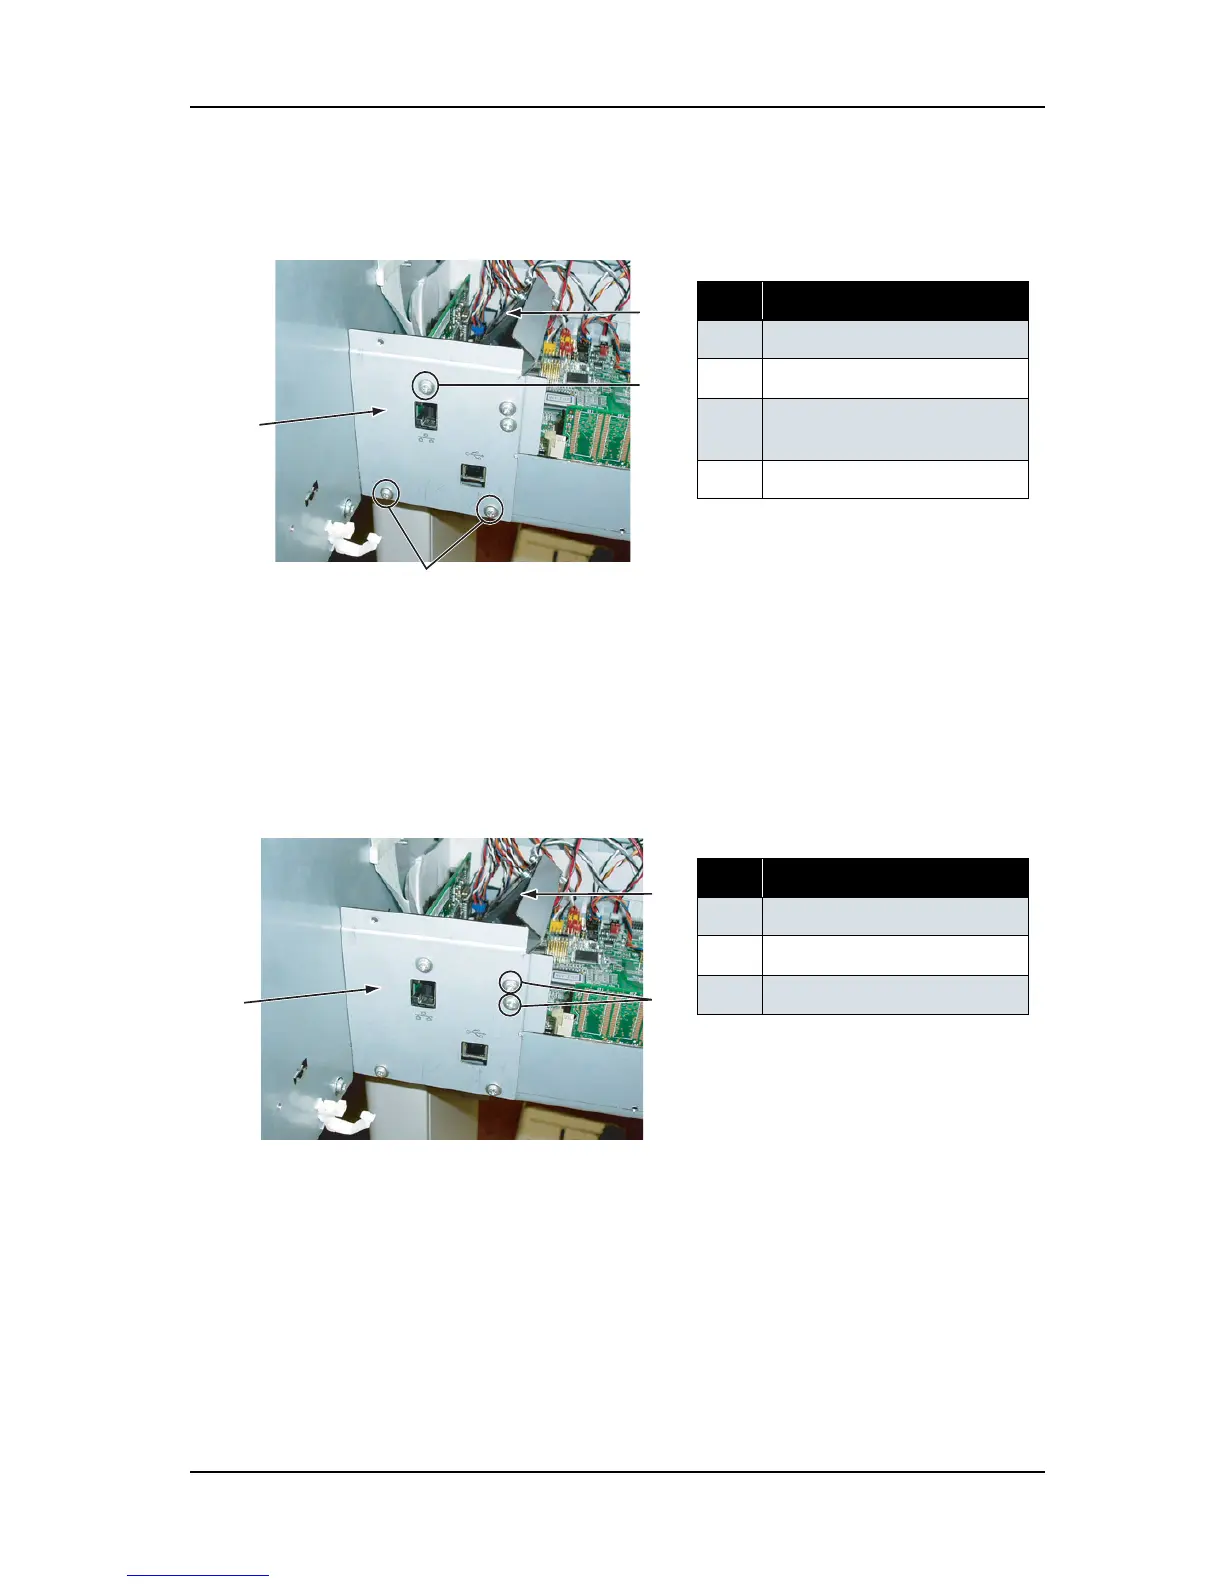
(3) Replacing Cooling Fan (5V)
1. Remove the cooling fan (5V) connector.
2. Remove the fan bracket screw (tapping screw M3
× 6, S cup: 2pcs).
3. Remove the cooling fan screw (pan-head screw with spring washer and flat washer M
3 × 20: 2pcs) from
the fan bracket.
4. Replace the cooling fan.
No. Part name
1 Connector panel
2
Connector panel screw
3
Bracket network interface card
screw
4 Cooling fan (5V)
No. Part name
1 Connector panel
2
Fan bracket screw
3
Cooling fan (5V)
2
1
3
4
3
2
1