4 Parts Replacement RJ-901C/RJ-900C Maintenance Manual
4-30
4.5 Replacement of CR Driving Section Components
4.5.1 CR Motor Assembly
NOTE
Before replacing parts in the CR motor assembly, remove the following covers.
• R side cover: "4.2.1 Removing R Side Cover" p.4-6
•L side cover: "4.2.3 Removing L Side Cover" p.4-9
1. Detach the CR motor assembly connector from the cable connector.
2. Take the CR motor assembly cable off the clamp.
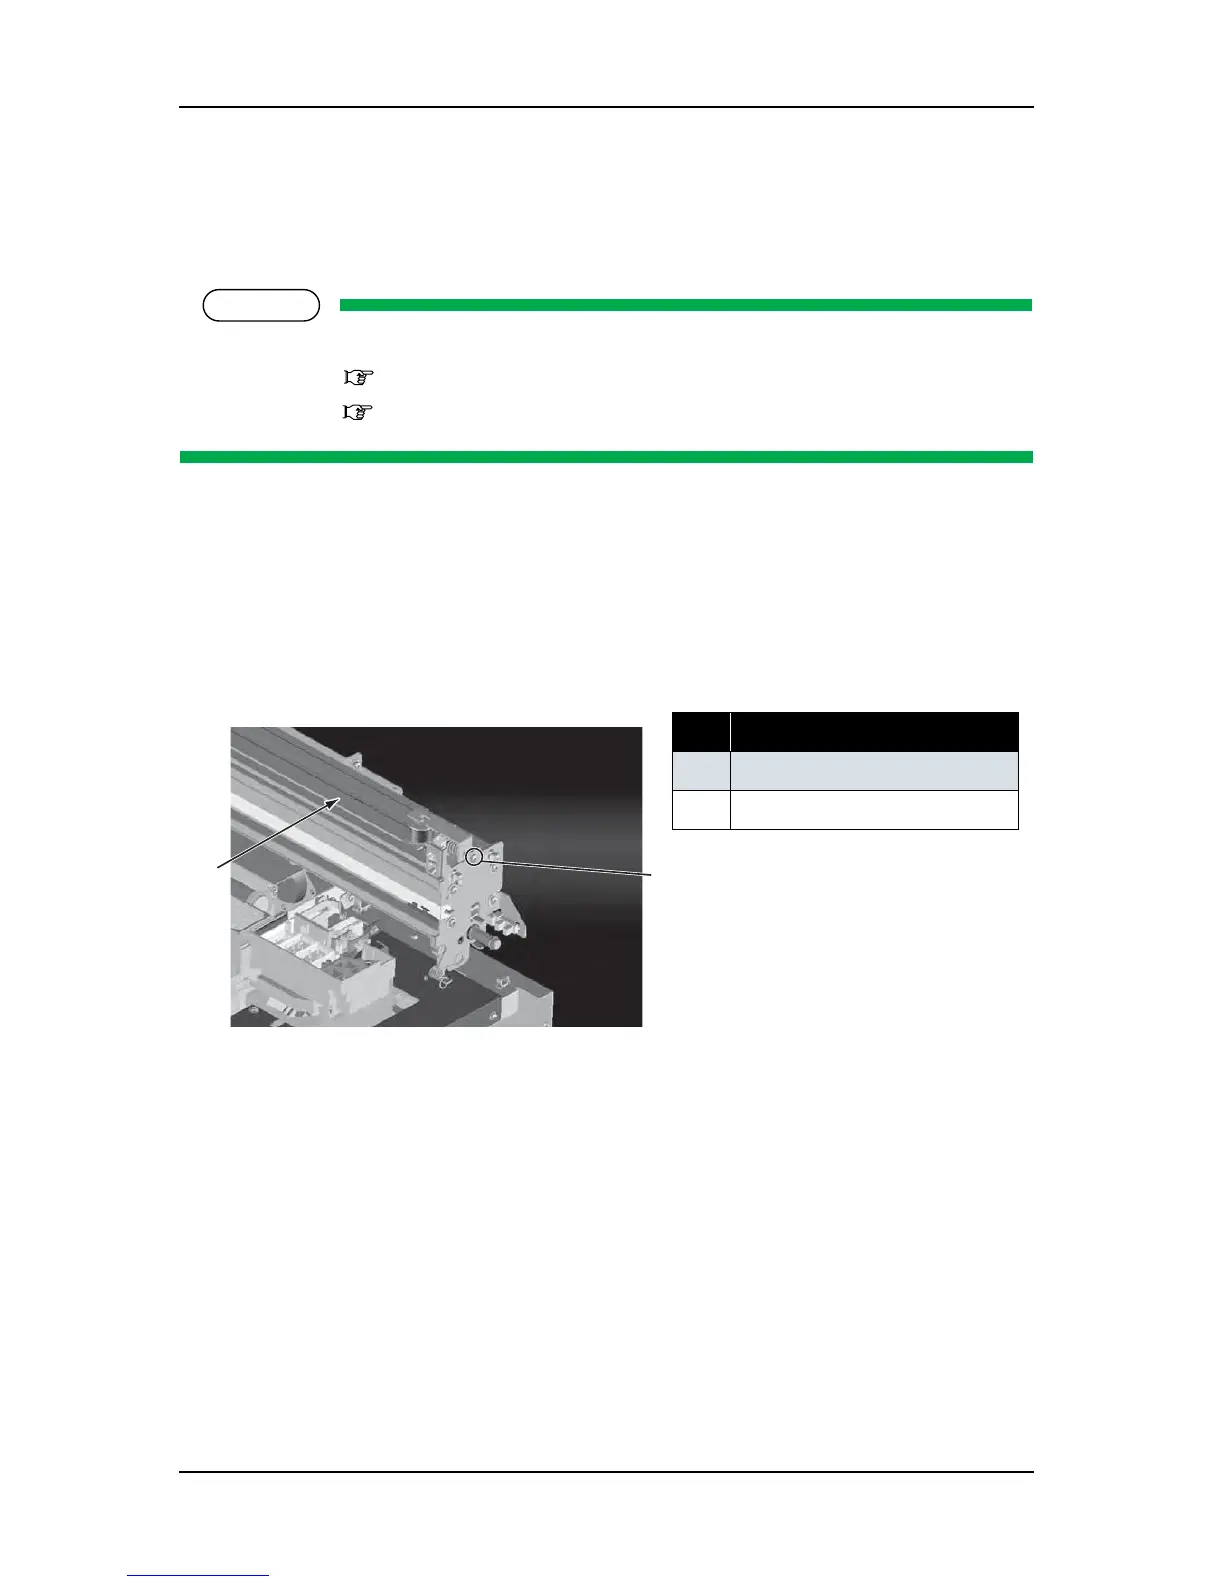
3. Release the CR locker by pushing it with your finger, then move the carriage from the capping position
to the left.
4. Loosen the CR tension mounting shaft on the R side frame, then release the CR belt tension.
5. Take the CR belt off the CR motor assembly pulley on the L side frame.
No. Part name
1 CR belt
2
CR tension mounting shaft
1
2