Loading Paper
Xerox WorkCentre 3315DN/3325DN/3325DNI
User Guide
145
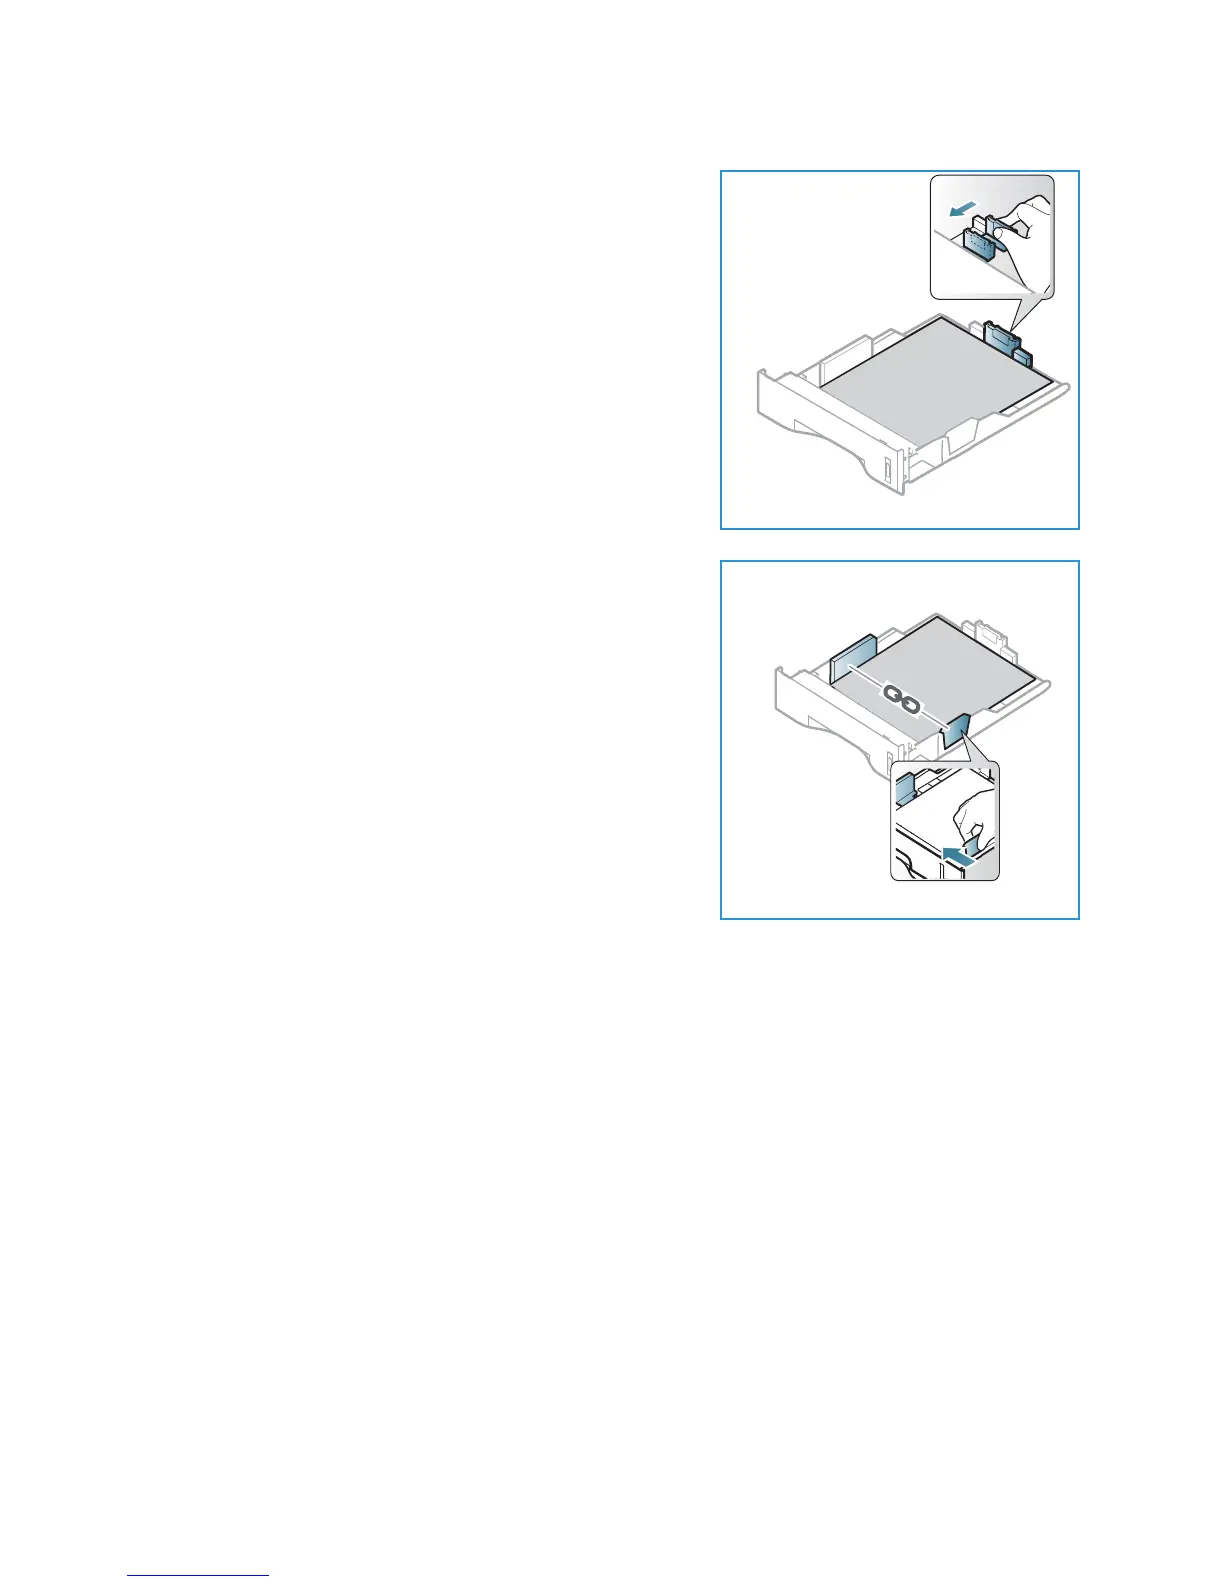
2. Slide the paper length guide until it lightly touches the
end of the paper stack.
3. Position the side guide by squeezing the lever and sliding
it towards the stack of paper, until it gently touches the
side of the stack.
4. Insert the paper tray into the machine.
5. After loading paper in the paper tray, set the paper size
and type using the control panel. Press OK to confirm the
settings or Stop to change the settings. These settings
will apply to Copy and Fax modes.
6. When printing from your computer, ensure you select the
Select Paper button to specify the correct paper size,
color and type. Not confirming the paper details may
result in printing delays. For information about setting
the paper type and size on the control panel, refer to
Setting Paper Size and Type on page 148.
Note: The settings made from the printer driver on your computer override the settings on the
control panel.
Using the Bypass Tray
The bypass tray is located on the front of your machine. It can be closed when not in use, making the
product more compact. Use the bypass tray to print transparencies, labels, envelopes or postcards in
addition to making quick runs of paper types or sizes that are not currently loaded in the paper tray.
When using the bypass tray for special media it may be necessary to use the rear door for the output.
For further information refer to Media Output Locations on page 23.
Acceptable print media is plain paper from 3.0 x 5.0 inches to 8.5 x 14 inches Legal (76 mm x 127 mm
to 216 mm x 356 mm) and weighing between 16 lb and 58 lb (60 g/m²
and 220 g/m²). For more media
specifications, refer to Media Specifications on page 150.