2-5
1
2
3
4
5
6
7
8
9
10
PERIODIC CHECKS AND ADJUSTMENTS
PERIODIC MAINTENANCE
2.
Check:
• Check that engine oil is at the specified level “a”.
▼▼▼▼▼▼▼▼▼▼▼▼▼▼▼▼▼▼▼▼▼▼▼▼▼▼▼▼▼▼▼▼▼▼▼▼▼▼▼▼▼
Oil level checking steps:
a. Place the multi-purpose engine on a level surface.
b. Warm up the engine for several minutes.
c. Stop the engine.
d. Remove the oil filler cap.
e. Check that engine oil is at the specified level “a”.
Add oil if necessary.
▲▲▲▲▲▲▲▲▲▲▲▲▲▲▲▲▲▲▲▲▲▲▲▲▲▲▲▲▲▲▲▲▲▲▲▲▲▲▲▲▲
3.
Install:
• Oil filler cap
REPLACING THE ENGINE OIL
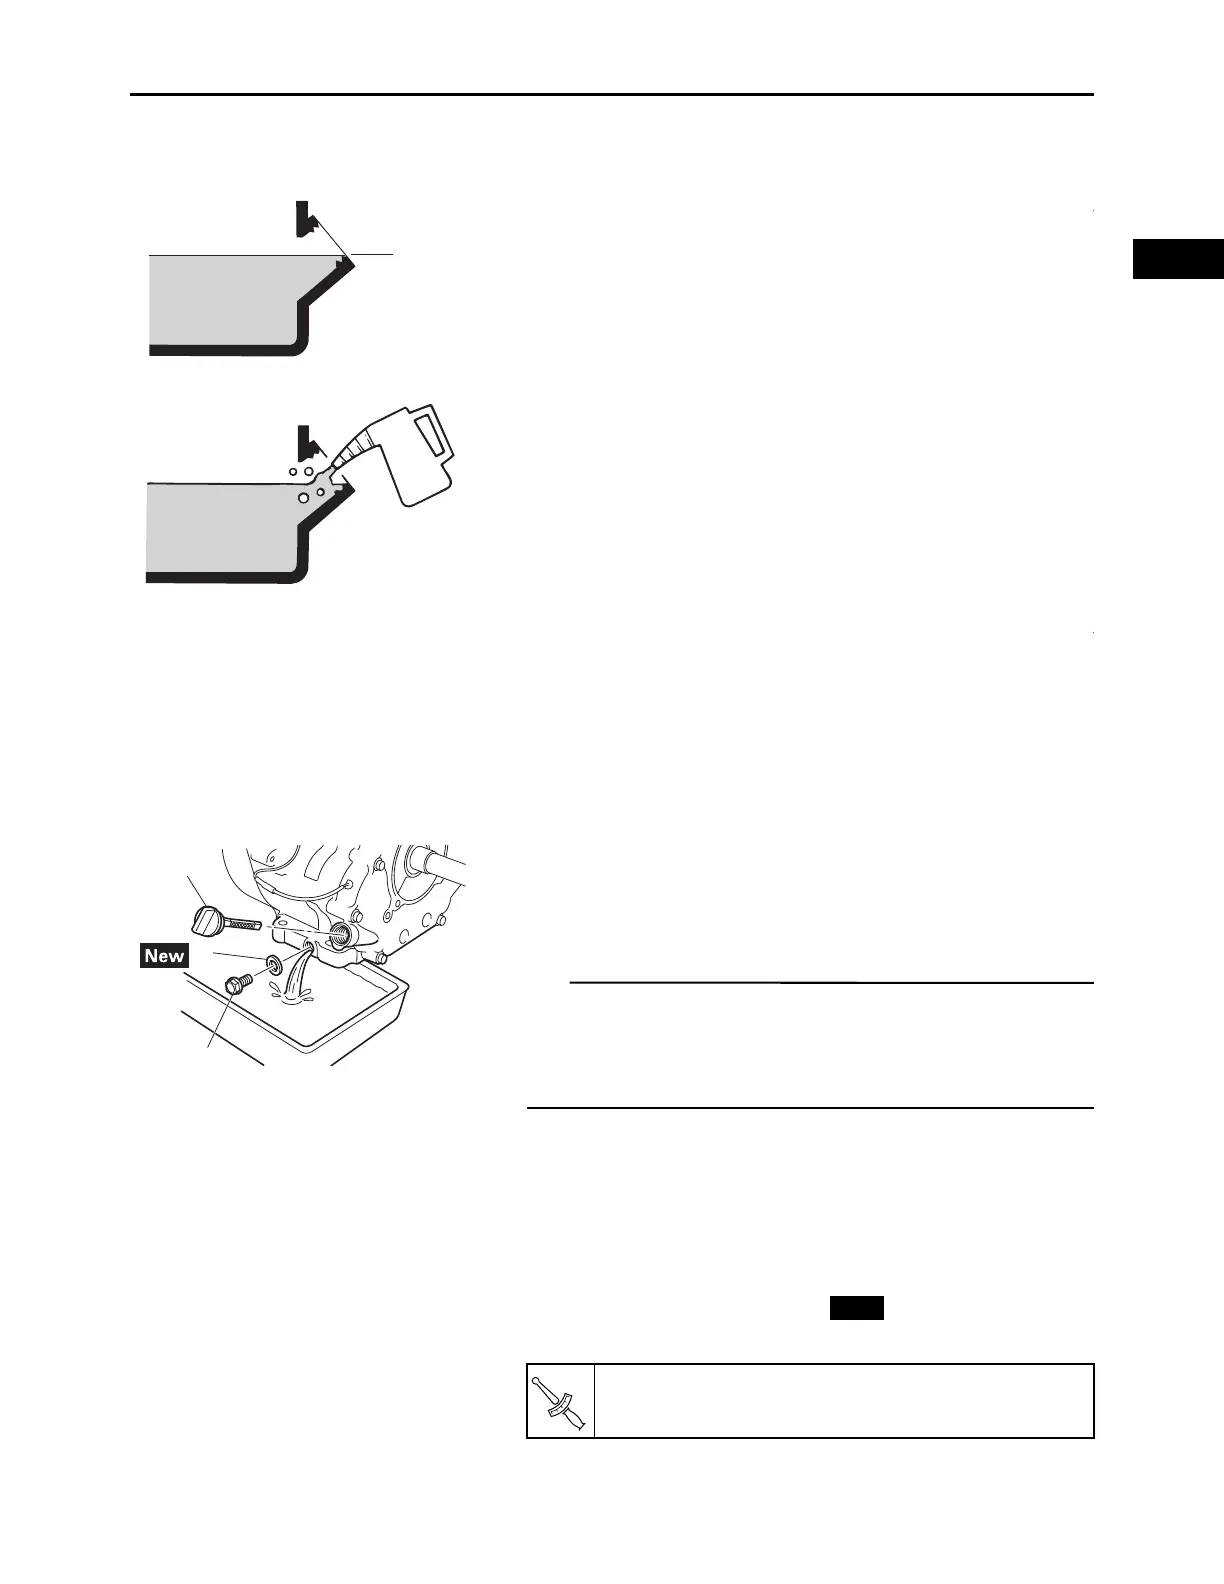
1.
Warm up the engine for several minutes, and then
stop the engine.
2.
Remove:
• Oil filler cap “1”
• Oil drain bolt “2”
• Oil drain bolt gasket “3”
• This engine is equipped with two oil filler caps. Use
whichever side is accessible.
• This engine is equipped with two oil drain bolts. Use
whichever side is accessible.
3.
Drain:
• Engine oil
Place the oil pan under the engine and drain the
engine oil.
4.
Install:
• Oil drain bolt gasket “3”
• Oil drain bolt “2”
Oil drain bolt:
27 N·m (2.7 kgf·m, 20 lb·ft)