3-43
1
2
3
4
5
6
7
8
9
10
ENGINE
PISTON, CAMSHAFT, CRANKCASE, AND CRANKSHAFT
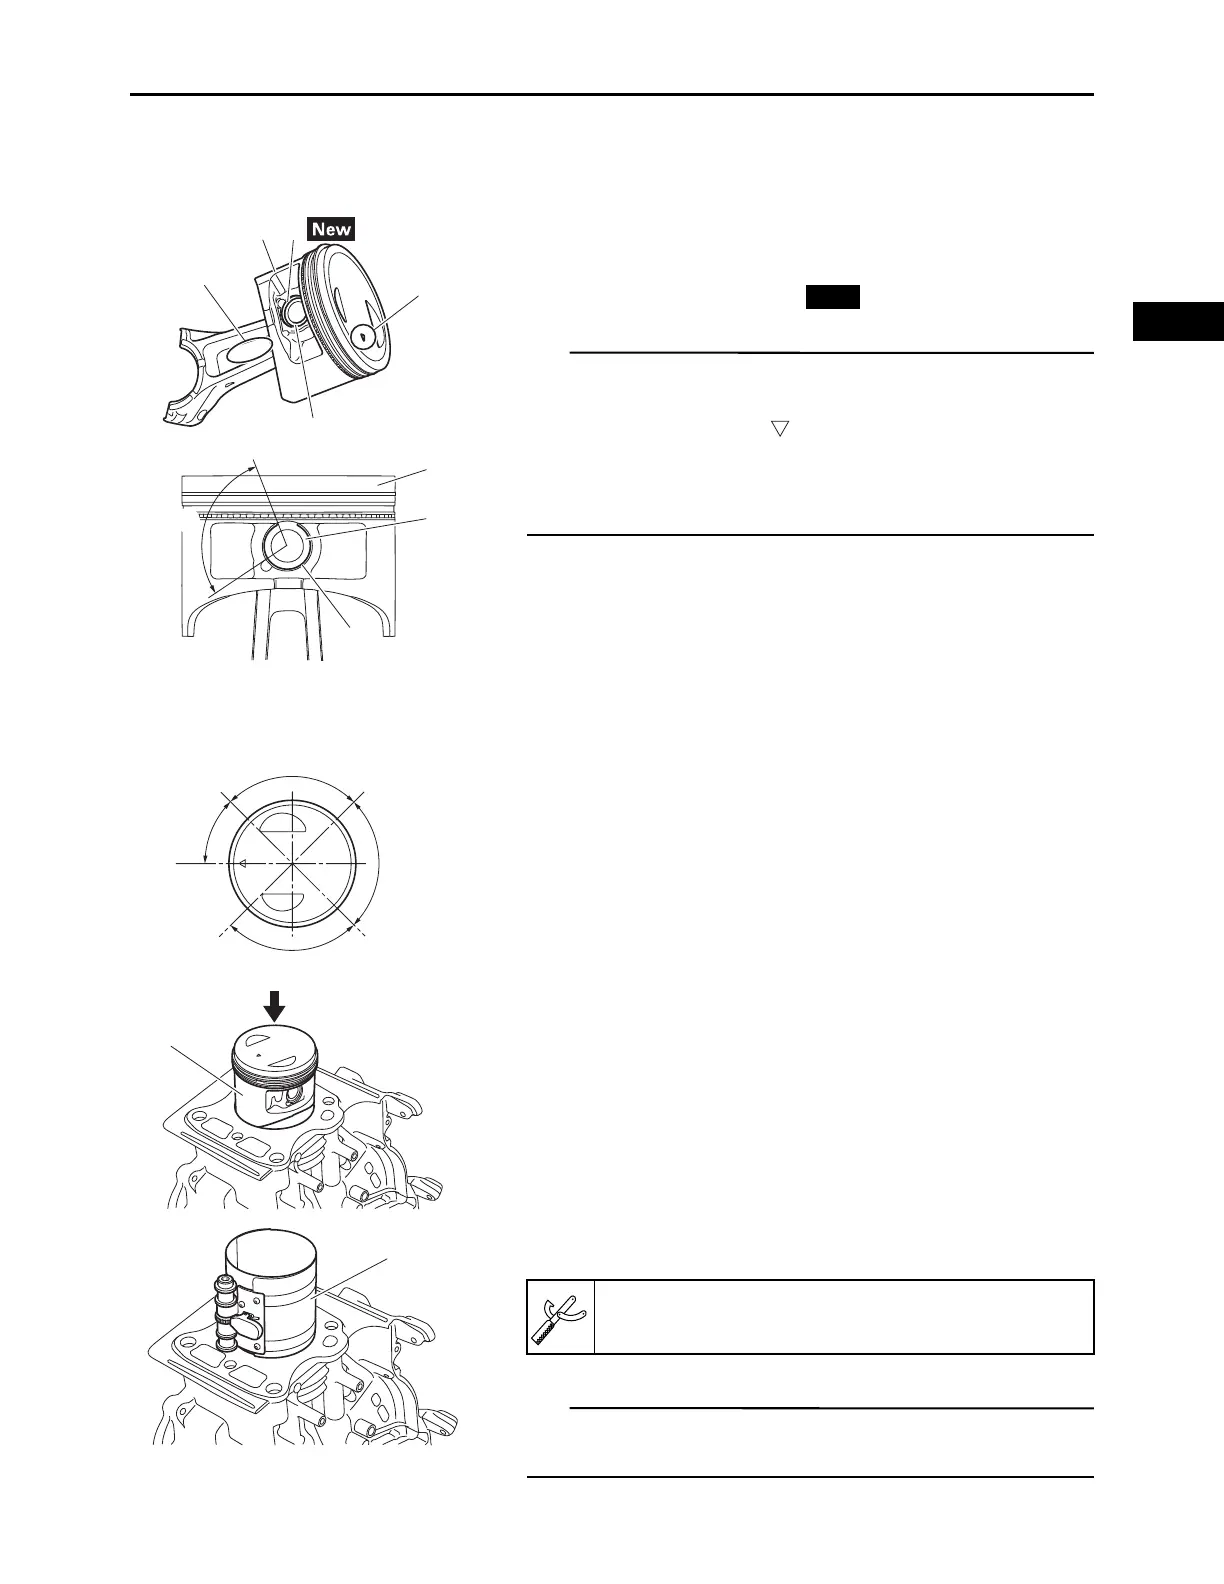
2.
Apply the engine oil to the inside of the connecting rod
small end.
3.
Install:
• Piston “1”
• Piston pin “2”
• Piston pin circlips “3”
• Make sure that the “YAMAHA” mark “a” on the con-
necting rod faces toward the crankcase cover.
• Make sure that the “ ” mark “b” on the piston head
faces toward the push rod.
• Install the piston pin circlips so that the clip ends are
45 “c” or more from the cutout in the piston.
INSTALLING THE CRANKSHAFT
1.
Make sure that the end gap of each piston ring is
positioned correctly, as shown in the illustration.
2.
Install:
• Piston with the connecting rod “1”
3.
Attach:
• Piston ring compressor “1”
Attach the piston ring compressor to the piston, and then
insert the piston into the cylinder.
a. Lower oil ring rail
b. 2nd ring
c. Upper oil ring rail
d. Top ring, oil ring expander
Piston ring compressor:
YM-08037, 90890-05158