3-39
1
2
3
4
5
6
7
8
9
10
ENGINE
PISTON, CAMSHAFT, CRANKCASE, AND CRANKSHAFT
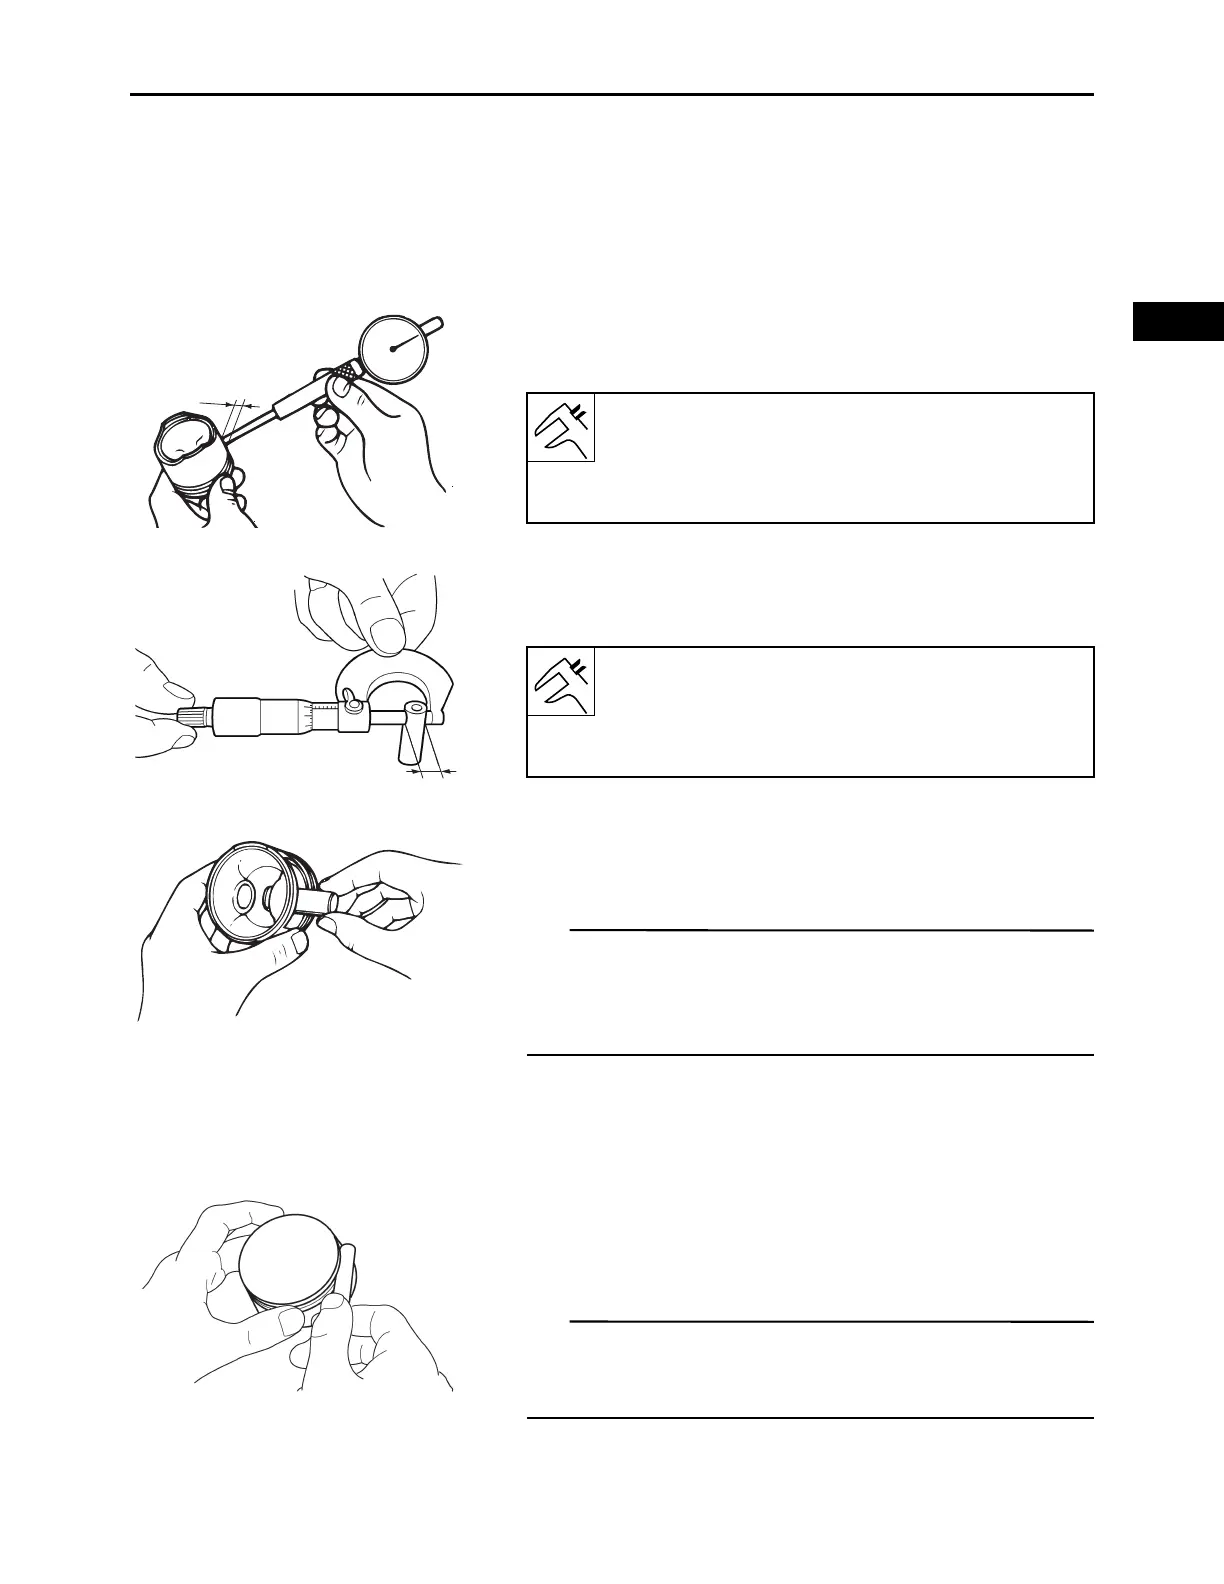
CHECKING THE PISTON PIN
1.
Check:
• Piston pin
Blue discoloration/grooves Replace the piston
pin and then check the lubrication system.
2.
Measure:
• Piston pin hole inside diameter “a”
Out of specification Replace.
3.
Measure:
• Piston pin diameter “a”
Out of specification Replace.
4.
Check:
• Check that the piston pin enters smoothly into the
piston pin hole.
If the piston pin fits too tight into the piston, check the pis-
ton pin hole. If there is any protrusion, use a knife or
scraper to gently remove it so that piston pin can be
pushed in smoothly with your fingers.
CHECKING THE PISTON RINGS
The following procedure applies to all of the piston rings.
1.
Measure:
• Piston ring side clearance
Out of specification Replace the piston and pis-
ton rings as a set.
Before measuring the piston ring side clearance, eliminate
any carbon deposits from the piston ring grooves and pis-
ton rings.
a
Piston pin hole inside diameter:
19.004–19.015 mm (0.7481–0.7486 in)
Limit:
19.045 mm (0.7498 in)
a
Piston pin diameter:
18.995–19.000 mm (0.7478–0.7480 in)
Limit:
18.975 mm (0.7470 in)