5-8
1
2
3
4
5
6
7
8
9
10
ELECTRICAL
ELECTRICAL COMPONENTS
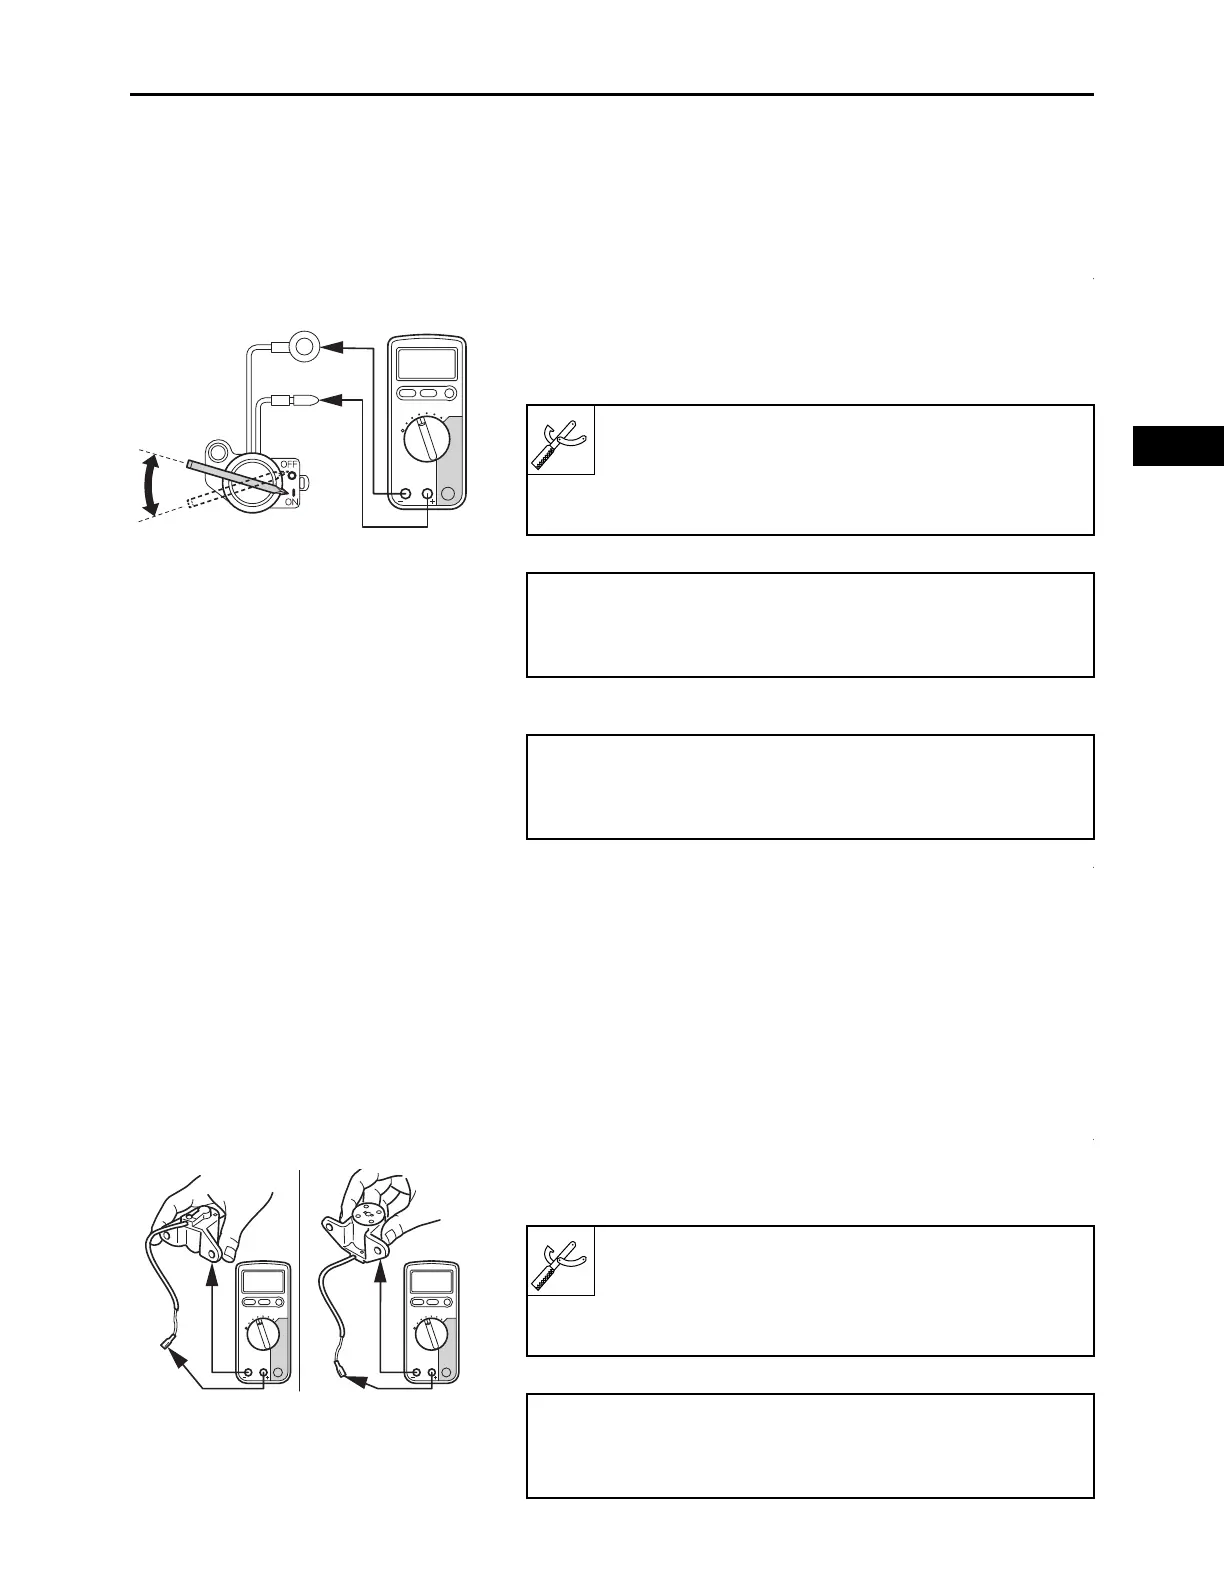
CHECKING THE ENGINE SWITCH
1.
Check:
• Engine switch continuity
Out of specification Replace.
▼▼▼▼▼▼▼▼▼▼▼▼▼▼▼▼▼▼▼▼▼▼▼▼▼▼▼▼▼▼▼▼▼▼▼▼▼▼▼▼▼
a. Disconnect the engine switch connectors.
b. Connect the digital circuit tester () to the engine
switch connectors as shown.
c. Check the engine switch continuity.
▲▲▲▲▲▲▲▲▲▲▲▲▲▲▲▲▲▲▲▲▲▲▲▲▲▲▲▲▲▲▲▲▲▲▲▲▲▲▲▲▲
CHECKING THE OIL LEVEL SWITCH
1.
Disconnect:
• Oil level switch
(from the bottom of the crankcase cover)
2.
Check:
• Oil level switch continuity
Out of specification Replace.
▼▼▼▼▼▼▼▼▼▼▼▼▼▼▼▼▼▼▼▼▼▼▼▼▼▼▼▼▼▼▼▼▼▼▼▼▼▼▼▼▼
a. Connect the digital circuit tester () to the oil level
switch as shown.
Model 88 Multimeter with tachometer:
YU-A1927
Digital circuit tester (CD732):
90890-03243
• Positive tester probe
Black “1”
• Negative tester probe
Black “2”
• Engine switch “ON”
Continuity “a”
• Engine switch “OFF”
No continuity “b”
Model 88 Multimeter with tachometer:
YU-A1927
Digital circuit tester (CD732):
90890-03243
• Positive tester probe
Oil level switch lead “1”
• Negative tester probe
Body ground “2”