ZONE2/ZONE3/
ANTENNA
75
R.PRESENCE
SURROUND
AV 1
HDMI OUT
AV 2 AV 3
EXTRA SP2
12
PHONO
GND
(1 BD/DVD)
AV 1
DOCK NETWORK
AV 2 AV 3 AV 4
AV 1
AV 3
AV 4
AV 2
COAXIAL COAXIAL
OPTICAL OPTICAL
OPTICAL
AUDIO 1
(2 TV)
(3 CD)
AUDIO 2 AUDIO 3 AUDIO 4
FRONT
SURROUND
SUR. BACK
SUBWOOFER
CENTER
MULTI CH INPUT
COMPONENT VIDEO
COAXIAL
MON.OUT/ZONE OUT
ZONE
ZONE 2
AV O UT
AV OUT/
ZONE 4
ԘԙԚԛ Ԝԝ
YP
B
P
R
YP
B
P
R
A
B
C
D
(1 BD/DVD)
HD Radio
GND
AMFM
(4 RADIO)
SIRIUS
ARC ARC
SELECTABLE
AUDIO
VIDEO
COMPONENT
VIDEO
COAXIAL
OPTICAL
COMPONENT
VIDEO
HDMI
R
R
C
V
V
L
L
O
C
O
P
R
Y
P
R
YP
B
HDMI
HDMI
P
B
P
B
P
B
P
R
Y
P
R
Y
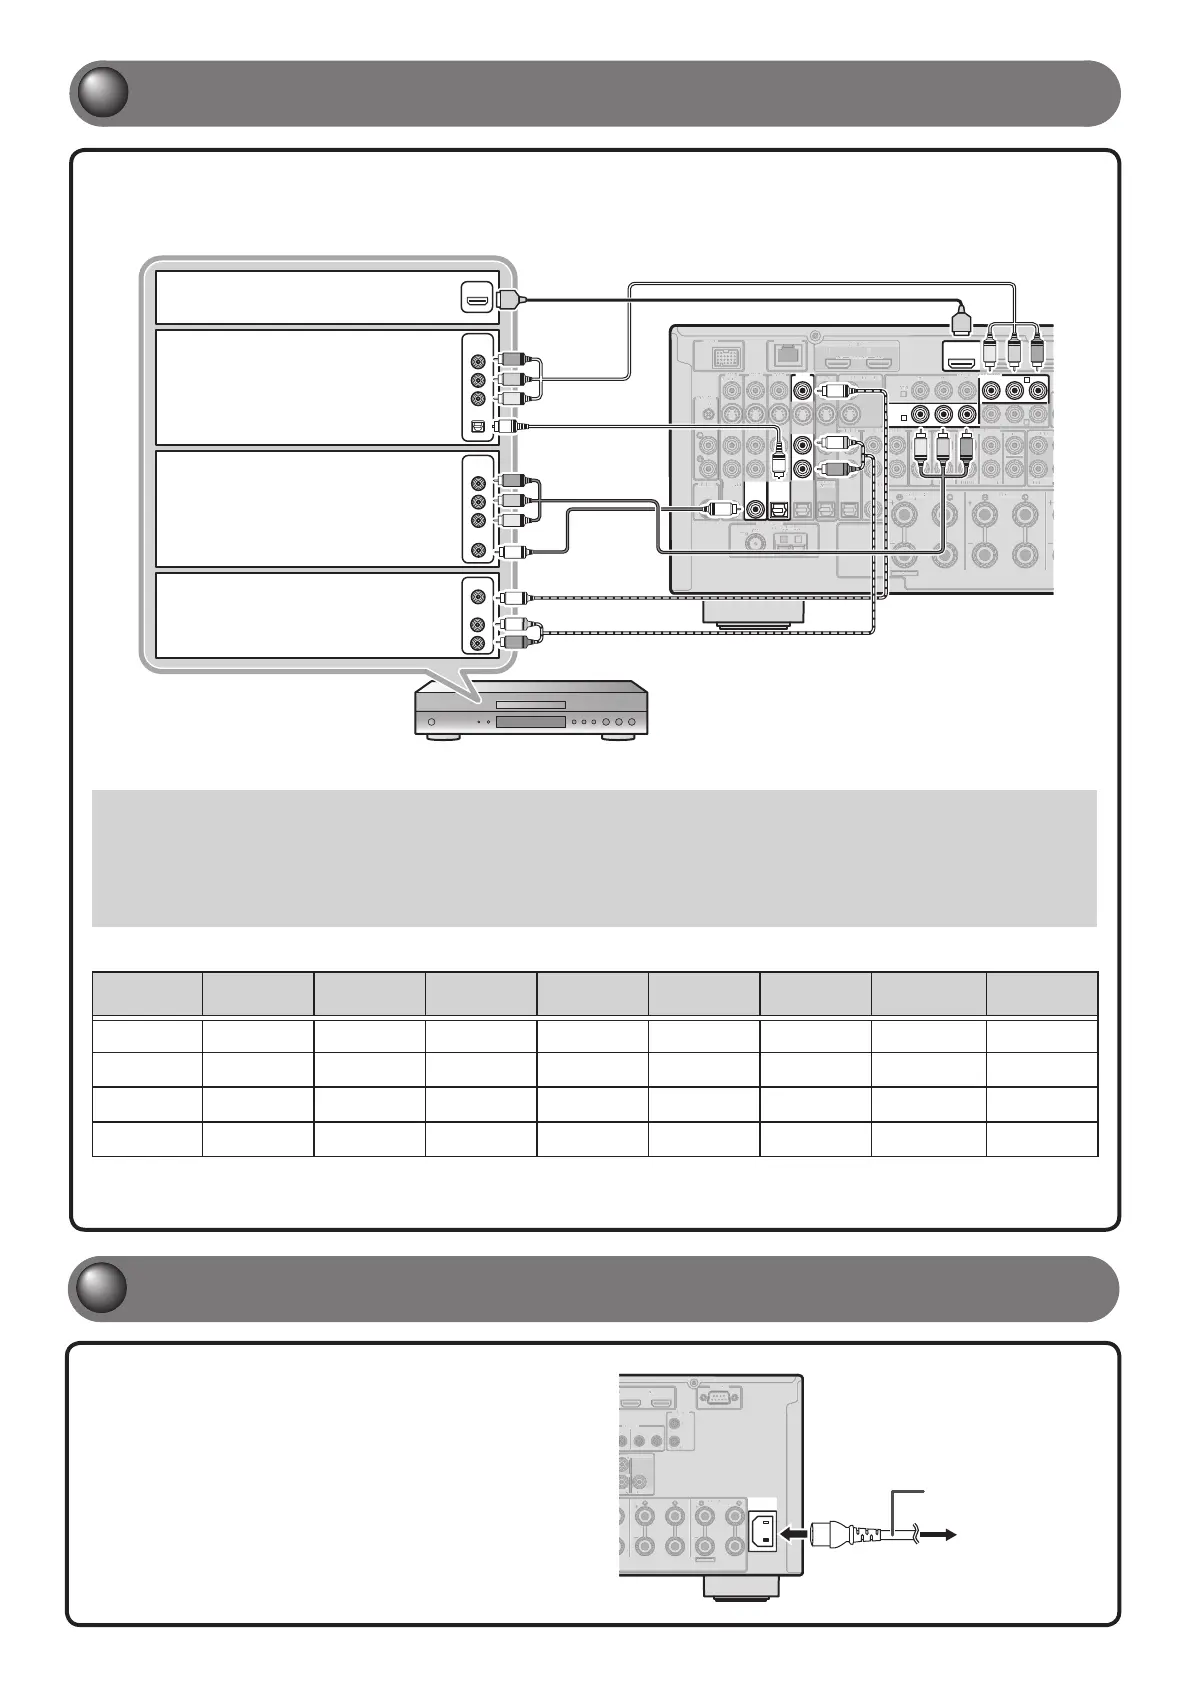
A When the HDMI output is
available.
B When the component video
output is available (with
optical digital audio output).
C When the component video
output is available (with
coaxial digital audio output).
D When only the video input
is available (with the analog
audio output).
To the power outlet
EXTRA SP1
ZONE2/ZONE3/
F.PRESENCE
AC IN
R
V 6 AV 7
FRONT
CENTER
EAR)
ONT)
OOFER
1
2
RS-232C
2
2
1
UT IN OUT
REMOTE
TRIGGER
OUT
+12V 0.1A MAX.
Power cable
- 5 -
3
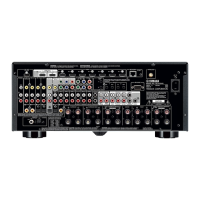
Connect playback devices such as BD/DVD players and recorders
If your playback device has multiple audio/video outputs, connect with the following priority
(A to D) to enjoy a higher quality sounds and images.
Plug the supplied power cable into the AC
inlet after all other connections are complete,
then plug the power cable into an AC wall
outlet.
4
Connect the power cable
✽ Refer to “Connecting BD/DVD players and other devices” in Owner's Manual for details on connection other than above illustration.
• When playing back a device, select the corresponding input source to which the jack is connected.
• If necessary, you can connect components that cannot be connected using the above methods, such as devices that output video from
component video output jacks and audio from analog output jacks. Refer to “Connecting external components” in the Owner’s Manual for
details.
• At the default settings, input sources and sound programs are preset on the SCENE keys. When a playback device is connected to AV1,
pressing the SCENE1 key selects the AV1 input. When a playback device is connected to AUDIO2, pressing the SCENE3 selects the AUDIO2
input. The input source and sound program preset on the SCENE key can be changed.
Default scene settings
SCENE Input Audio Select HDMI Output
Sound
Program
Pure Direct
Mode
Tone Control Adaptive DRC Enhancer
1 (BD/DVD) AV1 Auto OUT1+2 Drama Auto
Bass:0.0dB
Treble:0.0dB
On Off
2 (TV) AUDIO1 Auto OUT1+2 STRAIGHT Auto
Bass:0.0dB
Treble:0.0dB
On On
3 (CD) AUDIO2 Auto OUT1+2 STRAIGHT Auto
Bass:0.0dB
Treble:0.0dB
Off Off
4 (RADIO) TUNER - - - OUT1+2 STRAIGHT Auto
Bass:0.0dB
Treble:0.0dB
Off On
The several settings other than ones in the above table can be assigned to the SCENE keys. For more information on the SCENE function, refer to “Changing
input settings with a single key (SCENE function)” in the Owner’s Manual.

 Loading...