EasyManuals Logo

2N Helios IP User Manual

2N Helios IP
119 pages
To Next Page IconTo Next Page
To Previous Page IconTo Previous Page
Page #34 background imageLoading...
Page #34 background image
Mounting Electrical Installation
2.3
34
2N
®
Helios IP resetting procedure
1. Switch 2N
®
Helios IP off.
2. Connect the jumper into the resetting (default setting) position (put the
display switch into the F_RES position in the display-equipped models with
535v1 and 535v2 board versions).
3. Switch 2N
®
Helios IP on and wait for the acoustic start signalling.
4. Switch 2N
®
Helios IP off.
5. Remove the jumper from the resetting (default setting) position (put the
display switch into the NORMAL position in the display-equipped models with
535v1 and 535v2 board versions).
6. Switch 2N
®
Helios IP on.
Normal
operation
Default
settings
Display
connector X6
PCB version
530v2
Display connector
X7
PCB version
535v1, 535v2
Connector X19
PCB version
535v5
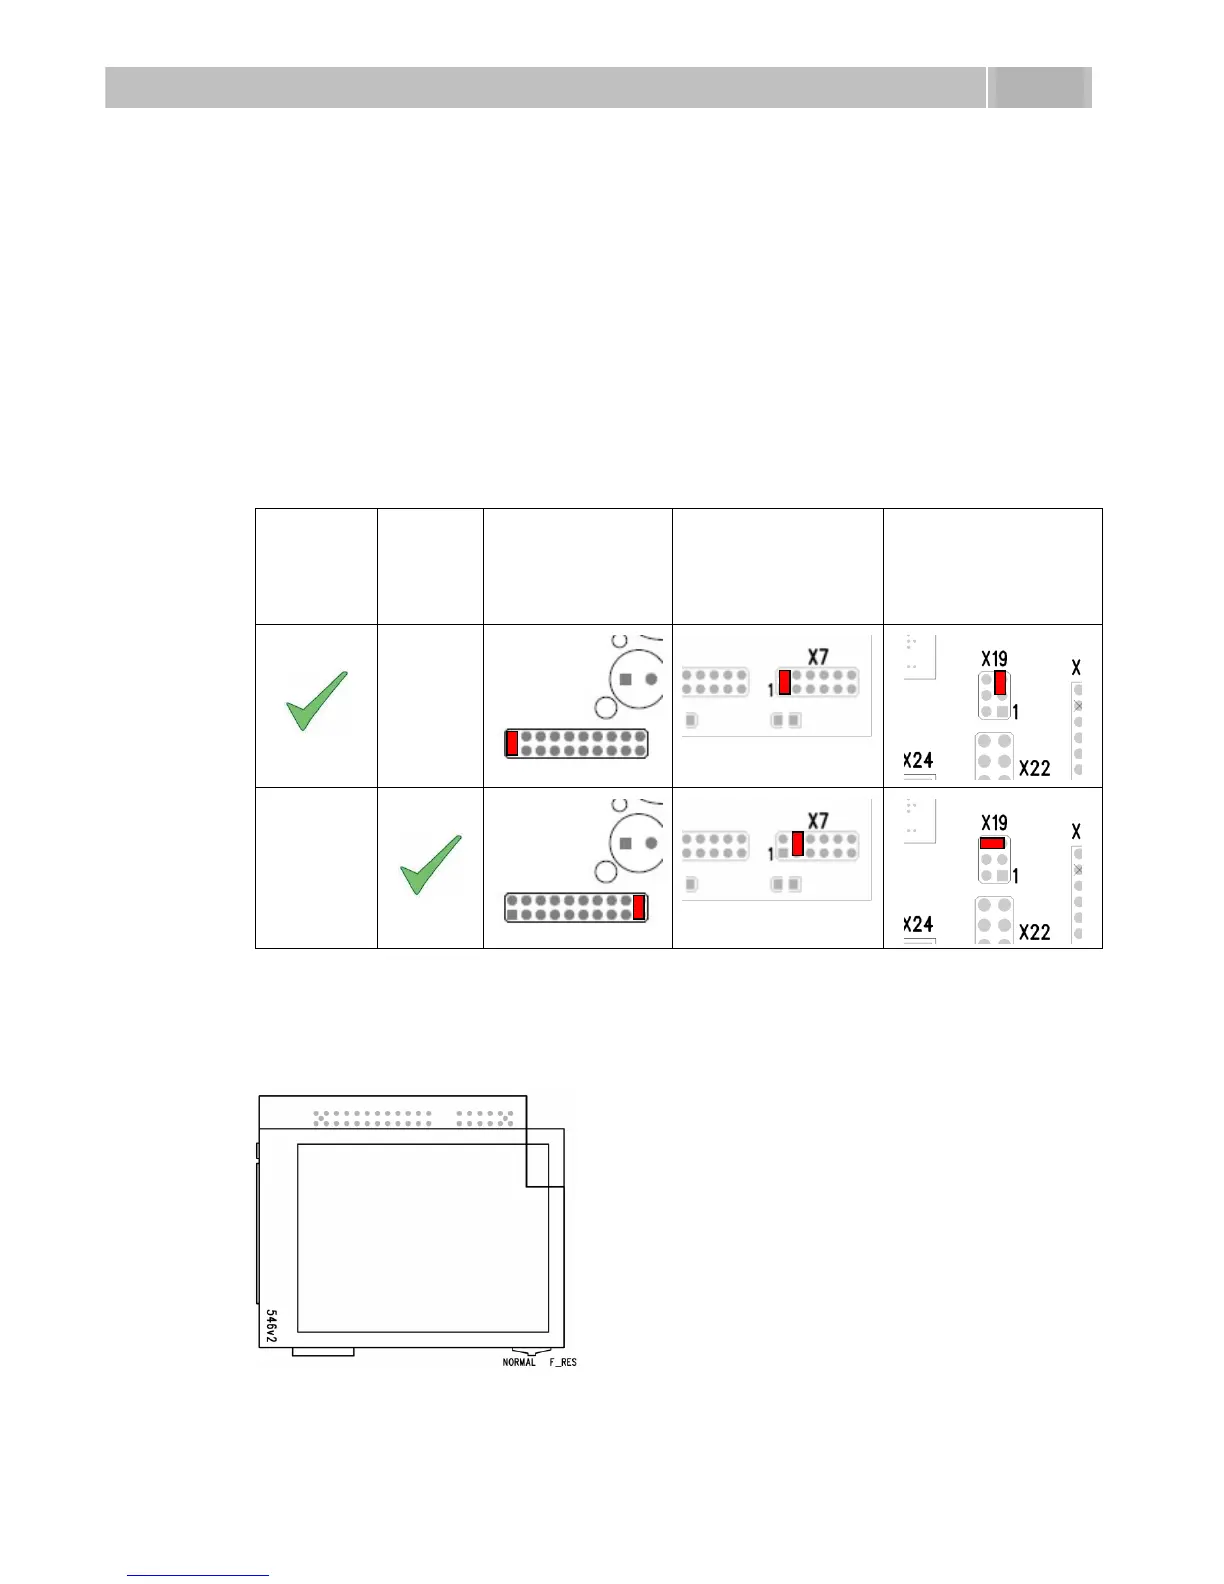
Table 2.5 Configuration Jumpers on Display Connector
To reset the default values of a display-equipped 2N
®
Helios IP, put the switch in the
display right-hand bottom corner in position F_RES. This applies to modules with
board versions 535v1 and 535v2 only. For 535v5 versions, use a jumper at connector
X19.
Figure 2.14 Resetting Procedure Display Model

Table of Contents

Other manuals for 2N Helios IP

Questions and Answers:

Question and Answer IconNeed help?

Do you have a question about the 2N Helios IP and is the answer not in the manual?

2N Helios IP Specifications

General IconGeneral
TypeIP Intercom
ConnectivityEthernet
Tamper SwitchYes
AudioFull duplex
MicrophoneBuilt-in
SpeakerBuilt-in
CameraYes
Power SupplyPoE
Operating Temperature+60°C
Ingress ProtectionIP54
ProtocolsSIP, RTSP, ONVIF
Audio CodecG.711, G.722
InstallationSurface mount, flush mount (depending on model)

Related product manuals