EasyManuals Logo

2N Helios IP User Manual

2N Helios IP
119 pages
To Next Page IconTo Next Page
To Previous Page IconTo Previous Page
Page #52 background imageLoading...
Page #52 background image
Quick Configuration for Calling
3.2
52
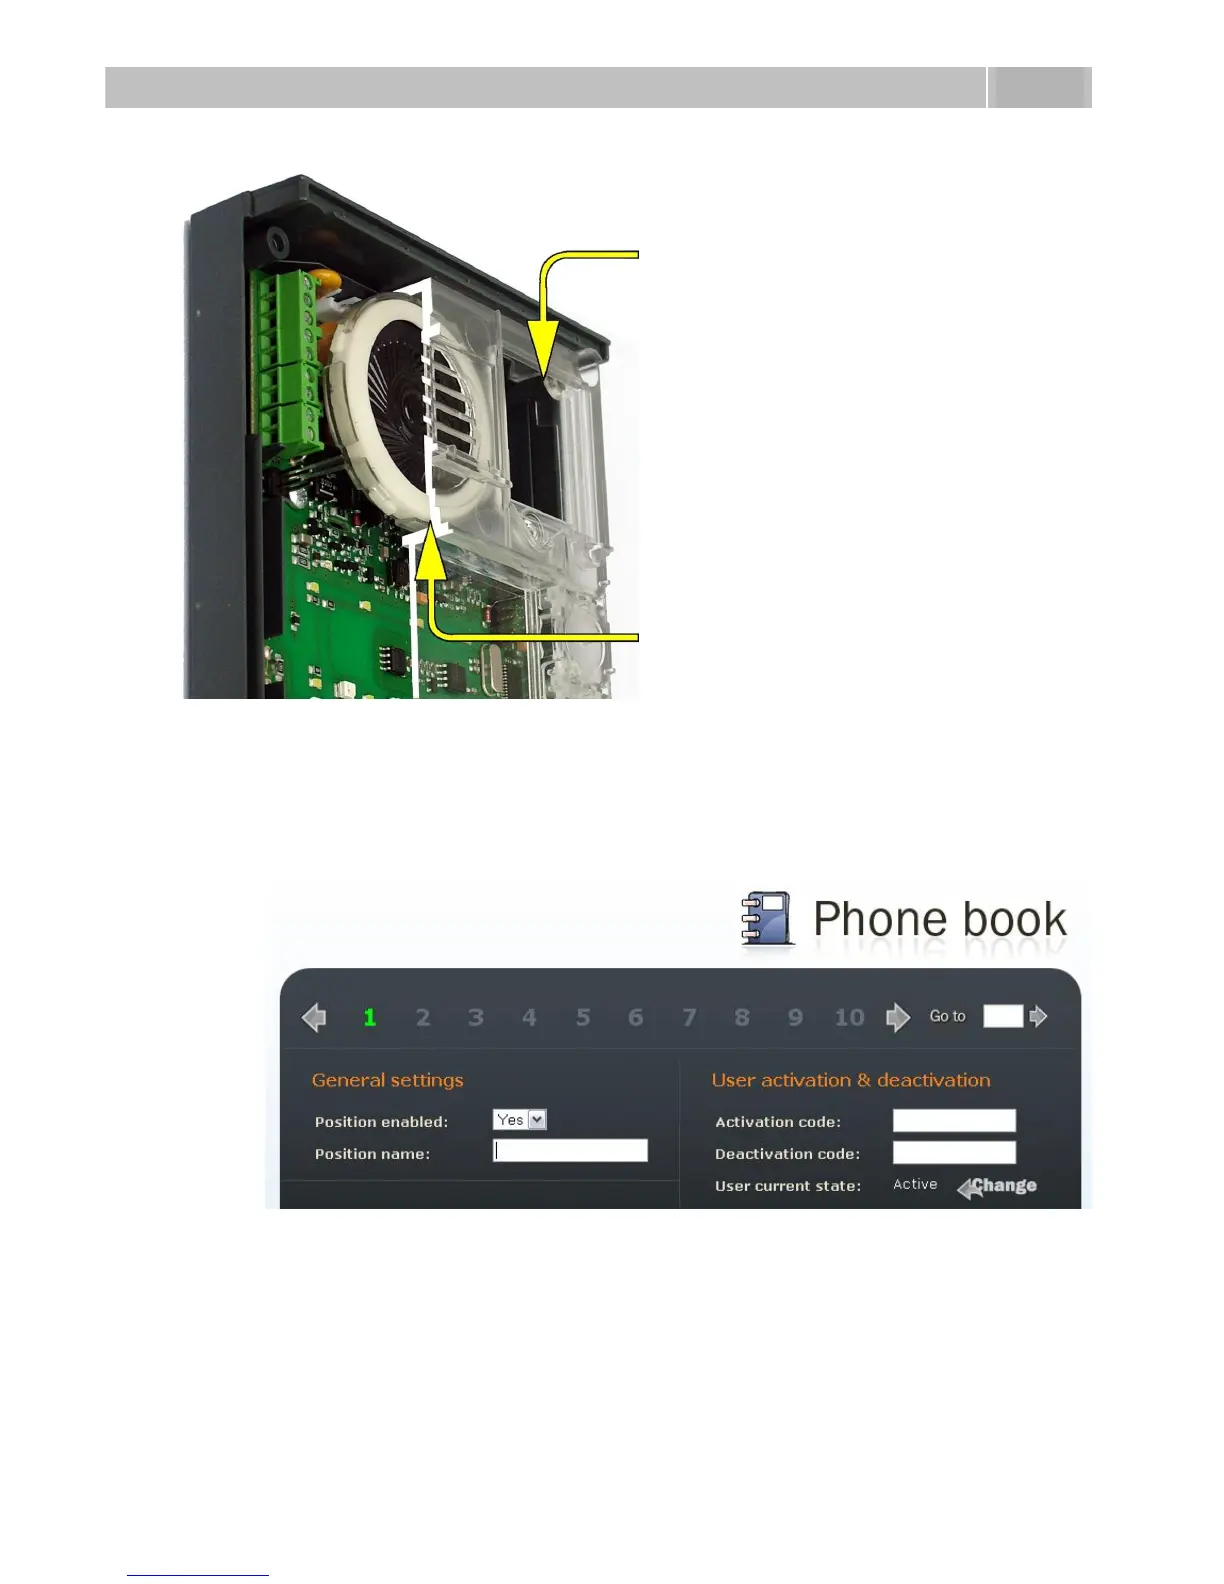
Properly tightened screw
RIGHT
The seal touches the plastic
cover. Water flows out through a
small hole (not shown in the
figure).
Note: Water does not affect the
loudspeaker Mylar membrane.
Extending Module Connection subsection). To retrieve the remaining positions, use the
numeric keypad if available. To select a telephone directory position, use the upper
navigation bar with button numbers. For numbering of 2N
®
Helios IP buttons,
including extending module buttons, refer to the Button Numbering subsection. To
move between the positions, either use the arrow keys or enter the position number
and push the Move to button (see Figure 3.10).
Figure 3.10 Telephone Directory Navigation Bar

Table of Contents

Other manuals for 2N Helios IP

Questions and Answers:

Question and Answer IconNeed help?

Do you have a question about the 2N Helios IP and is the answer not in the manual?

2N Helios IP Specifications

General IconGeneral
TypeIP Intercom
ConnectivityEthernet
Tamper SwitchYes
AudioFull duplex
MicrophoneBuilt-in
SpeakerBuilt-in
CameraYes
Power SupplyPoE
Operating Temperature+60°C
Ingress ProtectionIP54
ProtocolsSIP, RTSP, ONVIF
Audio CodecG.711, G.722
InstallationSurface mount, flush mount (depending on model)

Related product manuals