213D Systems, Inc.
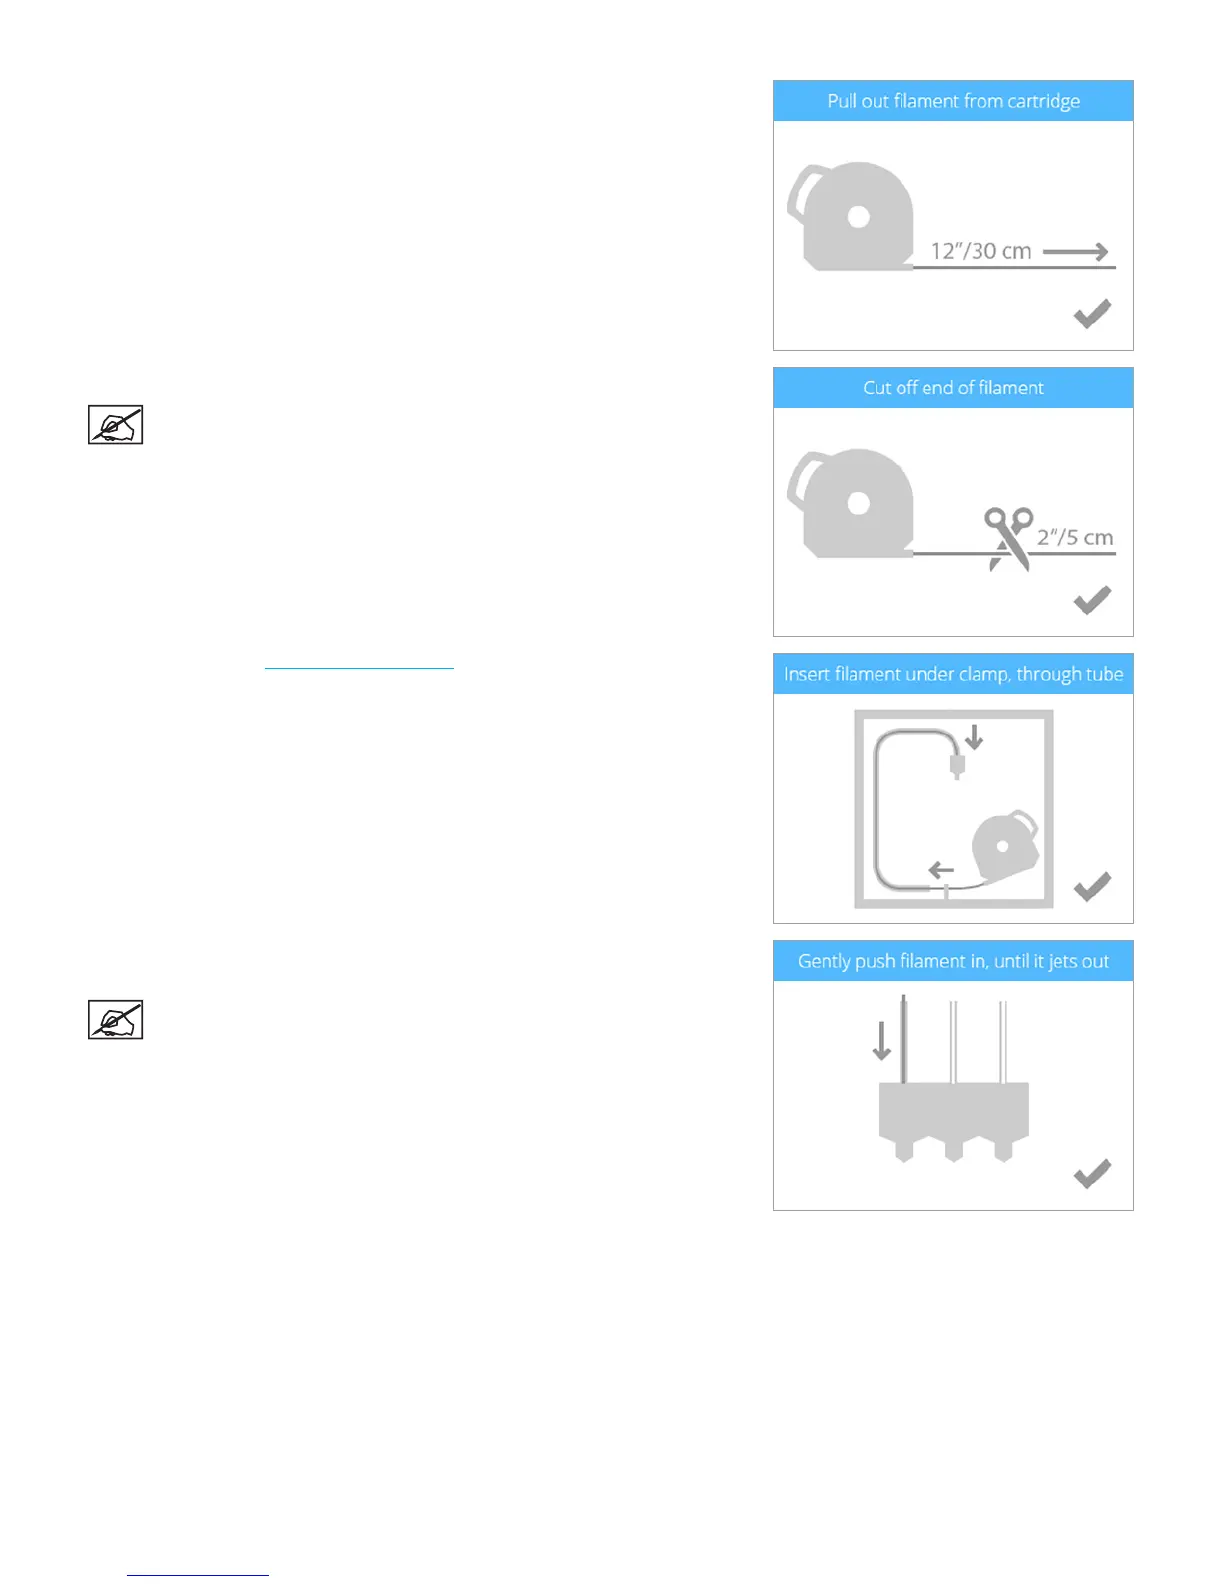
4. Pull out 12”/30 cm of material from the cartridge. Select the checkmark to
continue.
5. Cut off 2”/5 cm of material from the end. Select the checkmark to continue.
NOTE: Ensure the material is not bent or creased. If the material is
not straight, pull out the damaged material from the cartridge. Cut
off and dispose the portion that is not straight.
6. Insert the material under the clamp roller and into the material tube. Select the
checkmark to continue.
7. Gently push the print material into the print jet until molten plastic jets into the jet
wiper. Select the checkmark to continue.
NOTE: When the material reaches far enough into the print jet area,
a motor will assist with feeding the material into the print jet.