4 Repair
4.7.2. Replacement of gearbox, axis 2
3753HAC022033-001 Revision: K
© Copyright 2004-2011 ABB. All rights reserved.
3.
DANGER!
Turn off all electric power, hydraulic and
pneumatic pressure supplies to the robot!
Turn off all electric power and hydraulic but not the
air pressure to the gearboxes, motors and SMB.
4. If the robot is fitted with moveable mechanical
stops on axis 2 (not stock equipment), these must
be removed at this point.
The attachment holes of the mechanical stops are
used to attach the fixture, lower arm.
5. Secure the lower arm to the frame by inserting the
locking screw into the hole.
Art. no. is specified in Required
equipment on page 373!
Shown in the figure Location of
gearbox on page 373!
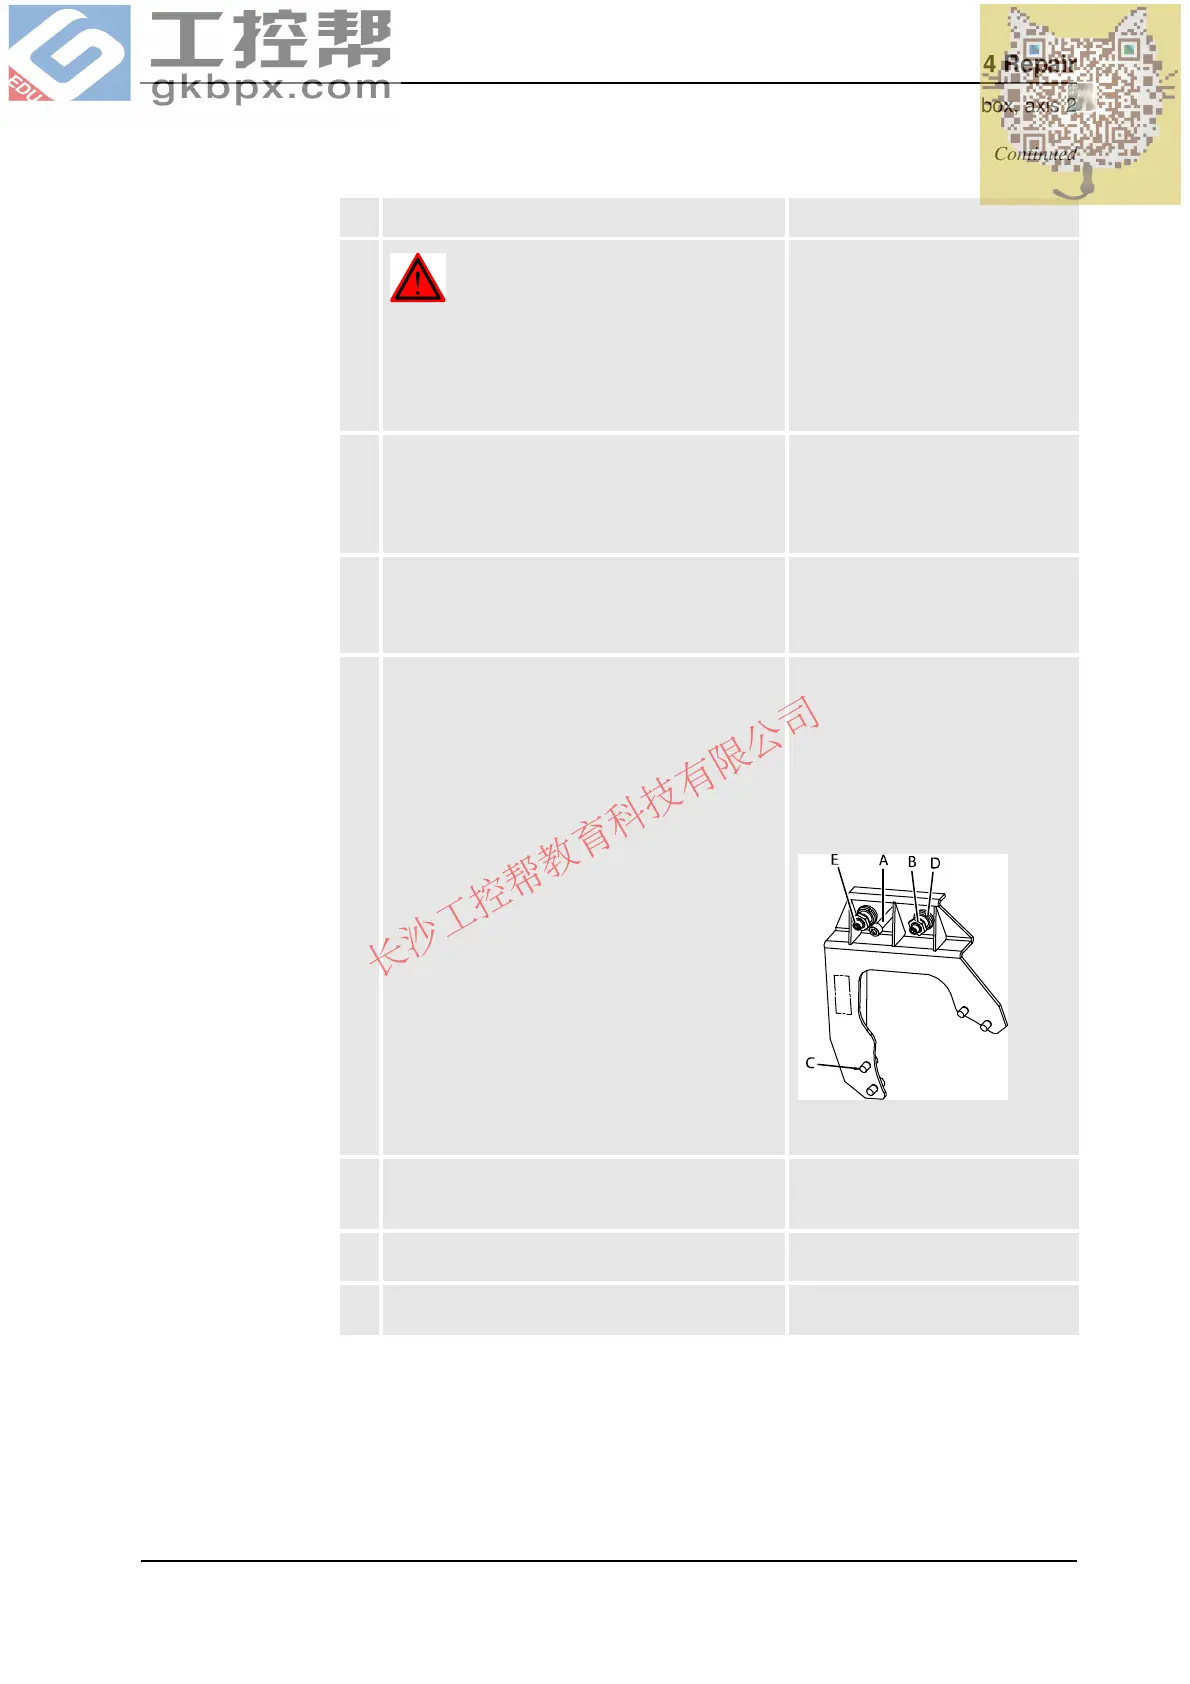
6. Fit the fixture, lower arm to prevent the lower arm
from falling.
• Make sure that both adjusters (B) on the
fixture are screwed back.
• Align the fixture with the frame and lower
arm.
• Tighten the four M16 bolts (C) on the
inside of the frame, in attachment holes,
with tightening torque: 220 Nm.
• Screw in the two adjusters (B) until they
rest against the flats on the lower arm.
Tighten by hand.
• Lock, using the two ring nuts (D).
• Tighten the two M12 bolts (E) in the
attachment holes, fixture lower arm with
tightening torque: 91 Nm.
Art. no. is specified in Required
equipment on page 373!
Attachment holes for the fixture are
shown in the figure Location of
gearbox on page 373!
Make sure the fixture is pressed
tightly against the lower arm before
securing with screws!
xx0200000261
• A: Locking screw, lower arm
7. Unload the balancing device shaft by using a
specific press tool.
Detailed in section Unloading the
balancing device using hydraulic
press tool. on page 320.
8. Drain the gearbox, axis 2. Detailed in section Draining, oil on
page 204.
9. Remove the motor, axis 2. Detailed in section Removal, motor
on page 335.
Action Note
Continued
Continues on next page