4 Repair
4.7.3. Replacement of gearbox, axis 3
3833HAC022033-001 Revision: K
© Copyright 2004-2011 ABB. All rights reserved.
Refitting, gearbox axis 3
The procedure below details how to refit gearbox, axis 3.
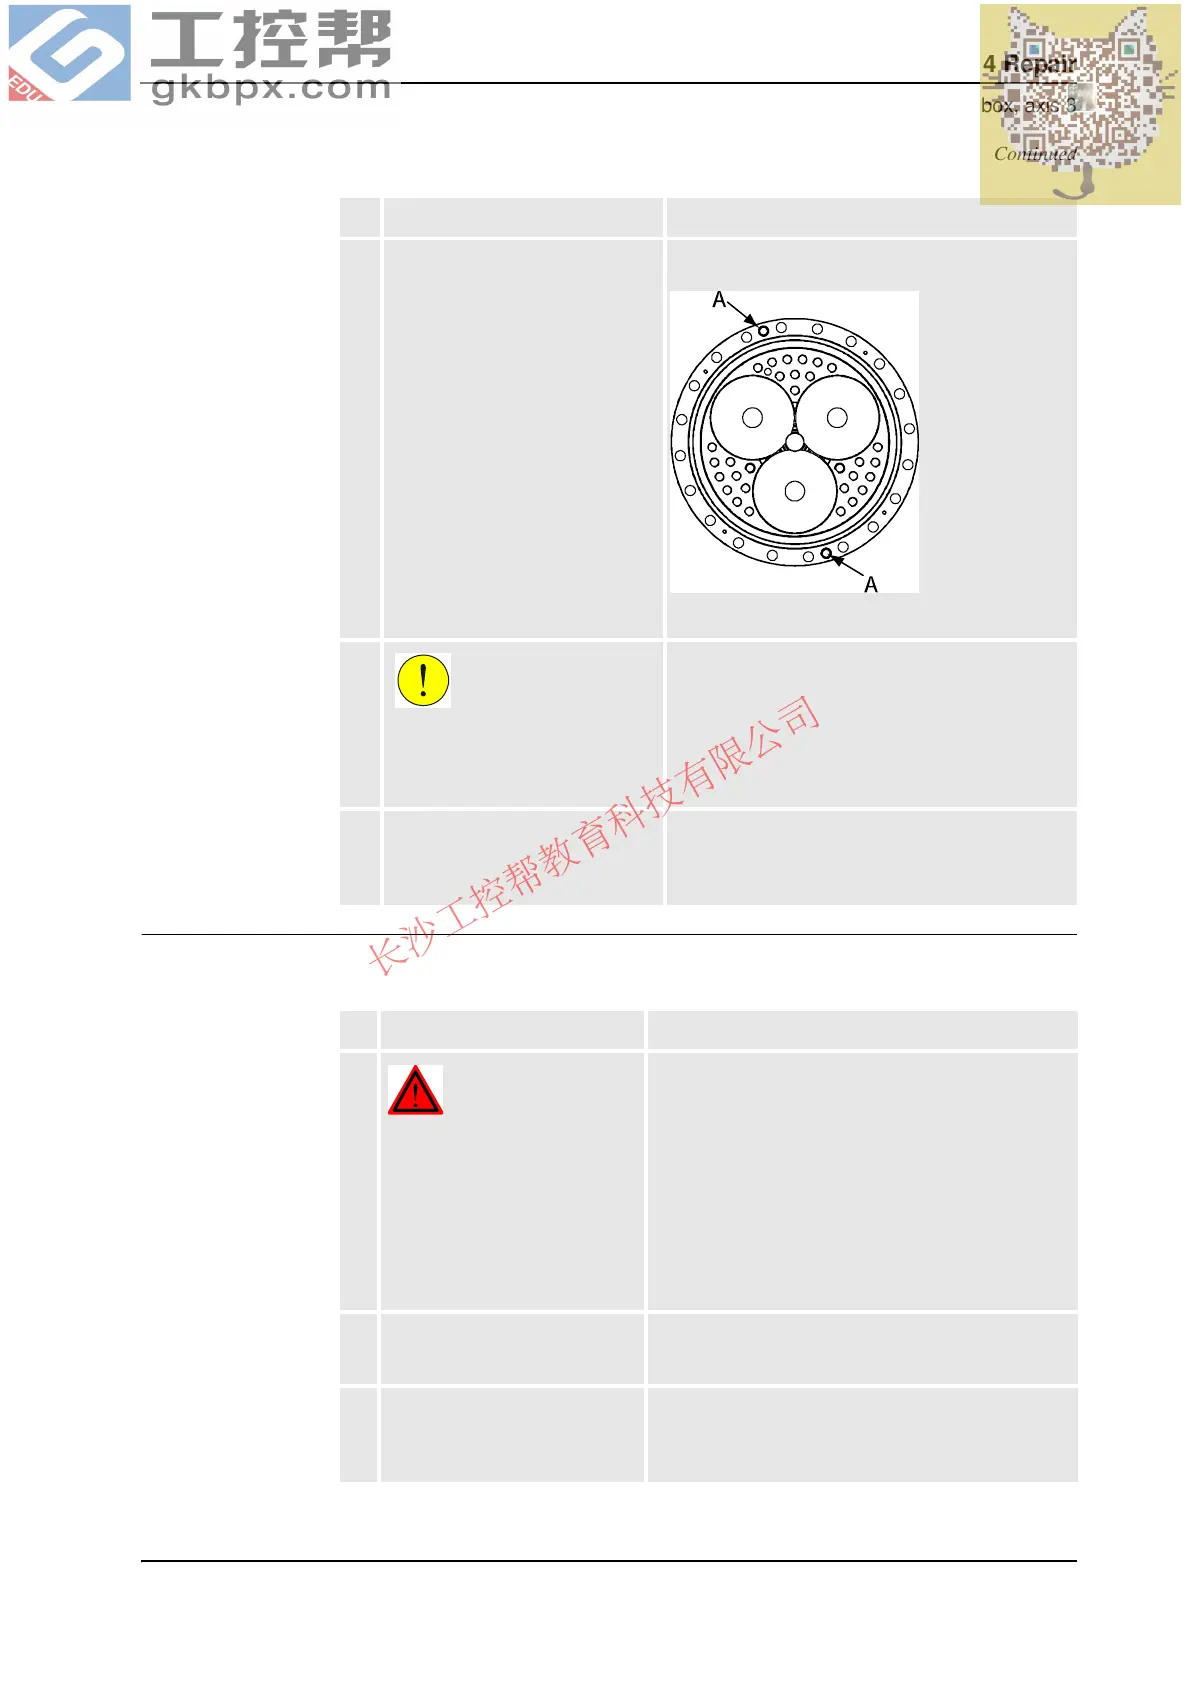
9. Fit the lifting eye to the gearbox, in
one of the attachment screw holes
that attaches the gearbox to the
lower arm .
If required, use screws in the holes
(A) shown in the figure to the right
to press the gearbox free.
Art. no. is specified in Required equipment on page
381.
xx0200000033
• A: M16 holed for pressing the gearbox out
10.
CAUTION!
The gearbox weighs 125 kg! All
lifting equipment used must be
sized accordingly!
11. Remove the gearbox, with
guidance from the guide pins,
using an overhead crane or
similar.
Action Note
Action Note
1.
DANGER!
Turn off all electric power,
hydraulic and pneumatic
pressure supplies to the robot!
Turn off all electric power and
hydraulic but not the air
pressure to the gearboxes,
motors and SMB.
2. Turn the upper arm in such a
position that the gear mating
surface faces upwards.
3. Fit two guide pins in 180°
relation to each other in the
holes in the upper arm, used for
the gearbox attachment screws.
Art. no. is specified in Required equipment on page
381.
Continued
Continues on next page