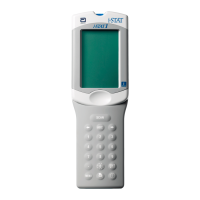
PROCEDURE MANUAL FOR THE i-STAT SYSTEM
20
REV. DATE: 16-Oct-12 ART: 714446-00L
Integrity Testing
From each lot of blood gas/chemistry cartridges received, use a representational number of cartridges to analyze i-STAT
or TriControls Level 1 and 3 Controls. For CHEM8+ cartridges, analyze i-STAT CHEM8+ or TriControls Control Levels
1 and 3. If not using TriControls and hematocrit is included on the cartridge type being tested, also analyze RNA Medical
Hematocrit Control Levels 1 and 3. For ACT cartridges, analyze i-STAT Level 1 and Level 2 ACT Controls. For
PT/INR cartridges, analyze i-STAT Level 1 and Level 2 PT Controls. For cTnI cartridges, analyze i-STAT Level 1 and
Level 3 Cardiac Marker Controls. For CK-MB cartridges, analyze CLINIQA Cardiac Marker Level 1 and 3 controls. For
BNP cartridges, analyze i-STAT, BNP Control Levels 1 and 3. Use any verified analyzer for control testing. Transmit
the results to the Central Data Station. Use the expected values published in the Value Assignment Sheet to verify the
integrity of the cartridges.
Procedure for testing cartridges with i-STAT Level 1 and Level 3 Controls:
1. Prior to testing cartridges that measure PO2, ampules should stand at room temperature a minimum of 4 hours before
use. When testing other cartridges (G, Crea, E3+, EC4+, 6+, or EC8+), ampules may be used once the fluid has
reached room temperature, approximately 30 minutes for individual ampules. For best results, ampules, cartridges, and
handhelds should be at the same temperature. When using cartridges that contain sensors for measuring ionized
calcium, pH, PCO
2
, or PO
2
(G3+, EG6+, EG7+, CG4+, CG8+, or EC8+), a separate ampule must be used for each
cartridge being tested; if these sensors are not present (i.e., the 6+ cartridge), the contents of one ampule may be used
to fill more than one cartridge as long as the cartridges are filled and inserted into a handheld within 10 minutes of
opening the ampule.
2. Immediately before use, shake the ampule vigorously for 5 to 10 seconds to equilibrate the liquid and gas phases. To
shake, hold the ampule at the tip and bottom with forefinger and thumb to minimize increasing the temperature of the
solution. If necessary, tap the tip of the ampule to send solution back into the bottom section of the ampule. Protect
fingers with gauze, tissue, or glove, or use an ampule breaker to snap off the tip of the ampule at the neck.
3. Immediately transfer the solution from the ampule into a plain capillary tube or plain syringe, and then immediately
transfer the solution into a cartridge. Immediately seal the cartridge and insert it into a handheld. It is important not to
expose the solution to room air since this will alter the results.
When using a capillary tube, fill from the bottom of the ampule. Avoid drawing solution from the surface by
covering the far end of the tube as it is inserted into the ampule. Once the open end of the tube rests at the bottom
of the ampule, uncover the other end to allow filling by capillary action.
When using a syringe (1cc or 3cc syringes with 16 to 20 gauge needles are recommended), slowly draw
approximately 1 mL of solution from the bottom of the ampule. If air is trapped between the leading edge of the
solution and the plunger, do not invert the syringe to expel it; this will not affect solution near the tip of the
syringe. If air bubbles are continually drawn into the syringe, or if a bubble is trapped near the tip of the syringe,
discard the ampule and syringe and use a fresh ampule and syringe. Expel one or two drops from the syringe
before filling the cartridge.
Do not use solution left in the syringe, ampule, or capillary tube for additional testing of the cartridges that
contain sensors for ionized calcium, pH, PCO
2
, or PO
2
. However, cartridges without these sensors may be tested
with remaining fluids if within 10 minutes of opening the ampule.
4. Compare results to the value assignment sheet ranges. Check that the lot number on the control ampule matches the lot
number on the package insert and that the software version listed on the insert matches the software installed in the
handheld. If all results are within expected ranges, use the cartridges as needed. Transmit the results to the Central Data
Station.
Procedure for testing cartridges with TriControls Level 1 and Level 3 Controls:
1 Prior to testing cartridges that measure PO2, ampules should stand at room temperature a minimum of 4 hours before
use. When testing other cartridges (G, Crea, E3+, EC4+, 6+, EC8+, or CHEM8+), ampules may be used once the fluid
has reached room temperature, approximately 30 minutes for individual ampules. For best results, ampules, cartridges,
and handhelds should be at the same temperature. When using cartridges that contain sensors for measuring ionized
calcium, pH, PCO
2
, or PO
2
(G3+, EG6+, EG7+, CG4+, CG8+, EC8+, or CHEM8+), a separate ampule must be used
for each cartridge being tested; if these sensors are not present (i.e., the 6+ cartridge), the contents of one ampule may
be used to fill more than one cartridge as long as the cartridges are filled and inserted into a handheld within 10
minutes of opening the ampule.
2 Immediately before use, shake the ampule vigorously for 5 to 10 seconds to equilibrate the liquid and gas phases. To
shake, hold the ampule at the tip and bottom with forefinger and thumb to minimize increasing the temperature of the

 Loading...