Chapter 1 Installation and setup
18
OsmoTECH® Single-Sample Micro-Osmometer User Guide
the web server, plug an Ethernet cable that’s connected
to your network into the Ethernet port on the back of
the OsmoTECH.
NOTE: You must also configure the communication
settings in the OsmoTECH software. For more
information, see Connecting to a LIS and
Configuring a LAN connection.
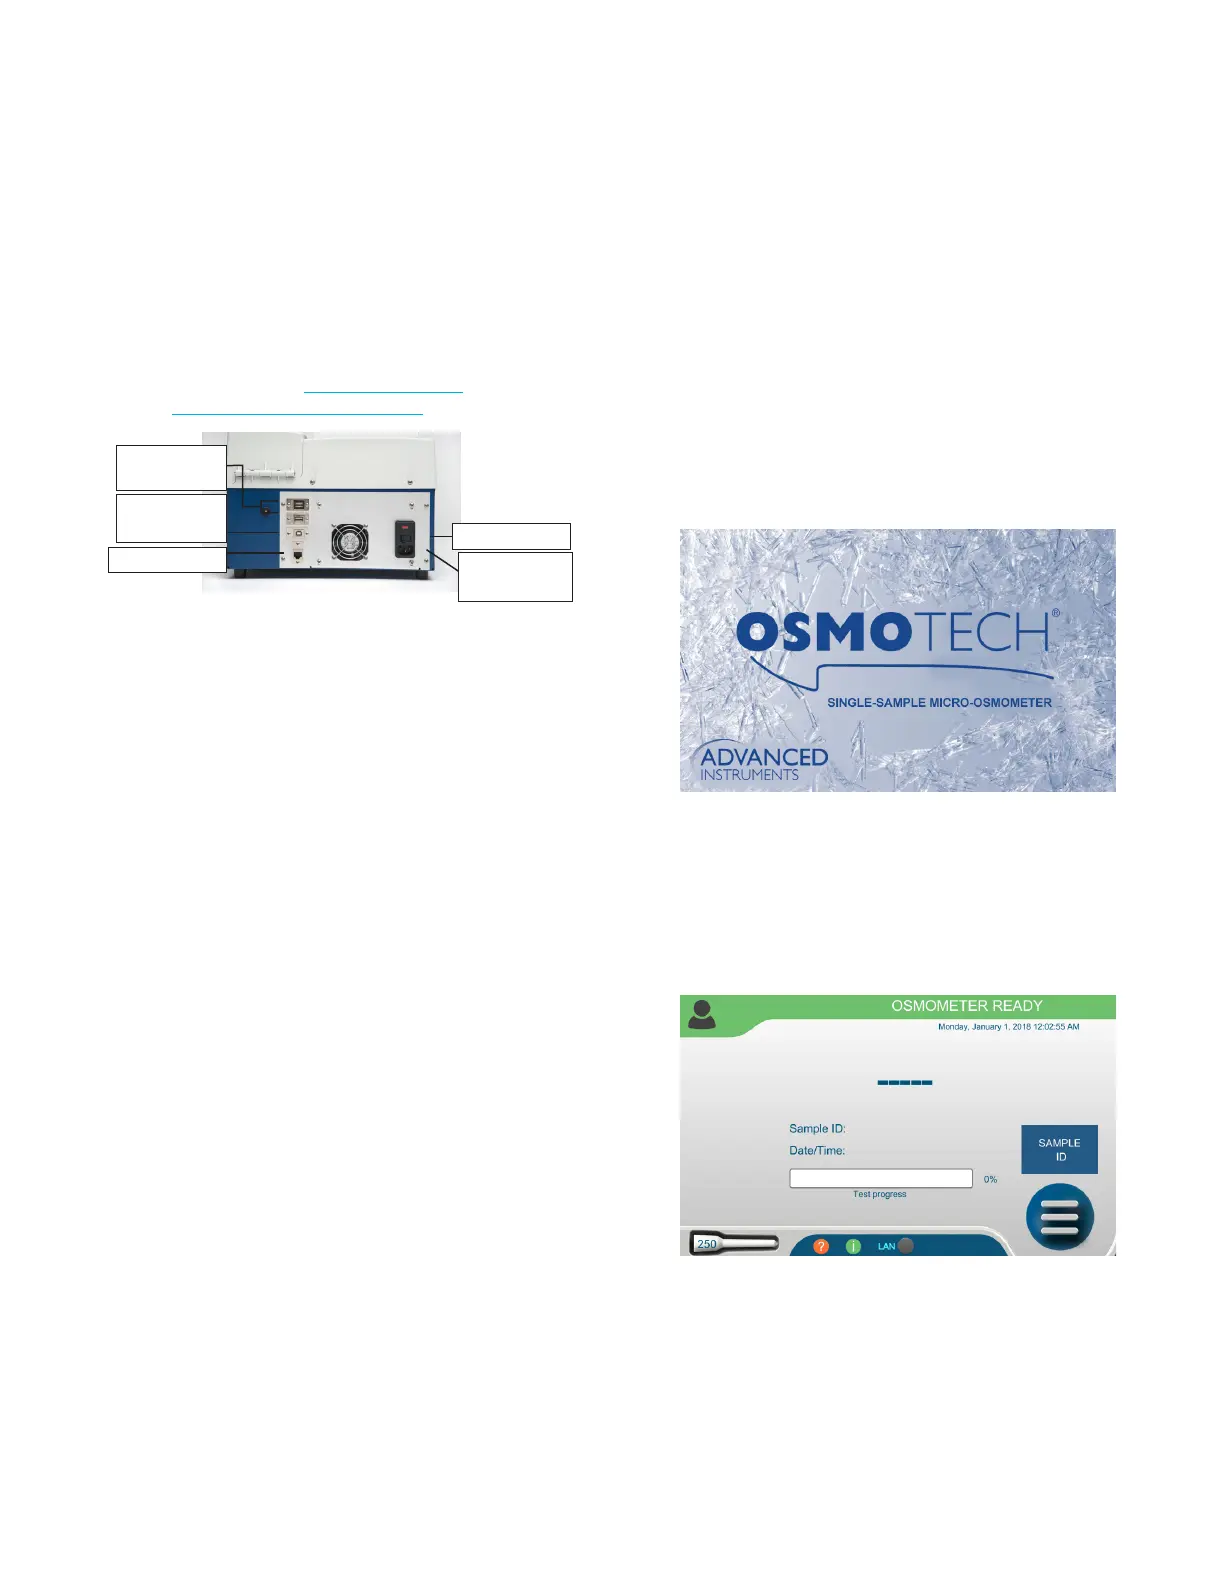
Power switch
USB 2.0
Type B port
Ethernet port
Plug for power
cord
USB 2.0
Type A port
1.7 Powering up the instrument
1. Connect the power cord to the back of the
instrument (Figure 1) and insert the plug into the
power outlet.
2. Turn on power to the instrument using the rocker
switch on the back. Depress the side marked with
the symbol
When the instrument powers up, the splash screen
displays.
3. After a few moments, the OsmoTECH Home screen
displays.
From the Home screen, you can initiate sample
testing and view the results. Initially, the instrument
status shown in the green status banner is
Osmometer Ready.